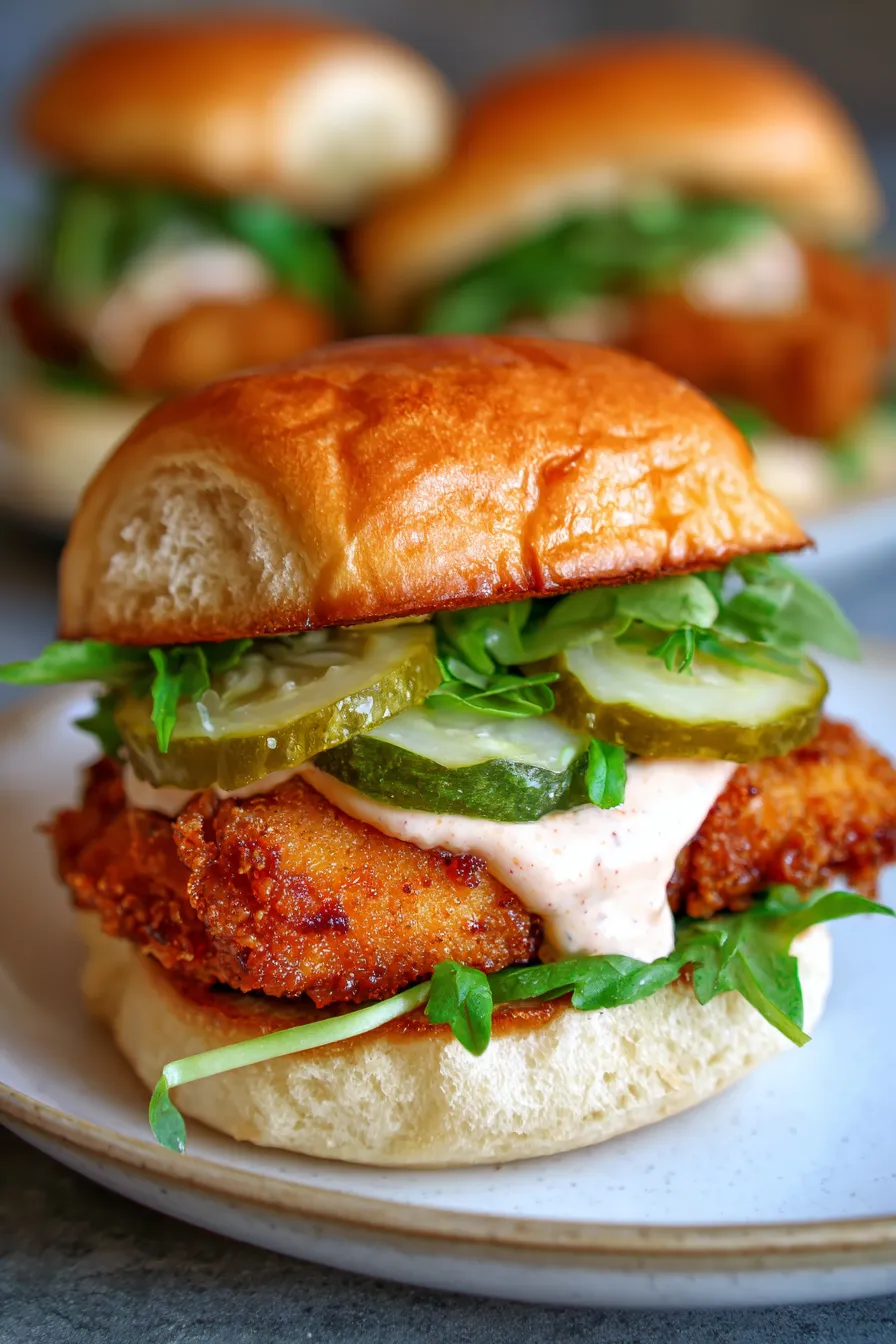
Best Ever Crispy Chicken Sandwich at Home
There’s something incredibly nostalgic about a perfectly crispy chicken sandwich, isn’t there? I remember rainy Saturday afternoons as a child, when my dad would sometimes bring home these golden-fried masterpieces. The first bite was always pure magic – that satisfying crunch, followed by tender, juicy chicken, all nestled in a soft bun. It was a simple pleasure that felt like the ultimate treat.
Fast forward to today, and my mission has always been to recreate those cherished memories right in my own kitchen. After countless experiments and a few culinary adventures, I’m thrilled to share my absolute favorite recipe for a homemade Crispy Chicken Sandwich at Home. This isn’t just any recipe; it’s a labor of love, a tested family favorite that brings incredible comfort food right to your table, making it the perfect easy dinner for any night of the week.
Get ready to ditch the drive-thru and experience the pure joy of biting into your very own perfectly seasoned, super crispy, and incredibly juicy chicken sandwich. This recipe is designed to be approachable yet delivers a flavor and texture profile that will have everyone asking for seconds. Trust me, once you try this, you’ll never look back!
Why You’ll Love This Recipe
- ❤️ Unbelievable Crispy Texture: We’re talking next-level crunch that stays crispy! Our double-dredging technique ensures every bite is a symphony of satisfying texture, far superior to anything you’ll get from fast food.
- ❤️ Juicy, Flavorful Chicken: Thanks to a magical buttermilk marinade, the chicken pieces remain incredibly tender and moist, infused with flavor from the inside out. No dry chicken here, ever!
- ❤️ Simple & Approachable: Don’t be intimidated by the idea of frying chicken at home. Our step-by-step guide breaks it down into easy, manageable parts, making it perfect for even novice cooks to master. You’ll feel like a pro in no time!
- ❤️ Customizable to Your Taste: Whether you love a fiery kick or a cool, creamy sauce, this sandwich is your canvas. Adjust the seasonings, play with different toppings, and make it uniquely yours every single time.
- ❤️ Family Favorite & Crowd-Pleaser: This recipe is a guaranteed hit with everyone from picky eaters to gourmet enthusiasts. It’s the ultimate comfort food that brings smiles and full bellies around the table. Perfect for game day, family dinners, or a special weekend treat.
- ❤️ Better Than Takeout: Seriously, once you taste this homemade version, you won’t want to go back to store-bought. You control the quality of ingredients, the freshness, and of course, the incredible taste that only comes from food made with love at home.
- ❤️ Affordable & Wholesome: Making your own crispy chicken sandwiches is not only more delicious but also more economical than frequenting fast-food chains. Plus, you know exactly what goes into your meal, allowing for healthier choices if desired.
What You Need
You only need a few simple pantry staples for this recipe! From the juicy chicken to the secret spices and a few fresh toppings, everything comes together to create culinary magic. Check the full printable recipe card below for detailed measurements and a complete list of ingredients.
Expert Tips
- 💡 Don’t Skip the Buttermilk Marinade: This is a non-negotiable step for juicy, tender chicken. The acidity in buttermilk helps to tenderize the chicken pieces without making them tough, while also providing a fantastic flavor base. Marinate for at least 4 hours, or ideally, overnight in the refrigerator for the best results.
- 💡 Pound Your Chicken Evenly: For consistent cooking and an even texture, use a meat mallet or a heavy rolling pin to pound your chicken fillets to about a 1/2-inch thickness. This ensures every piece cooks through at the same rate and fits perfectly on your bun. Place chicken between two sheets of plastic wrap to keep things tidy.
- 💡 Season Your Flour Dredge Generously: The flour coating is where a lot of the flavor and *all* of the crispiness comes from. Don’t be shy with your seasonings here! Mix in plenty of salt, black pepper, garlic powder, onion powder, paprika, and a pinch of cayenne for a subtle kick. Taste your flour mixture before coating if you’re unsure.
- 💡 Achieve the Perfect Double Dredge: After marinating, allow any excess buttermilk to drip off, then press the chicken firmly into the seasoned flour. Gently shake off excess, then dip it back into any remaining buttermilk (or an egg wash) before a final press into the flour. This creates those incredible craggy bits that become super crispy.
- 💡 Maintain Oil Temperature: This is crucial for successful frying. Use a deep-fry thermometer to keep your oil between 325-350°F (160-175°C). Too low, and the chicken will be greasy; too high, and the outside will burn before the inside cooks. Adjust your heat as needed throughout the frying process.
- 💡 Don’t Overcrowd the Pan: Fry the chicken in batches to maintain the oil temperature. Overcrowding cools down the oil too quickly, leading to soggy, poorly cooked chicken. Give each piece space to sizzle and crisp up beautifully.
- 💡 Drain on a Wire Rack: After frying, transfer your crispy chicken immediately to a wire rack set over a baking sheet. This allows air to circulate around the chicken, preventing the bottom from getting soggy. Avoid placing it directly on paper towels for extended periods.
- 💡 Toast Your Buns: A perfectly toasted bun is the unsung hero of any great sandwich. Lightly butter your brioche buns and toast them in a dry skillet, under the broiler, or in a toaster until golden brown. This adds extra texture and prevents the bun from getting soggy from the sauces.
- 💡 Assemble Immediately: For the ultimate experience, assemble your sandwiches right after the chicken is fried and rested. This ensures maximum crispiness and warmth. Layer your favorite sauces, pickles, and lettuce, and dig in!
- 💡 Flavor Boost with Hot Sauce: For an extra layer of flavor and a gentle heat, consider adding a dash of your favorite hot sauce directly into your buttermilk marinade or mixing it into your mayonnaise-based sauce. It really takes the sandwich up a notch!
Variations & Substitutions
This recipe is wonderfully versatile, allowing you to tailor it to your dietary needs or flavor preferences:
- Spicy Kick: Amp up the heat by adding extra cayenne pepper to your flour dredge or whisking a generous amount of hot sauce into your buttermilk marinade. A drizzle of hot honey on top of the finished sandwich is also incredible.
- Gluten-Free Option: Simply swap out the all-purpose flour for a good quality gluten-free all-purpose flour blend. Ensure it’s suitable for frying, and the crispiness will still shine through.
- Dairy-Free/Vegan Version: For a plant-based alternative, you can use large pieces of firm tofu or thick slices of king oyster mushrooms. Marinate them in a dairy-free milk (like unsweetened almond milk) mixed with a tablespoon of apple cider vinegar (to mimic buttermilk). Coat in seasoned flour and shallow fry. Serve on vegan buns with dairy-free sauces.
- Healthier Pan-Frying/Air Frying: While deep frying yields the crispiest result, you can pan-fry in less oil or even air-fry for a lighter version. For air frying, spritz the coated chicken generously with oil and cook at 375°F (190°C) for 15-20 minutes, flipping halfway, until golden and cooked through.
- Flavorful Topping Combinations: Experiment beyond classic pickles and mayo. Try coleslaw, thinly sliced red onion, crispy fried onions, a slice of cheese (pepper jack is great!), or a different sauce like a tangy BBQ aioli or a sweet chili mayo.
Storage & Freezing
While these crispy chicken sandwiches are best enjoyed fresh, you can definitely prepare components ahead of time or store leftovers.
- Cooked Chicken: Store leftover fried chicken in an airtight container in the refrigerator for up to 3 days. To reheat and revive some crispiness, place it on a wire rack in an oven preheated to 375°F (190°C) for 10-15 minutes, or until heated through and crispy. Avoid microwaving, as it will make the crust soggy.
- Marinaded Chicken (Uncooked): The chicken can be marinated in buttermilk for up to 24 hours in the refrigerator. Any longer, and the chicken may start to break down too much.
- Freezing Cooked Chicken: You can freeze cooked, cooled chicken fillets in a freezer-safe bag or container for up to 2-3 months. Thaw in the refrigerator overnight, then reheat as directed above. The crispiness won’t be quite the same as fresh, but it will still be delicious.
- Sauce & Toppings: Prepare your sauces and slice your toppings ahead of time and store them separately in airtight containers in the fridge. This makes assembly a breeze!
FAQ
Can I use chicken tenders instead of thighs or cutlets?
Absolutely! Chicken tenders work wonderfully for this recipe. Just be mindful that they will cook faster due to their smaller size. Pound them slightly to an even thickness for best results and adjust frying time accordingly.
What kind of oil is best for frying crispy chicken?
For deep frying, choose oils with a high smoke point and neutral flavor. Excellent choices include peanut oil, canola oil, vegetable oil, or sunflower oil. Avoid olive oil, which has a lower smoke point and can impart an undesired flavor.
How do I know when the chicken is fully cooked?
The best way to ensure your chicken is fully cooked and safe to eat is by using an instant-read meat thermometer. Insert it into the thickest part of the chicken fillet; it should read 165°F (74°C). The chicken will also be golden brown and the juices will run clear.
Can I bake or air fry this chicken instead of deep frying?
Yes, for a healthier option! While deep frying gives the ultimate crisp, you can achieve a good result by baking or air frying. For air frying, spray generously with oil and cook at 375°F (190°C) for about 15-20 minutes, flipping halfway. For baking, place on a greased wire rack over a baking sheet, spray with oil, and bake at 400°F (200°C) for 25-30 minutes, flipping halfway, until golden and cooked through. The crust won’t be quite as craggy or rich, but it will still be tasty.
There you have it! Your ultimate guide to making the most incredible Crispy Chicken Sandwich at Home. This recipe isn’t just about food; it’s about creating memories, sharing joy, and savoring every single satisfying bite. I truly hope this becomes a staple in your kitchen, bringing as much happiness to your family as it does to mine.
Don’t forget to pin this recipe for later and share your delicious creations with me on social media! Happy cooking!
Best Crispy Chicken Sandwich at Home – Ultimate Recipe!
Ingredients
- 2 large boneless, skinless chicken thighs (about 1.5 lbs total), pounded to 1/2-inch thick
- 1 cup buttermilk
- 1/2 tsp salt
- 1/4 tsp black pepper
- 1.5 cups all-purpose flour
- 1 tbsp cornstarch (for extra crispiness)
- 1 tbsp smoked paprika
- 1 tsp garlic powder
- 1 tsp onion powder
- 1/2 tsp cayenne pepper (optional, for heat)
- 1/2 tsp dried oregano
- Vegetable oil or peanut oil, for frying
- 4 brioche buns, toasted
- Pickle slices, for serving
- Mayonnaise or spicy mayo, for serving
- Lettuce leaves (romaine or iceberg), for serving
Instructions
- Step 1 1. Marinate the Chicken: In a bowl, combine chicken thighs, buttermilk, 1/2 tsp salt, and 1/4 tsp black pepper. Cover and refrigerate for at least 4 hours, or preferably overnight.
- Step 2 2. Prepare Dredging Station: In a shallow dish, whisk together flour, cornstarch, paprika, garlic powder, onion powder, cayenne pepper (if using), and oregano. Season generously with an additional 1 tsp salt and 1/2 tsp black pepper.
- Step 3 3. Dredge the Chicken: Remove chicken from buttermilk, allowing excess to drip off. Place chicken into the flour mixture, pressing firmly to coat completely. Ensure every crevice is covered. Gently shake off any excess flour. For extra crispiness, you can dip it back into the buttermilk briefly and then back into the flour for a second dredge. Place coated chicken on a wire rack.
- Step 4 4. Heat the Oil: Pour about 2-3 inches of oil into a heavy-bottomed pot or Dutch oven. Heat to 325-350°F (160-175°C) using a deep-fry thermometer.
- Step 5 5. Fry the Chicken: Carefully lower 1-2 pieces of chicken into the hot oil (do not overcrowd). Fry for 6-8 minutes, flipping halfway, or until golden brown and cooked through (internal temperature reaches 165°F/74°C).
- Step 6 6. Drain: Remove chicken from oil and place on a clean wire rack set over paper towels to drain excess oil. Repeat with remaining chicken.
- Step 7 7. Assemble Sandwiches: Spread mayonnaise or spicy mayo on both sides of toasted brioche buns. Layer with lettuce, crispy chicken, and plenty of pickle slices. Serve immediately and enjoy!