The Easiest & Best Sugar Cookie Frosting (No Chill!)
There are some baking traditions that just stick with you, aren’t there? For me, it’s always been decorating sugar cookies. I can still vividly recall those cozy, rainy Saturday afternoons at my grandma’s kitchen table, powdered sugar dusting everything, and the sweet scent of vanilla filling the air. Grandma always said the key to a truly magical cookie wasn’t just the cookie itself, but the frosting – it had to be just right: creamy, spreadable, and sturdy enough for all our elaborate (and sometimes messy!) designs.
For years, I chased that perfect consistency, enduring runny messes and frosting so stiff it cracked the cookies. But after countless batches, I finally perfected my ultimate Sugar Cookie Frosting recipe. It’s a tested, family-favorite creation that brings all those nostalgic feelings right back, making every cookie a little masterpiece. Get ready to ditch the frustration and embrace pure joy with this super easy, incredibly delicious, and perfectly pipeable frosting that’s ideal for all your cookie decorating adventures.
This recipe is truly a game-changer for anyone who loves baking and wants a reliable, luscious frosting. It’s perfect for holidays, birthday parties, or just a simple afternoon treat, transforming plain sugar cookies into works of art with minimal effort. Trust me, once you try this perfect sugar cookie frosting, you’ll never go back to anything else; it truly makes cookie decorating easy and incredibly fun!
Why You’ll Love This Recipe
❤️ Here’s why this Sugar Cookie Frosting will become your new go-to recipe:
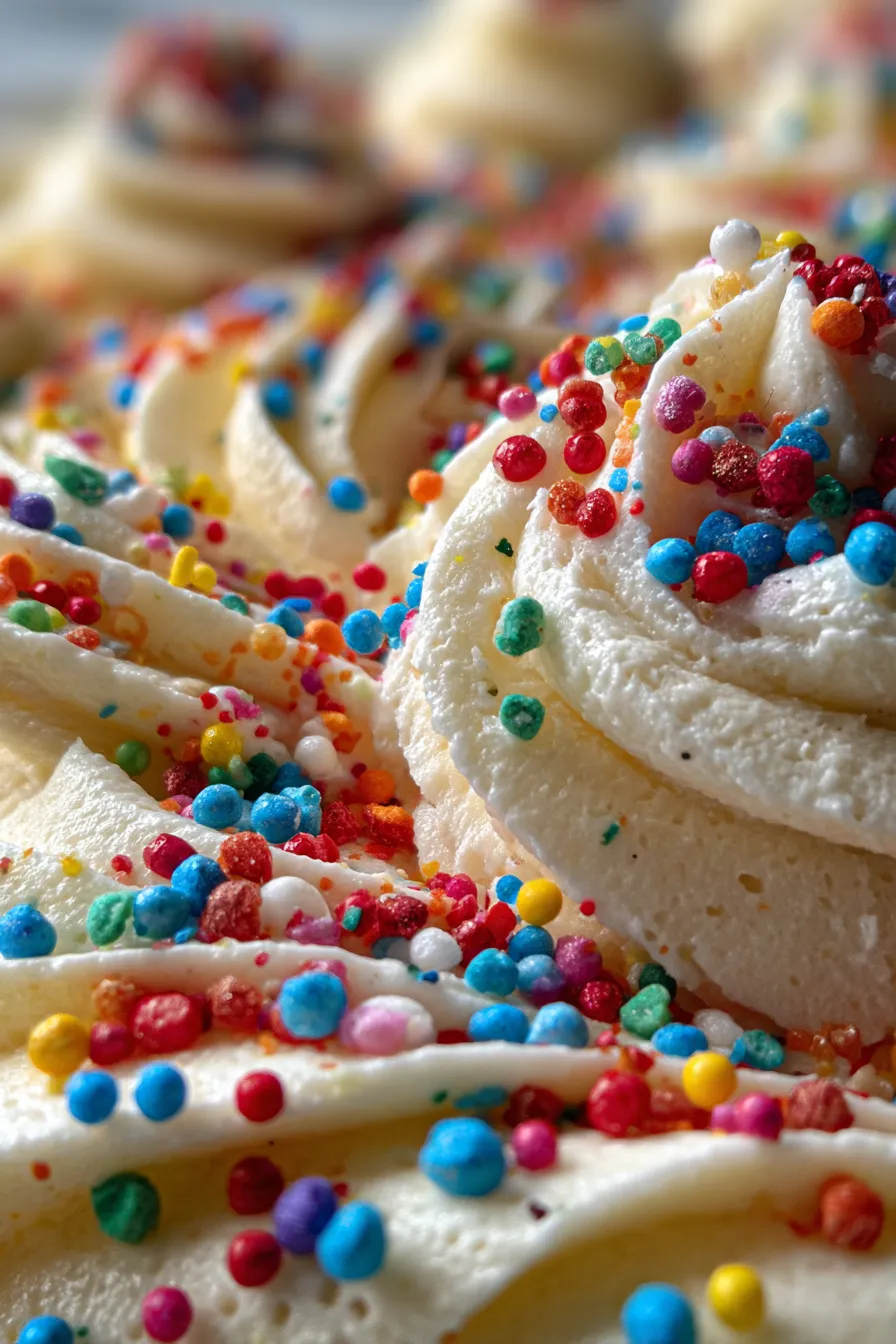
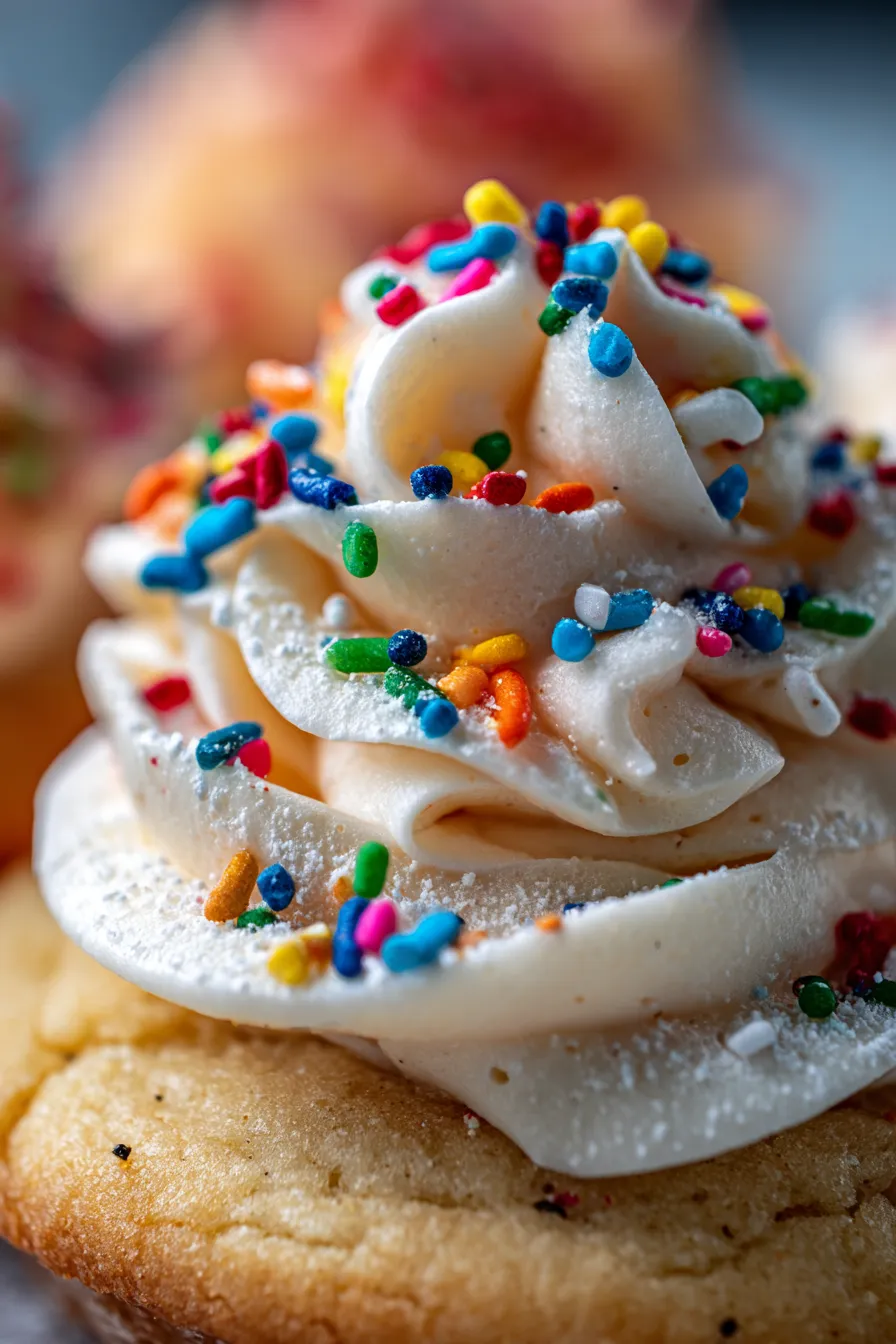
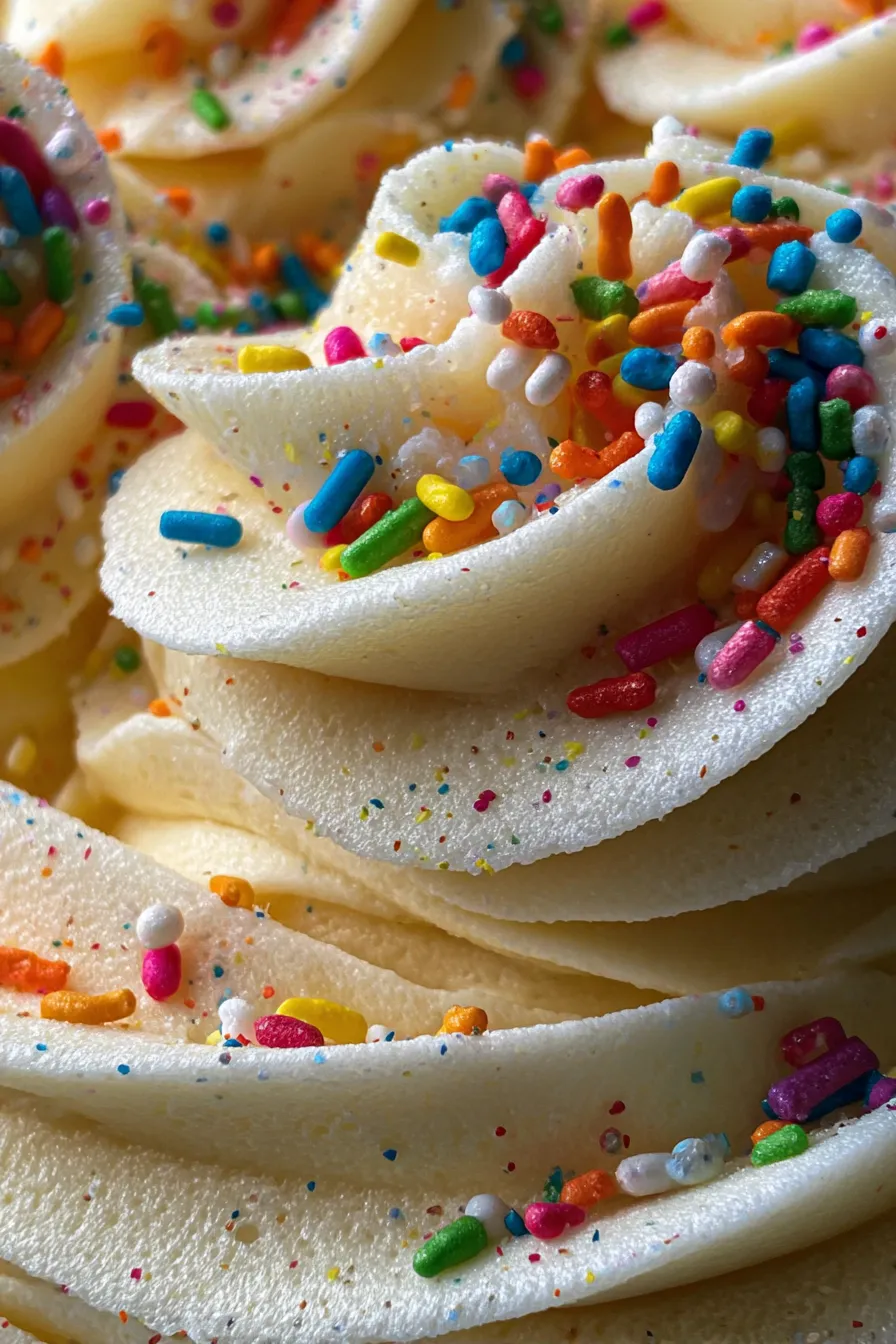
- Velvety Smooth Texture: This frosting whips up incredibly smooth and creamy, making it an absolute dream to work with. No gritty bits here, just pure, sweet deliciousness that melts in your mouth.
- Perfectly Pipeable & Spreadable: Whether you’re a seasoned decorator or a beginner, you’ll find this consistency forgiving and easy to handle. It holds its shape beautifully for intricate designs but also spreads like a dream for flood icing.
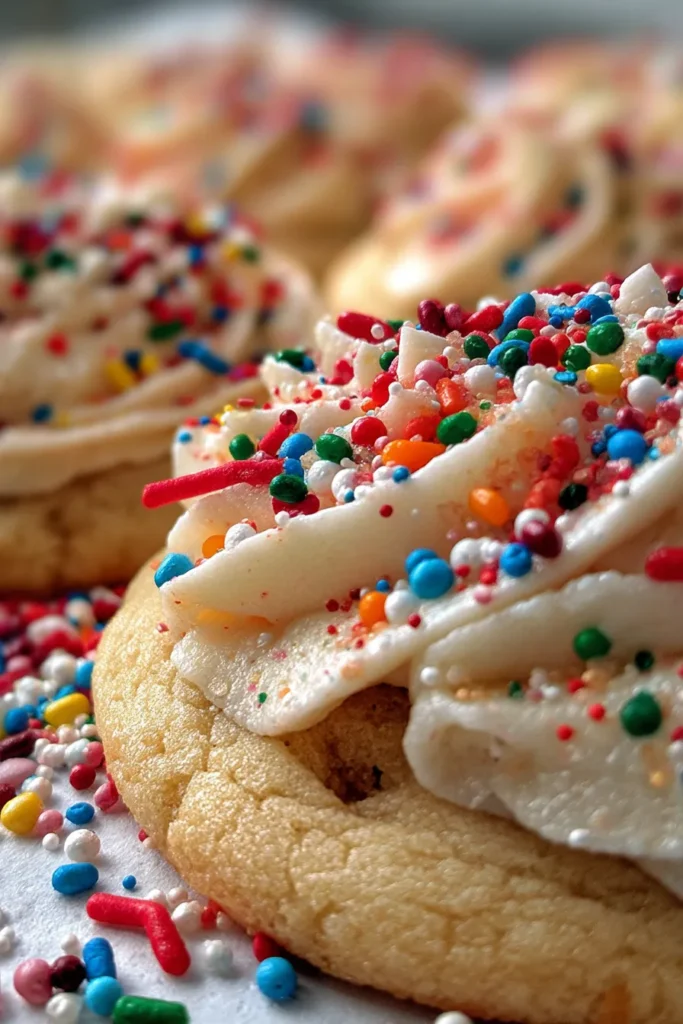
- Dries Firmly (But Not Hard!): One of the best qualities! This frosting sets up perfectly to a soft crust, allowing you to stack cookies without smudging your masterpieces, but it won’t chip or crack when you bite into it.
- Super Easy to Make: With just a few basic pantry ingredients and minimal steps, you can whip up a batch of this fantastic frosting in under 15 minutes. It’s perfect for last-minute baking sessions!
- Versatile for Customization: Easily colored with food gels and flavored with various extracts, this frosting is your canvas for endless creative possibilities. Match it to any theme or holiday!
- Kid-Friendly: Its delightful taste and easy application make it a huge hit with little helpers. It’s a wonderful recipe to get children involved in the joy of baking and decorating.
- Basic Ingredients, Big Flavor: You likely already have everything you need in your kitchen! Simple ingredients come together to create a rich, buttery, and perfectly sweet vanilla flavor that complements any sugar cookie.
- No Weird Ingredients: Forget specialty sugars or stabilizers. This recipe uses classic methods and ingredients for a result that tastes authentically homemade and utterly delicious.
- Reliably Delicious: This isn’t a frosting that will let you down. It’s consistently perfect, batch after batch, ensuring your cookies always look and taste amazing.
What You Need
You only need a few simple pantry staples for this recipe! Check the full printable recipe card below for detailed measurements. The magic truly happens when these basic ingredients come together with a little love and a good mixer.
Expert Tips
💡 Achieve frosting perfection every time with these insider tips:
- Use Room Temperature Butter: This is CRUCIAL! Your butter should be soft enough to indent with your finger but not melted. This ensures it creams smoothly with the powdered sugar, preventing lumps and creating that silky texture. Take it out of the fridge at least an hour before.
- Sift Your Powdered Sugar: Don’t skip this step! Powdered sugar often contains tiny clumps. Sifting ensures your frosting is incredibly smooth, preventing clogged piping tips and gritty texture. A fine-mesh sieve works wonders.
- Start with Less Liquid: When adding milk or cream, begin with the smaller amount recommended in the recipe. You can always add more, a teaspoon at a time, until you reach your desired consistency. It’s much harder to fix frosting that’s too thin!
- Whip It Good (But Don’t Overwhip): Beat the frosting for 3-5 minutes on medium-high speed once all ingredients are combined. This incorporates air, making it light, fluffy, and increasing its volume. Stop once it’s creamy and holds a peak. Over-whipping can sometimes incorporate too much air, leading to a brittle texture.
- Adjust Consistency for Decorating: For outlining and intricate details, you’ll want a slightly stiffer frosting (like toothpaste). For flooding (filling in areas), add a tiny bit more milk until it’s the consistency of honey or glue, where a dropped dollop slowly melts back into the surface in about 10-15 seconds.
- Gel Food Coloring is Your Friend: For vibrant, true colors without diluting your frosting, use gel food coloring. Start with a tiny drop and add more until you achieve your desired shade. Liquid food coloring can add too much moisture and change the frosting’s consistency.
- Scrape the Bowl Frequently: As you mix, butter and sugar can cling to the sides and bottom of the bowl. Stop and scrape down the bowl with a rubber spatula periodically to ensure everything is thoroughly incorporated and evenly mixed.
- Use Good Quality Vanilla: Since vanilla is a primary flavor, using a high-quality vanilla extract or vanilla bean paste will make a noticeable difference in the overall taste of your frosting. Don’t skimp here!
- Patience with Drying: Allow your decorated cookies plenty of time to dry (at least 2-4 hours, or overnight in a humid environment) before stacking or packaging them. This prevents smudges and ensures the frosting sets properly.
Variations & Substitutions
This versatile sugar cookie frosting recipe is incredibly adaptable! Feel free to get creative and customize it to your taste or dietary needs:
- Flavor Swaps: Replace vanilla extract with almond extract for a classic bakery flavor, peppermint extract for holiday cookies, lemon extract or zest for a citrusy twist, or even a dash of maple or coffee extract for unique profiles. Vanilla bean paste adds beautiful specks and intense vanilla flavor.
- Dairy-Free/Vegan: Use a high-quality vegan butter substitute (stick form works best) and a plant-based milk (like almond or oat milk). Ensure they are at room temperature. The texture will be very similar to the original!
- Cream Cheese Frosting: For a tangier flavor, substitute half of the butter with softened cream cheese. You might need to add a bit more powdered sugar to achieve the desired stiffness.
- Coloring: As mentioned in tips, gel food coloring is best for vibrant colors without altering consistency. Mix small batches to get various colors for decorating!
- Spice It Up: A tiny pinch of ground cinnamon, nutmeg, or cardamom can add a subtle warmth, especially lovely for fall or winter-themed cookies.
Storage & Freezing
Proper storage ensures your beautiful Sugar Cookie Frosting stays fresh and ready for your next baking project!
- Countertop Storage: If using immediately or within a few hours, you can keep the frosting at room temperature in an airtight container.
- Refrigerator: Store leftover frosting in an airtight container in the refrigerator for up to 1 week. Before using, let it come to room temperature and re-whip it with an electric mixer for a few minutes until it’s light and fluffy again. You might need to add a tiny splash of milk if it’s too stiff.
- Freezing: This frosting freezes beautifully! Place it in a freezer-safe, airtight container or heavy-duty freezer bag for up to 2-3 months. Thaw overnight in the refrigerator, then let it come to room temperature on the counter before re-whipping until smooth and creamy again.
- Decorated Cookies: Once cookies are decorated and the frosting has fully dried (which can take several hours depending on humidity and thickness), they can be stored in an airtight container at room temperature for up to 5-7 days.
FAQ
Q: Why is my frosting too thin/thick?
A: Frosting consistency is key! If it’s too thin, gradually beat in more sifted powdered sugar, 1/4 cup at a time, until it reaches the desired stiffness. If it’s too thick, add milk or heavy cream, 1/2 teaspoon at a time, until it loosens up. Small adjustments make a big difference!
Q: How long does this frosting take to dry?
A: The drying time can vary based on humidity, the thickness of the frosting, and the amount of liquid used. Generally, a thin layer will form a crust in about 1-2 hours, while thicker layers might take 4-6 hours or even overnight to fully set to a touchable, stackable finish. Drying in a low-humidity environment speeds up the process.
Q: Can I make this frosting ahead of time?
A: Absolutely! This frosting is perfect for making in advance. Store it in an airtight container in the refrigerator for up to a week. When you’re ready to use it, let it come to room temperature and then re-whip it with an electric mixer until it’s smooth and fluffy again. This trick helps restore its ideal texture.
Q: What’s the best way to get vibrant colors without affecting consistency?
A: Gel food coloring is your best friend here! Unlike liquid food coloring, gel colors are highly concentrated and won’t add excess moisture to your frosting, preserving its perfect consistency. Start with a tiny dab on a toothpick and gradually add more until you achieve your desired vibrant shade.
There you have it! The ultimate guide to making the most delicious, pipeable, and perfectly setting Sugar Cookie Frosting. This recipe truly takes the stress out of cookie decorating and brings back all the joy of those childhood baking memories. Whether you’re making cookies for a special occasion or just for fun, this frosting will elevate every bite and make your creations shine. Happy decorating, my friends!
Don’t forget to pin this recipe for later so you can easily find it for your next batch of cookies!
Best Sugar Cookie Frosting: Easy, Creamy & Perfect for Decorating
Ingredients
- 1/2 cup (1 stick) unsalted butter, softened
- 3-4 cups powdered sugar, sifted
- 2-4 tablespoons milk or heavy cream
- 1 teaspoon pure vanilla extract
- Pinch of salt
Instructions
- Step 1 In a large bowl, cream the softened butter with an electric mixer until light and fluffy (about 2-3 minutes).
- Step 2 Gradually add 3 cups of sifted powdered sugar, 1 cup at a time, mixing on low speed until combined after each addition. The mixture will be thick.
- Step 3 Add 2 tablespoons of milk or heavy cream, vanilla extract, and a pinch of salt. Beat on medium speed until smooth.
- Step 4 Increase speed to medium-high and beat for another 3-5 minutes, scraping down the sides of the bowl occasionally, until the frosting is light, fluffy, and smooth.
- Step 5 If the frosting is too thick for your desired consistency (for piping or spreading), add additional milk or cream, 1/2 teaspoon at a time, beating after each addition, until it reaches your desired texture. If it's too thin, add more sifted powdered sugar, 1/4 cup at a time.
- Step 6 Use immediately for decorating or store as directed in the blog post.