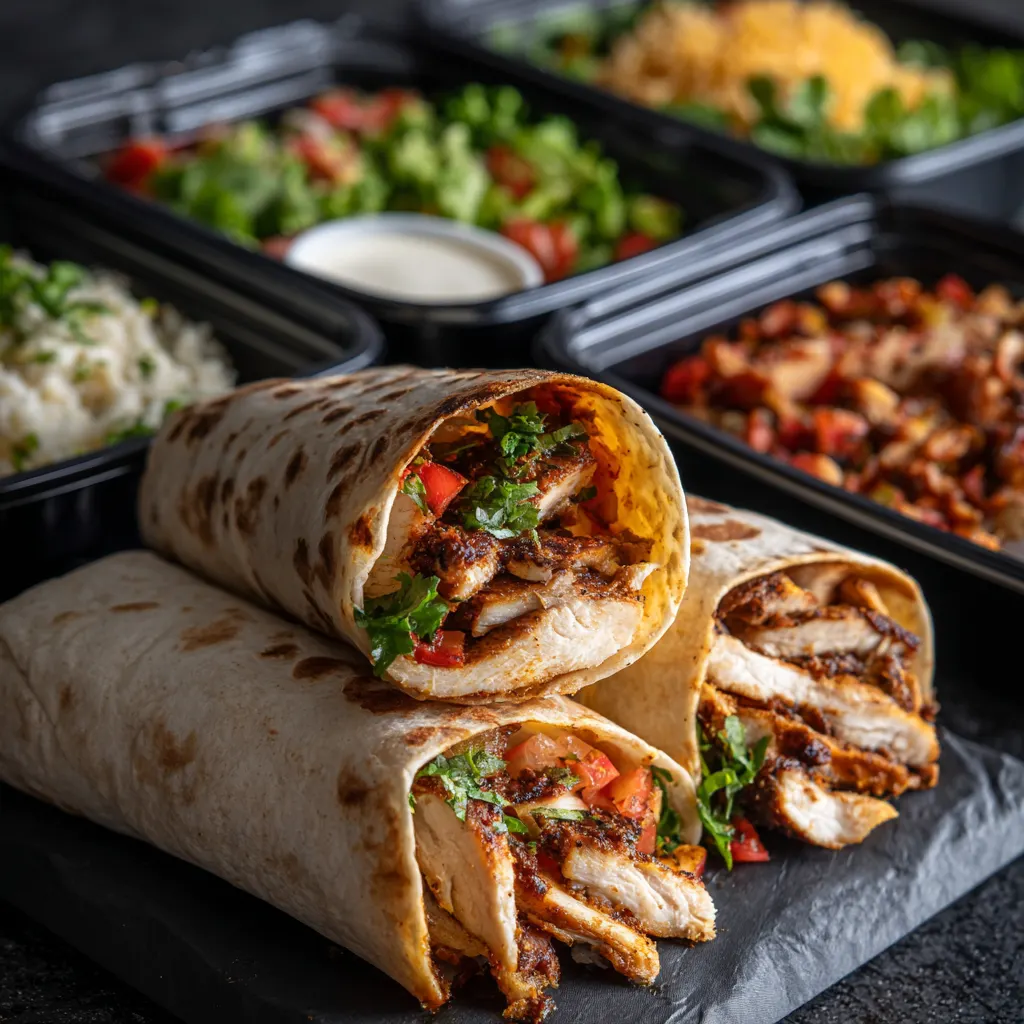
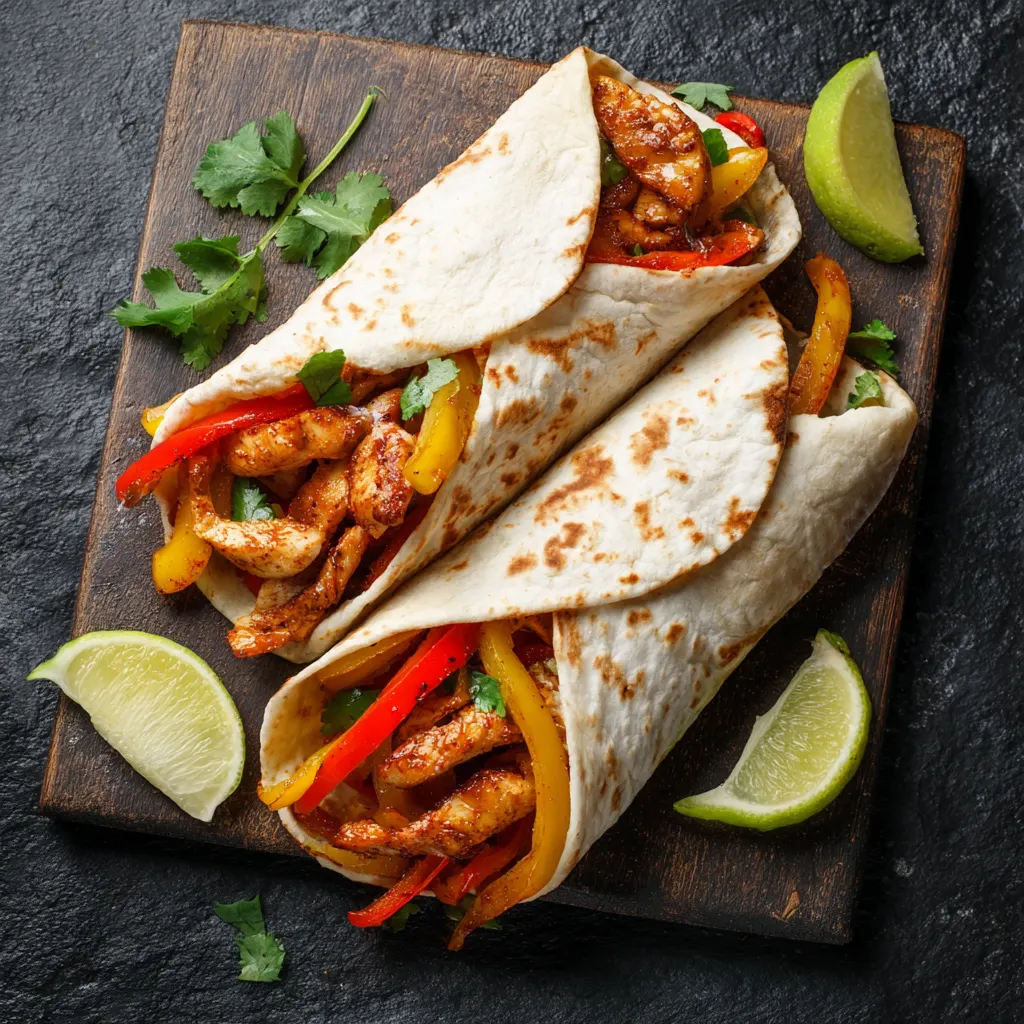
Chicken fajita wraps are a quintessential meal prep solution, offering a perfect balance of lean protein, fiber-rich vegetables, and bold, zesty flavors. This recipe transforms the classic sizzling skillet experience into a convenient, portable lunch or dinner that stays fresh throughout the week. By mastering the art of the homemade marinade and the “barrier method” for assembly, you can enjoy restaurant-quality fajitas without the mid-week sogginess.
Ingredients
For the Fajita Chicken & Vegetables:
-
1.5 lbs boneless, skinless chicken breasts, sliced into thin strips
-
3 large bell peppers (a mix of red, yellow, and green), thinly sliced
-
1 large red or yellow onion, thinly sliced
-
2 tablespoons olive oil or avocado oil
-
1 tablespoon fresh lime juice
The Ultimate Fajita Spice Blend:
-
1 tablespoon chili powder
-
1 teaspoon ground cumin
-
1 teaspoon garlic powder
-
1 teaspoon smoked paprika
-
½ teaspoon dried oregano
-
½ teaspoon onion powder
-
½ teaspoon salt (or to taste)
-
¼ teaspoon black pepper
-
Optional: ¼ teaspoon red chili flakes for extra heat
For Assembly & Serving:
-
6 to 8 large flour or whole wheat tortillas (burrito size)
-
1.5 cups shredded Monterey Jack or sharp cheddar cheese
-
½ cup Greek yogurt or sour cream
-
Optional toppings: Sliced jalapeños, fresh cilantro, or a small amount of salsa (added just before eating)
Step-by-Step Instructions
-
Marinate the Chicken: In a large bowl, whisk together the olive oil, lime juice, and all the spices from the spice blend. Toss the chicken strips in the marinade until evenly coated. For the best flavor, let the chicken sit for at least 20 minutes (or up to 4 hours in the fridge).
-
Sear the Protein: Heat a large non-stick skillet or griddle over medium-high heat. Add the chicken strips in a single layer. Cook for 5 to 7 minutes, turning occasionally, until the chicken is golden brown and cooked through. Remove the chicken from the pan and set aside on a plate.
-
Sauté the Vegetables: In the same pan (adding a drizzle of oil if needed), toss in the sliced peppers and onions. Sauté for 4 to 6 minutes over high heat. You want them to be tender but still retain a slight “snap” and some charred edges.
-
Combine and Cool: Return the chicken to the pan with the vegetables. Stir everything together for 1 minute to marry the flavors. Crucial Step: Transfer the mixture to a shallow dish and allow it to cool completely to room temperature before assembling the wraps. This prevents steam from being trapped inside the tortilla, which causes sogginess.
-
Assemble with the Barrier Method: Lay a tortilla flat. Spread a thin layer of Greek yogurt or sour cream in the center. Sprinkle a layer of cheese over the sauce—the cheese acts as a fat barrier between the moist chicken and the wrap. Spoon the cooled chicken and veggie mixture on top.
-
Fold and Seal: Fold in the sides of the tortilla, then roll it up tightly from the bottom. For a professional finish, place the wraps seam-side down in a dry, hot skillet for 1 minute to “seal” the edge and add a slight crunch.
Strategies for Long-Term Freshness
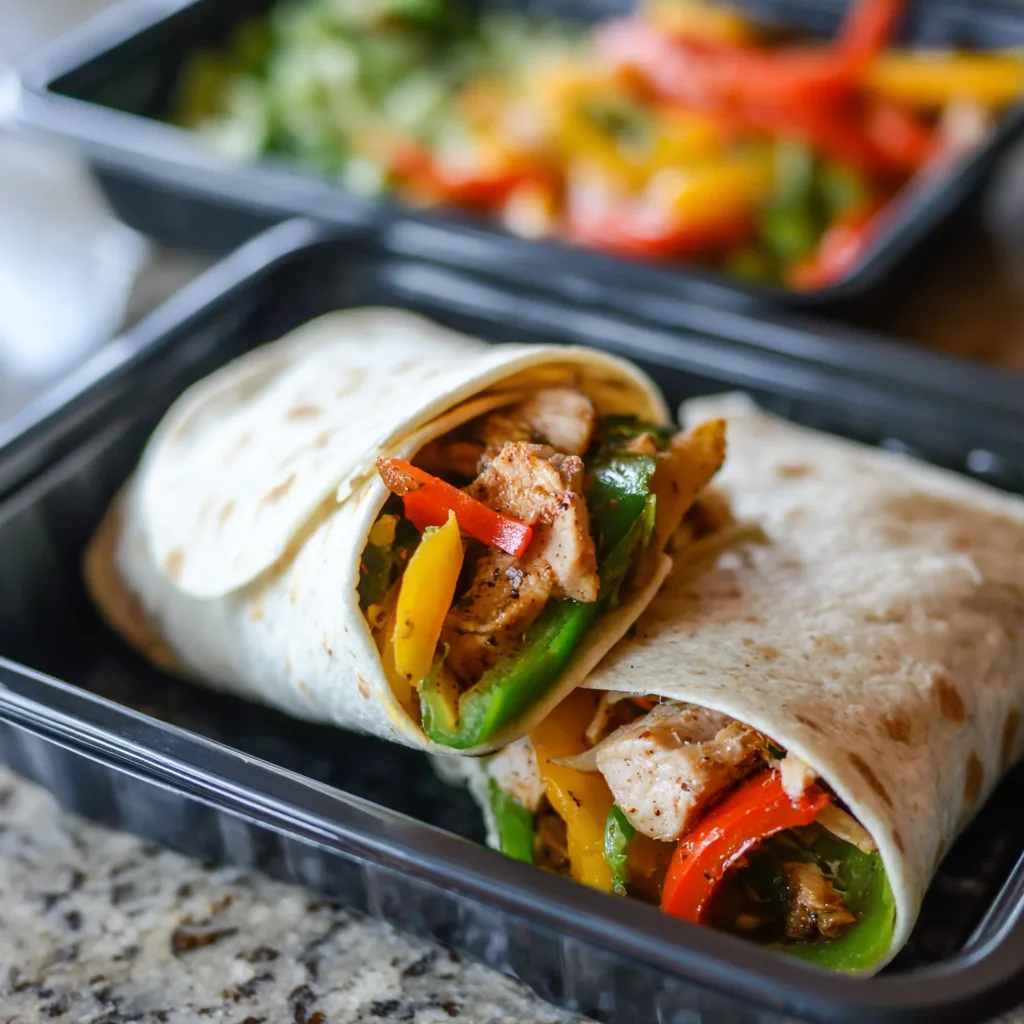
The biggest challenge with meal-prepping wraps is maintaining the integrity of the tortilla. To keep your wraps fresh for up to four days, store the assembled wraps individually. Wrapping each one tightly in parchment paper followed by a layer of aluminum foil mimics the packaging of a professional deli and keeps air out.
If you prefer an even fresher experience, consider the “deconstructed” storage method. Store the cooked chicken and vegetable mix in one large airtight container and keep the tortillas and cold toppings (like cheese and yogurt) separate. This allows you to reheat the filling in a microwave or skillet for two minutes before assembling your wrap fresh at the moment of consumption.
Nutritional Benefits and Customization
Standard chicken fajita wraps are naturally high in protein, typically providing between 25g and 40g per serving depending on the amount of chicken used. By using bell peppers, you are also getting a significant dose of Vitamin C and antioxidants. To make this recipe even more health-conscious, you can swap traditional flour tortillas for high-fiber whole wheat versions or even large butter lettuce leaves for a low-carb alternative.
For those looking to increase the calorie density or satiety of the meal, consider adding a layer of black beans or cilantro-lime rice inside the wrap. If you are watching your fat intake, substituting Greek yogurt for sour cream provides the same tangy creaminess with a boost of probiotics and less saturated fat.
Reheating and Serving Tips
When you are ready to eat, the reheating method can make a world of difference. While a microwave is the most convenient option (wrap in a damp paper towel and heat for 60-90 seconds), an air fryer is the secret weapon for meal preppers. Placing a pre-assembled wrap in the air fryer at 350°F (175°C) for 3 to 5 minutes will result in a hot, juicy interior and a perfectly crispy, toasted exterior.
If you are eating the wraps cold, ensure you have omitted any ingredients that release excess water over time, such as fresh tomatoes or watery salsa. Instead, keep a small condiment container of salsa on the side to dip your wrap into. This ensures every bite is as flavorful and textured as the day you prepped it.