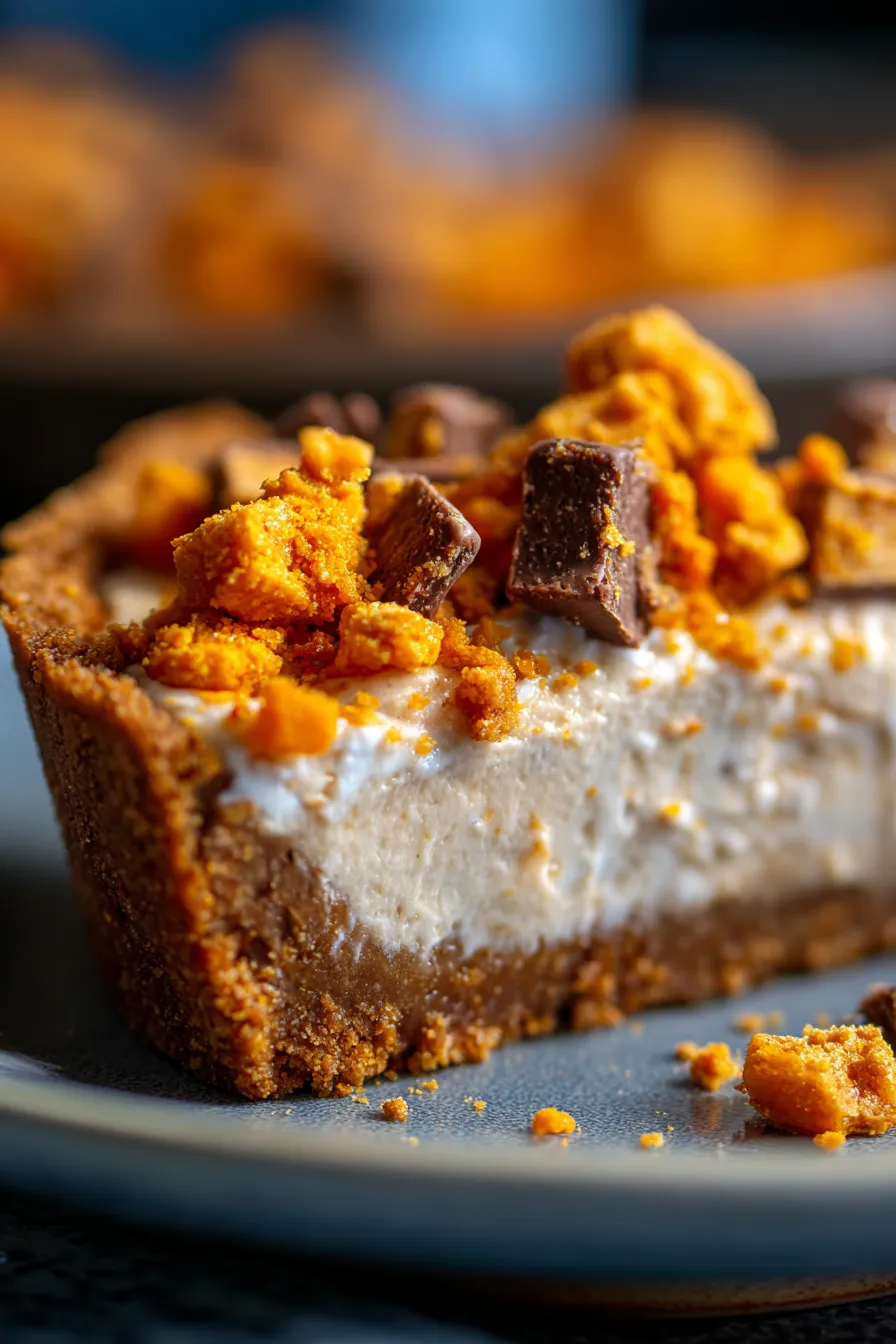
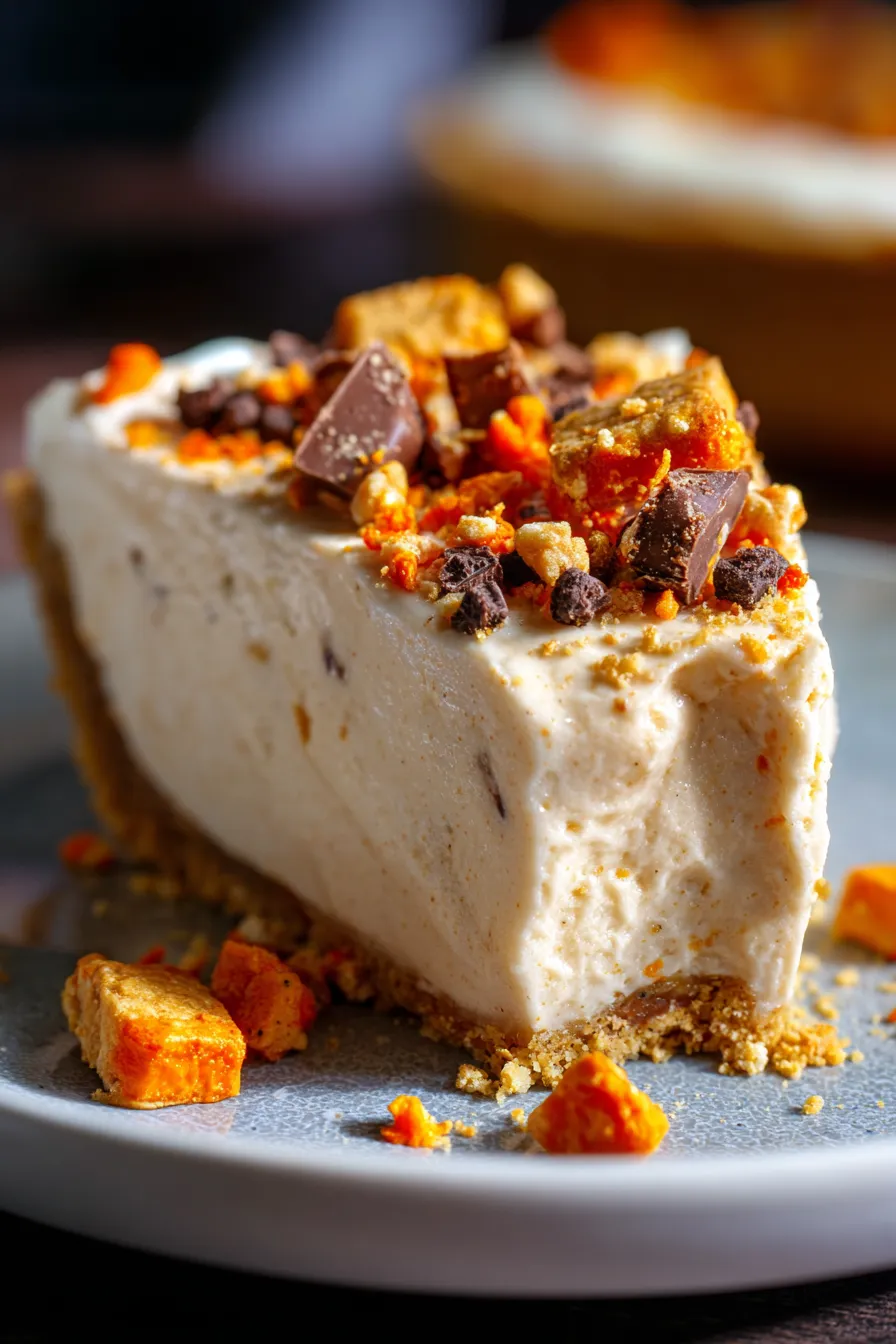
The Ultimate No-Bake Butterfinger Pie: A Family Favorite!
Oh, the memories a single dessert can conjure! I remember one particularly dreary Sunday afternoon, rain lashing against the windows, when my little ones were restless and craving something sweet. That’s when I first whipped up this incredible Butterfinger Pie. The joy on their faces, the quiet contentment as they savored each bite – it wasn’t just a dessert; it was a moment of pure, simple happiness. It quickly became our go-to for rainy days, potlucks, and any time we needed a serious dose of comfort food.
This recipe is more than just a sweet treat; it’s a nostalgic hug in a pie dish. It’s been tested countless times, perfected over years, and is now ready to become a cherished part of your family’s culinary traditions. If you’re searching for an easy dessert that delivers on flavor, texture, and pure bliss, look no further!
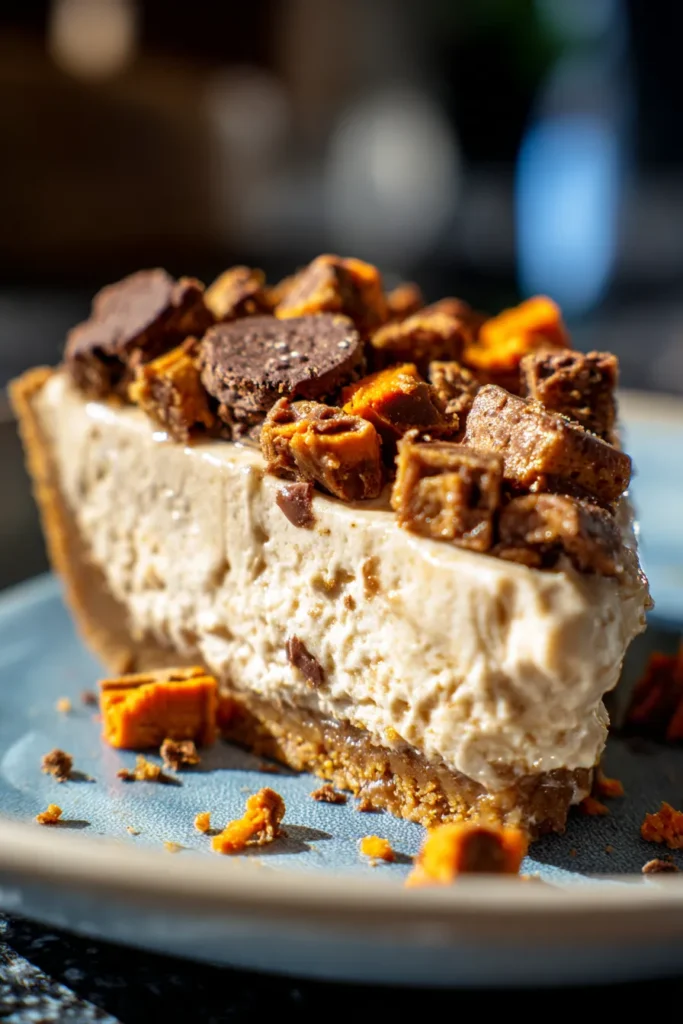
Prepare yourself for a dessert that’s effortlessly simple to make but tastes like you spent hours slaving away. The combination of crisp, chocolatey crust, a light-as-air creamy filling, and the unmistakable crunch of Butterfinger candy bars is simply irresistible. Get ready to impress everyone with this no-bake wonder!
Why You’ll Love This Recipe
- ❤️ Incredibly Easy & No-Bake: Forget turning on the oven! This pie comes together with minimal effort and no baking required, making it perfect for hot summer days or busy schedules. It’s a fantastic choice for beginner bakers or anyone looking for a stress-free dessert.
- Decadent Flavor Profile: You get the best of all worlds – rich chocolate from the crust, creamy tang from the cream cheese filling, and that signature crunchy, peanut buttery, slightly salty-sweet goodness from the Butterfinger bars. Every bite is a harmonious symphony of flavors and textures that will have you reaching for more.
- Crowd-Pleaser Guaranteed: Seriously, who doesn’t love Butterfinger? This pie is a guaranteed hit at potlucks, family gatherings, holiday meals, or just a simple weeknight treat. Expect rave reviews and requests for the recipe every single time you make it! It’s universally loved across all age groups.
- Customizable & Versatile: While the classic Butterfinger is king, this recipe is incredibly adaptable. You can easily switch up the candy bars, crust, or even add different mix-ins to create your own unique version. We’ll delve into some fantastic variations later on!
- Perfect Make-Ahead Dessert: This pie actually benefits from chilling for several hours, making it an ideal make-ahead option. Prepare it the day before your event, and you’ll have one less thing to worry about on the day of serving. It holds up beautifully in the refrigerator.
- Texture Heaven: From the firm, chocolatey crust to the silky-smooth, yet light and airy filling, punctuated by the unmistakable crunch of Butterfinger pieces, this pie offers an exciting textural experience. It’s not just a taste sensation, but a joy to eat.
- Kid-Friendly Fun: Crushing candy bars is a task kids absolutely adore! Let them help with this step (safely, of course), and they’ll feel a sense of accomplishment and ownership over this delicious creation. It’s a great way to get them involved in the kitchen.
- Simple Ingredients: You won’t need any fancy, hard-to-find ingredients. Most components are readily available at any grocery store, making this an accessible and convenient dessert to whip up whenever the craving strikes.
What You Need
You only need a few simple pantry staples for this recipe! Most of these ingredients are likely already in your kitchen, or easily found at your local grocery store. Check the full printable recipe card below for detailed measurements and a complete list.
Expert Tips
- 💡 Crushing Butterfinger Bars: For the best results, place the unwrapped candy bars in a large zip-top bag. Use a rolling pin or the flat side of a meat mallet to gently crush them. Aim for a mix of fine crumbs and slightly larger, satisfying chunks for optimal texture in the pie filling and topping. Don’t pulverize them entirely!
- Softened Cream Cheese is Key: Ensure your cream cheese is at room temperature before you start mixing. This is crucial for achieving a smooth, lump-free filling. Cold cream cheese will result in a clumpy texture that won’t fully incorporate into the whipped topping. Plan ahead and take it out of the fridge at least 30 minutes to an hour before you begin.
- Don’t Overmix the Whipped Topping: When folding in the whipped topping, be gentle. Overmixing can deflate the topping, leading to a less airy and fluffy filling. Use a spatula and fold until just combined, ensuring no streaks remain but without vigorous stirring.
- Chill Time is Non-Negotiable: This is a no-bake pie, and chilling is what sets it! A minimum of 4 hours is necessary, but overnight is truly ideal. This allows the filling to firm up completely and the flavors to meld beautifully. Rushing this step will result in a soft, less stable pie.
- Pressing the Crust: When pressing the Oreo crust into the pie dish, use the bottom of a flat-bottomed glass or measuring cup to create an even, compact layer. This ensures a sturdy base that won’t crumble when sliced. Make sure the crust goes slightly up the sides of the dish.
- The Perfect Slice: For clean slices, dip your knife in hot water and wipe it clean between each cut. This helps to prevent the filling and candy pieces from sticking and creates a beautiful presentation.
- Garnish Just Before Serving: While some crushed Butterfinger goes into the pie, save a generous portion for topping. Sprinkle this just before serving to ensure maximum crunch and visual appeal. You can also add a drizzle of melted chocolate or caramel for an extra touch of decadence.
- Use Good Quality Ingredients: While simple, the quality of your ingredients matters. Fresh cream cheese and a good brand of whipped topping will make a noticeable difference in the overall taste and texture of your pie.
- Adjust Sweetness to Taste: The powdered sugar amount can be adjusted slightly based on your preference. If you prefer a less sweet pie, you can slightly reduce the amount, but remember the Butterfinger bars themselves add a significant amount of sweetness.
Variations & Substitutions
One of the best things about this Butterfinger Pie is how easily it can be customized to suit different tastes or dietary needs. Get creative!
- Different Candy Bars: Not a Butterfinger fan (gasp!)? No problem! Try Snickers, Reese’s Peanut Butter Cups, Heath bars, or even M&M’s. Just crush them similarly.
- Crust Variations: Instead of an Oreo crust, consider a graham cracker crust, a Nilla wafer crust, or even a pretzel crust for a sweet and salty twist. You can buy pre-made crusts for even more convenience.
- Gluten-Free Option: Use gluten-free chocolate sandwich cookies for the crust, or opt for a simple almond flour or gluten-free graham cracker crust. Ensure your other ingredients are certified GF.
- No-Sugar-Added: Use sugar-free powdered sugar, sugar-free whipped topping, and sugar-free Butterfinger-style candies (if available). Be mindful that the texture might vary slightly.
- Peanut-Free: If there’s a peanut allergy, substitute Butterfinger with a different crunchy, peanut-free candy bar like a Heath bar (toffee) or crushed pretzels and a caramel swirl for a similar texture. Always check labels carefully.
- Chocolate Drizzle: Melt some chocolate chips and drizzle over the top of the pie before serving for an extra layer of chocolatey goodness.
- Caramel Swirl: A store-bought caramel sauce swirled into the filling or drizzled on top adds another dimension of flavor.
- Espresso Boost: A teaspoon of instant espresso powder mixed into the cream cheese filling can subtly enhance the chocolate flavor without making it taste like coffee.

Storage & Freezing
Keeping your Butterfinger Pie fresh is easy, ensuring you can enjoy every last crumb!
- Refrigerator: Store any leftover pie, tightly covered with plastic wrap or in an airtight container, in the refrigerator for up to 3-4 days. The crust might soften slightly over time, but the flavor will remain delicious.
- Freezing: This pie freezes surprisingly well! For best results, freeze individual slices or the whole pie (uncovered) until firm, then wrap tightly in plastic wrap and then aluminum foil. It can be stored in the freezer for up to 1 month.
- Thawing: When ready to enjoy a frozen slice, transfer it to the refrigerator to thaw for a few hours, or let it sit at room temperature for about 30-60 minutes.
FAQ
Q: Can I use homemade whipped cream instead of frozen whipped topping?
A: While you certainly *can* use homemade whipped cream, for the best stability and texture in this no-bake pie, frozen whipped topping (like Cool Whip) is highly recommended. It contains stabilizers that help the pie hold its shape much better, especially after chilling. If you do use homemade, make sure it’s very stiffly whipped.
Q: My pie filling seems a little soft. What did I do wrong?
A: The most common reason for a soft filling is insufficient chilling time. This pie needs at least 4 hours, but ideally overnight, to fully set. Also, ensure your cream cheese was properly softened and that you gently folded (rather than vigorously mixed) the whipped topping to maintain its airy volume.
Q: Can I make this pie ahead of time for a party?
A: Absolutely! This pie is a fantastic make-ahead dessert. In fact, it tastes even better the next day after the flavors have had a chance to fully meld in the refrigerator. Just be sure to cover it well with plastic wrap to prevent any odors from other foods in the fridge from affecting its taste.
Q: How many Butterfinger bars do I need?
A: For a standard 9-inch pie, you’ll typically need about 4-6 regular-sized Butterfinger candy bars (around 1.5-2 oz each). This provides enough for both the filling and a generous topping. If you love a lot of crunch, lean towards the higher end.
Q: What’s the best way to crush the candy bars without making a huge mess?
A: Place the unwrapped candy bars in a sturdy zip-top freezer bag. Seal it, pressing out as much air as possible. Then, use a rolling pin, the bottom of a heavy pan, or a meat mallet to gently tap and crush them. This method keeps the mess contained and allows you to control the size of the pieces effectively. Avoid pounding too hard, or the bag might break.
There you have it – the ultimate guide to creating a Butterfinger Pie that will earn you legendary status among your friends and family. This easy no-bake dessert is truly a showstopper, delivering on flavor, texture, and pure joy with minimal effort. Don’t wait for a special occasion; make it today and taste the magic!
If you loved this recipe, please consider leaving a comment and rating below. And don’t forget to pin this recipe for later so you can whip it up whenever that Butterfinger craving hits!
Easy No-Bake Butterfinger Pie Recipe – Ultimate Decadent Dessert
Ingredients
- 2 cups crushed Oreo cookies (about 20 cookies)
- 1/2 cup unsalted butter, melted
- 8 oz cream cheese, softened
- 1 cup powdered sugar
- 1 tsp vanilla extract
- 1 (12 oz) container frozen whipped topping, thawed (like Cool Whip)
- 5-6 regular size Butterfinger candy bars, crushed
Instructions
- Step 1 In a medium bowl, combine the crushed Oreo cookies and melted butter until well mixed.
- Step 2 Press the mixture firmly into the bottom and slightly up the sides of a 9-inch pie dish. Chill in the refrigerator for at least 30 minutes to set.
- Step 3 In a large bowl, using an electric mixer, beat the softened cream cheese, powdered sugar, and vanilla extract until smooth and creamy (about 2-3 minutes).
- Step 4 Gently fold in the thawed whipped topping until no streaks remain and the mixture is light and airy.
- Step 5 Carefully fold in about two-thirds of the crushed Butterfinger candy bars.
- Step 6 Spoon the filling evenly into the chilled Oreo crust.
- Step 7 Sprinkle the remaining crushed Butterfinger candy bars over the top of the pie.
- Step 8 Cover the pie loosely with plastic wrap and refrigerate for a minimum of 4 hours, or preferably overnight, until completely set. Slice with a warm, clean knife and serve chilled.