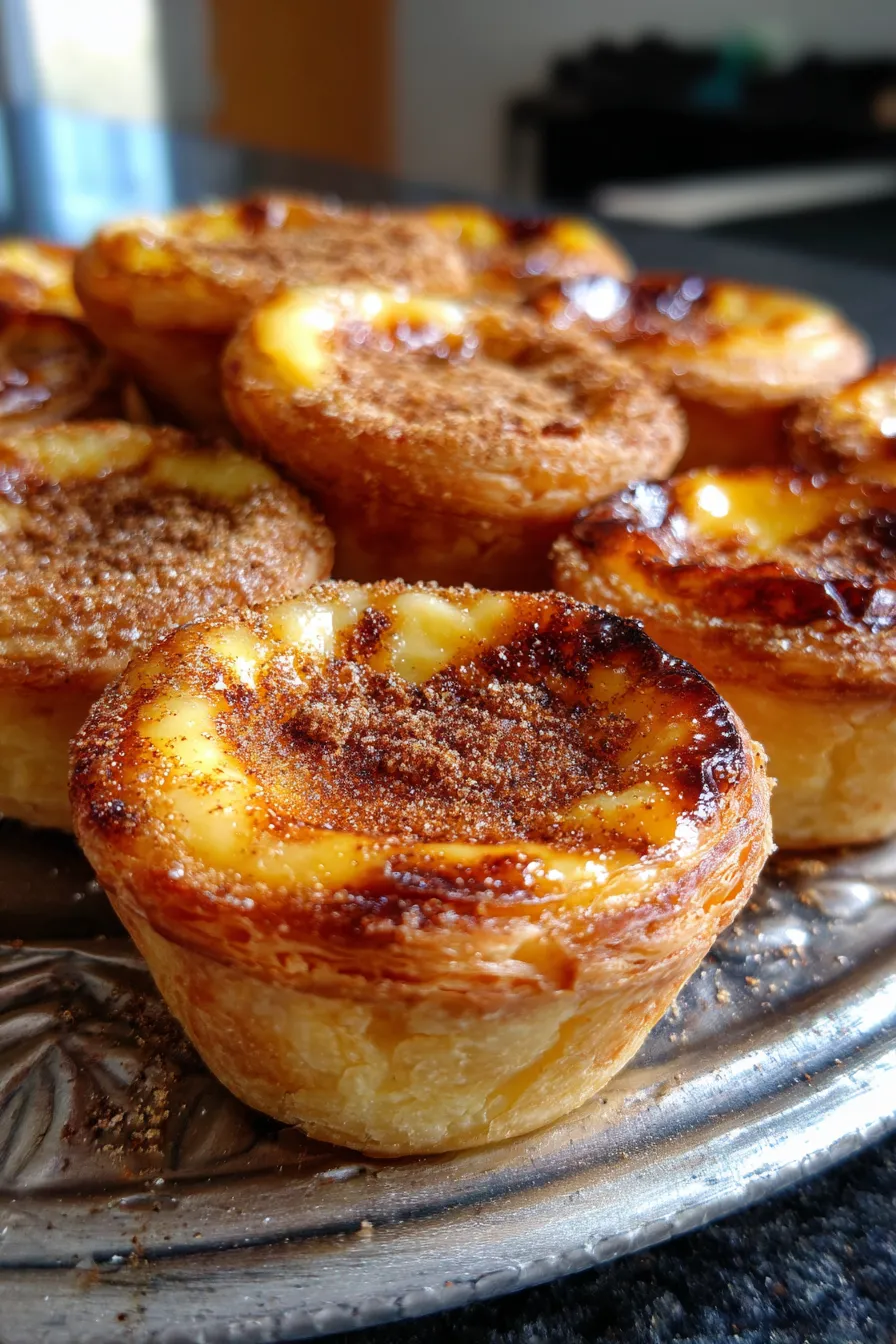
Best Ever Easy Portuguese Custard Tarts (Pastel de Nata)
Oh, the smell of freshly baked pastries! It instantly transports me back to my first solo trip to Lisbon. I remember stumbling upon a tiny pastelaria, the air thick with the scent of sugar and cinnamon, and biting into my very first Pastel de Nata. That moment was pure magic, a perfect blend of crispy, creamy, and sweet. Ever since, I’ve been on a mission to recreate that magic in my own kitchen.
This recipe for Easy Portuguese Custard Tarts (Pastel de Nata) is the culmination of countless experiments, tweaking and tasting, and it truly captures the essence of that unforgettable treat. It’s become a cherished family favorite, a delightful treat we often whip up on lazy Sunday afternoons, especially when the rain is tapping gently on the window. Trust me, once you make these, you’ll understand why they’re so utterly addictive and the ultimate comforting dessert.
This tried-and-tested recipe uses simple ingredients and delivers spectacular results every single time. Get ready to impress yourself and everyone you share them with!

Why You’ll Love This Recipe
❤️ Here’s why these tarts will steal your heart:
- Authentic Flavor, Simplified: We’ve captured the true taste of a traditional Pastel de Nata without the complex techniques often associated with them. You’ll get that rich, creamy, vanilla-lemon infused custard that’s utterly irresistible.
- Golden & Crispy Perfection: The secret is in the high heat! Achieving that signature blistered, caramelized top and impossibly flaky, buttery crust is easier than you think. Each bite is a symphony of textures.
- Pantry-Friendly Ingredients: You likely have most of what you need already! Simple items like puff pastry (store-bought is perfectly fine!), milk, sugar, and eggs are the stars of this show. No fancy equipment or exotic spices required.
- Impressive Showstopper: These tarts look incredibly professional and elegant, making them perfect for entertaining guests, holiday gatherings, or simply treating yourself to something special. Everyone will ask for the recipe!
- Surprisingly Easy to Make: Don’t let their gourmet appearance fool you. With a few smart shortcuts, like using quality store-bought puff pastry, these tarts come together with minimal fuss, making them a fantastic baking project for all skill levels.
- Versatile Treat: Enjoy them warm from the oven for a comforting experience, or chilled as a refreshing indulgence. They’re perfect with a cup of coffee, tea, or simply on their own.
- A Taste of Portugal at Home: Transport your taste buds to the charming streets of Lisbon with every bite. These tarts evoke a sense of travel and culinary adventure right from your kitchen, making them more than just a dessert – they’re an experience.
- Perfectly Portioned: Each tart is a delightful individual serving, making them easy to share, serve, and enjoy without any messy slicing. They’re the ultimate grab-and-go sweet treat for any occasion.
What You Need
You only need a few simple pantry staples for this recipe! The beauty of these tarts lies in the quality of these basic ingredients coming together to create something extraordinary. Check the full printable recipe card below for detailed measurements and exact quantities.
💡 Expert Tips for Perfect Pastel de Nata
- Puff Pastry Preparation is Key: Store-bought puff pastry is your best friend here! Thaw it in the refrigerator according to package directions, but don’t let it get too warm, or it will be sticky and hard to work with. Lightly flour your surface and rolling pin. Roll the pastry into a neat rectangle, then roll it up tightly into a log. This creates those beautiful, distinct layers.
- Achieving the Flaky Crust: Once you’ve rolled your pastry into a log, slice it into equal rounds (about 1 inch thick). Place each round cut-side up in your muffin tin. Now, using your thumb or a small tamper, press the pastry out from the center to form a thin cup. Ensure the bottom is thin and the sides come up just above the rim of the tin. This thinness is crucial for a crisp, crackly crust that contrasts perfectly with the creamy filling.
- Don’t Skimp on the High Heat: The super high oven temperature (around 500°F / 260°C) is non-negotiable for achieving that signature blistered, slightly charred top on your tarts. Don’t be afraid! It happens quickly. Position your oven rack in the upper third of the oven to get maximum heat on the tart tops.
- Mastering the Custard: When making the custard, whisk your egg yolks and sugar thoroughly before adding the flour. This helps prevent lumps. When adding the hot milk mixture to the egg mixture, slowly temper the eggs by drizzling in a little hot liquid at a time while whisking continuously. This prevents the eggs from scrambling. Strain the custard through a fine-mesh sieve after cooking to ensure a silky-smooth consistency.
- Filling Your Tart Shells: Fill the pastry shells almost to the very top, but leave just a tiny bit of space. The custard will puff up during baking and then settle. Overfilling can lead to spills, while underfilling might result in less pronounced browning on top.
- Watch Them Closely: Baking time can vary depending on your oven. Once the tops start to char and blister, they’re usually done. This can happen anywhere from 12-20 minutes in a very hot oven. Keep a close eye on them, especially after the 10-minute mark, to prevent over-burning.
- Cooling for Crispness: It’s tempting to devour them immediately, but letting them cool slightly in the muffin tin before transferring them to a wire rack allows the crust to firm up and prevents them from sticking. They are best enjoyed warm or at room temperature.
- Using a Blow Torch (Optional but Recommended): If your oven doesn’t get hot enough for sufficient charring, or if you want extra browning in specific spots, a kitchen blow torch is a fantastic tool. A quick pass over the tops after they’ve come out of the oven can achieve that perfect caramelized finish.
- Flavor Enhancements: Don’t forget a pinch of salt in your custard – it really brings out the sweetness. A strip of lemon peel (removed before filling the tarts) or a cinnamon stick infused into the milk can add delightful depth to the custard.
Variations & Substitutions
While the classic Easy Portuguese Custard Tarts (Pastel de Nata) are perfect as they are, you can certainly play around with flavors and ingredients to suit your preferences or dietary needs. Remember, these are creative suggestions, and the authentic recipe is always a delicious starting point!
- Spice It Up: A tiny pinch of freshly grated nutmeg or a touch of cardamom can add warmth to the custard. Add it with the cinnamon stick and lemon peel to the milk mixture.
- Citrus Zest: For an extra bright flavor, add a little orange zest along with the lemon zest to the milk when infusing.
- Gluten-Free Option: While challenging to replicate the flaky texture, you can experiment with a store-bought gluten-free puff pastry. Be aware that the texture may differ.
- Dairy-Free Custard: For a dairy-free version, try using full-fat coconut milk or a rich almond milk alternative. You might need to adjust the thickening agent slightly, but it can yield a delicious result.
- Mini Tarts: Use a mini muffin tin for bite-sized delights! Adjust baking time accordingly (they will bake faster).
Storage & Freezing
These delightful Easy Portuguese Custard Tarts (Pastel de Nata) are best enjoyed fresh, ideally warm from the oven. However, they store beautifully if you happen to have any leftovers (which is rare!).
- Room Temperature: You can keep them at room temperature for up to 1 day, loosely covered. The crust will remain crispier this way.
- Refrigerator: For longer storage, place them in an airtight container in the refrigerator for up to 3 days. The crust might soften slightly, but the custard remains delicious.
- Reheating: To restore some crispness to the crust, reheat refrigerated tarts in a preheated oven at 350°F (175°C) for about 5-7 minutes, or until warmed through and the crust is crisp again.
- Freezing: Unbaked tarts can be frozen! Prepare the pastry shells and fill them with custard, then freeze them on a baking sheet until solid. Transfer to an airtight container or freezer bag. When ready to bake, place directly from the freezer into a preheated 500°F (260°C) oven, adding about 10-15 minutes to the baking time. Baked tarts can also be frozen for up to 1 month in an airtight container; thaw in the fridge and reheat as above.
FAQ
Q: Why are my Pastel de Nata not getting dark and blistered on top?
A: The most common reason is that your oven isn’t hot enough, or the tarts aren’t close enough to the heating element. Ensure your oven is fully preheated to 500°F (260°C) or even 525°F (275°C) and bake them on the top rack. If you have an electric oven, ensure the broiler is not on at the same time, but the oven is at max conventional heat. A kitchen blow torch can also help achieve that perfect caramelized finish after baking.
Q: Can I use regular pie crust instead of puff pastry?
A: While you can technically make a custard tart with pie crust, it won’t be an authentic Pastel de Nata. The signature flaky, airy layers of puff pastry are crucial for the textural contrast that makes these tarts so special. Stick with puff pastry for the best results!
Q: My custard looks lumpy. What went wrong?
A: Lumpy custard often occurs if the hot milk mixture is added too quickly to the egg yolks without whisking constantly (scrambling the eggs) or if the flour isn’t fully incorporated. Always temper your eggs slowly, whisking vigorously. Straining the finished custard through a fine-mesh sieve before pouring it into the pastry shells will remove any small lumps and ensure a silky-smooth filling.
Q: Are Pastel de Nata typically served warm or cold?
A: Traditionally, Pastel de Nata are enjoyed slightly warm, often dusted with cinnamon or powdered sugar. The warmth enhances the creamy texture of the custard and the flakiness of the crust. However, they are also delightful at room temperature or even chilled, making them versatile for any preference.
There you have it – your ultimate guide to creating incredible Easy Portuguese Custard Tarts (Pastel de Nata) right in your home kitchen. This recipe is a labor of love, designed to bring a little bit of Portuguese sunshine to your table, no matter where you are. Don’t be shy, give it a try this weekend!
If you make these delectable tarts, be sure to tag me on social media or leave a comment below. I absolutely love seeing your culinary creations! And remember, good food is meant to be shared. Pin this recipe for later and spread the joy of these heavenly pastries!
Easy Portuguese Custard Tarts (Pastel de Nata) Recipe
Ingredients
- 1 sheet (14 oz / 400g) good quality puff pastry, thawed
- 1 ½ cups (360ml) whole milk
- 1 cup (200g) granulated sugar
- ¼ cup (30g) all-purpose flour
- 6 large egg yolks
- 1 tsp vanilla extract
- 1 strip lemon peel (about 2-inches long)
- Pinch of salt
- Ground cinnamon or powdered sugar, for dusting (optional)
Instructions
- Step 1 Prepare Puff Pastry: On a lightly floured surface, unroll the thawed puff pastry. Roll it into a roughly 10x14 inch rectangle. Starting from a long edge, tightly roll the pastry into a log. Cut the log into 12 equal (about 1-inch) rounds.
- Step 2 Shape Tart Shells: Place each pastry round, cut-side up, into the wells of a standard 12-cup muffin tin. Using your thumb, press the dough from the center outwards, lining the muffin cup to form a thin shell that extends just above the rim. Chill for 15 minutes.
- Step 3 Make Custard: In a medium saucepan, whisk together sugar and flour until combined. Gradually whisk in the milk until smooth. Add the lemon peel and salt. Heat over medium heat, whisking constantly, until the mixture thickens and comes to a gentle simmer. Remove from heat.
- Step 4 Temper Egg Yolks: In a separate bowl, lightly whisk the egg yolks. Slowly pour about half of the hot milk mixture into the egg yolks, whisking constantly to temper them. Pour the tempered egg yolk mixture back into the saucepan with the remaining hot milk mixture. Add vanilla extract.
- Step 5 Cook Custard: Return the saucepan to low-medium heat and cook, whisking continuously, for 2-3 minutes until the custard thickens slightly more. Do not boil. Remove lemon peel. Strain the custard through a fine-mesh sieve into a clean bowl to ensure itu2019s silky smooth.
- Step 6 Preheat Oven: Preheat your oven to its highest setting, typically 500°F (260°C) or 525°F (275°C). Place an oven rack in the upper third of the oven.
- Step 7 Fill and Bake: Pour the warm custard into the chilled pastry shells, filling them almost to the top. Bake for 15-20 minutes, or until the pastry is golden brown and the tops of the custards are beautifully blistered and caramelized. Watch carefully as they brown quickly!
- Step 8 Cool and Serve: Remove the tarts from the oven. Let them cool in the muffin tin for 5-10 minutes before carefully transferring them to a wire rack to cool completely or serve warm. Dust with cinnamon or powdered sugar if desired. Enjoy!