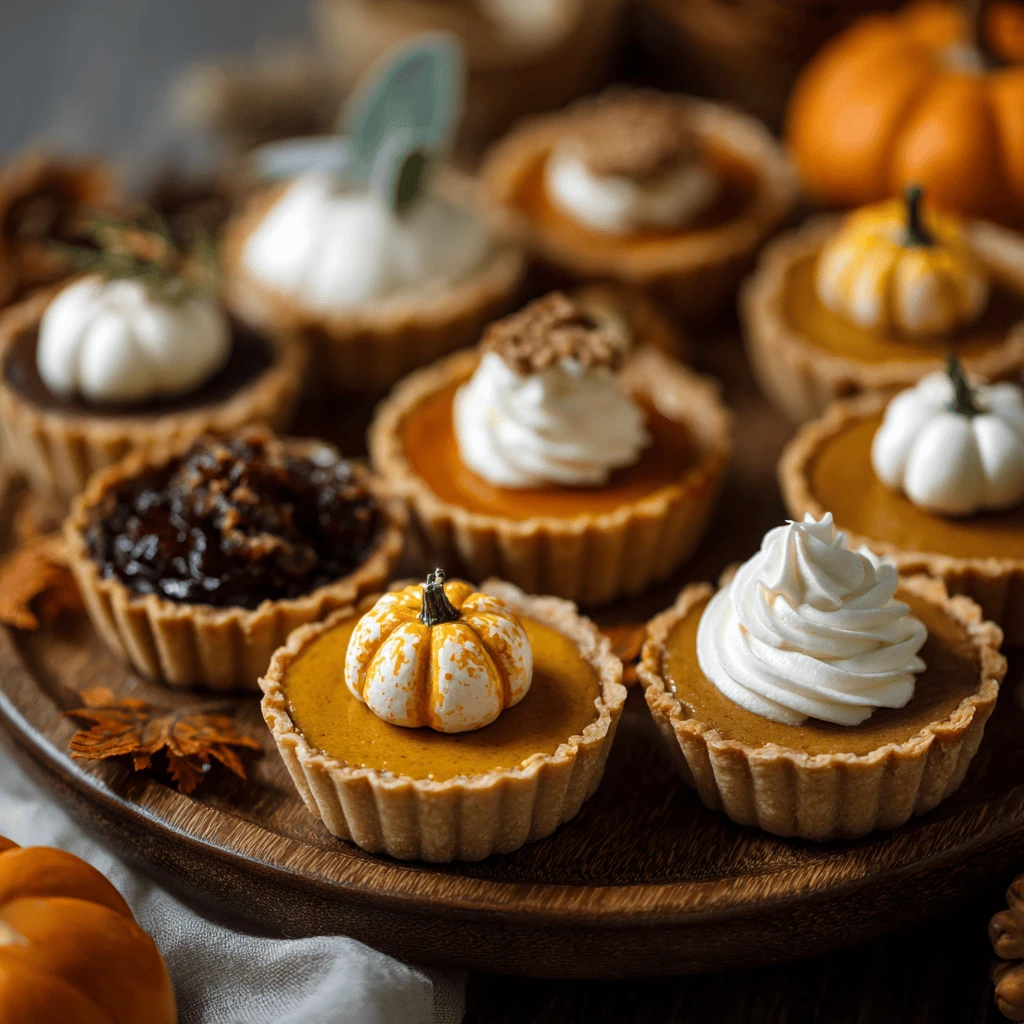
Mini Pumpkin Pies for Thanksgiving: A Deliciously Bite-Sized Dessert
Thanksgiving is a time for family, friends, and, of course, an abundance of delicious food. While pumpkin pie is a classic Thanksgiving dessert, why not try something a little different this year? Mini pumpkin pies are not only adorable but also incredibly easy to make and perfect for portion control. These bite-sized treats are sure to be a hit with everyone at your Thanksgiving gathering.
Why Mini Pumpkin Pies are Perfect for Thanksgiving
Mini pumpkin pies offer a number of advantages over their full-sized counterparts. They are:
- Perfect for portion control: Guests can enjoy a taste of pumpkin pie without feeling overly full.
- Easy to serve and eat: No need for cutting and serving slices. Just grab and enjoy!
- Visually appealing: Their small size makes them incredibly cute and appealing.
- Customizable: You can easily adjust the filling and toppings to suit your preferences.
- Great for potlucks: Easy to transport and share.
Beyond the practical benefits, mini pumpkin pies add a touch of elegance and whimsy to your Thanksgiving dessert spread. They are a delightful way to celebrate the holiday and indulge in the flavors of fall.
Making the Perfect Mini Pumpkin Pie Crust
The crust is the foundation of any great pie, and mini pumpkin pies are no exception. You have two main options: homemade crust or store-bought crust.
Homemade Mini Pie Crust: A Labor of Love
Making your own pie crust allows for complete control over the ingredients and flavor. Here’s a basic recipe:
Ingredients:
- 1 1/4 cups all-purpose flour
- 1/2 teaspoon salt
- 1/2 cup (1 stick) cold unsalted butter, cut into cubes
- 3-5 tablespoons ice water
Instructions:
1. Combine dry ingredients: In a large bowl, whisk together the flour and salt.
2. Cut in the butter: Add the cold butter cubes and use a pastry blender or your fingers to cut the butter into the flour until the mixture resembles coarse crumbs. Work quickly to keep the butter cold.
3. Add ice water: Gradually add the ice water, one tablespoon at a time, mixing gently after each addition. Stop adding water when the dough just comes together.
4. Form and chill the dough: Form the dough into a disc, wrap it in plastic wrap, and chill it in the refrigerator for at least 30 minutes.
5. Roll and cut: On a lightly floured surface, roll out the dough to about 1/8 inch thickness. Use a cookie cutter or a knife to cut out circles slightly larger than your mini muffin tin cups.
6. Press into muffin tin: Gently press each circle into the muffin tin cups, crimping the edges if desired.
Tips for Success:
- Keep the butter cold: Cold butter is crucial for creating a flaky crust.
- Don’t overwork the dough: Overworking the dough will result in a tough crust.
- Chill the dough: Chilling allows the gluten to relax, resulting in a more tender crust.
Store-Bought Mini Pie Crust: Convenience at its Finest
If you’re short on time, store-bought pie crust is a perfectly acceptable alternative. Look for pre-made pie crust rounds in the refrigerated section of your grocery store. Simply unroll the crust, cut out circles, and press them into your mini muffin tin.
Tips for using Store-Bought Crust:
- Bring to room temperature: Allow the crust to sit at room temperature for a few minutes before unrolling it to prevent cracking.
- Dust with flour: Lightly dust your work surface and the crust with flour to prevent sticking.
- Press gently: Gently press the crust into the muffin tin to avoid tearing.
No matter which crust you choose, be sure to pre-bake it for a few minutes before adding the filling. This will help prevent a soggy bottom.
Crafting the Perfect Pumpkin Pie Filling
The pumpkin pie filling is where the magic happens. A smooth, creamy, and flavorful filling is essential for a truly memorable mini pumpkin pie.
Ingredients:
- 1 (15 ounce) can pumpkin puree (not pumpkin pie filling)
- 1 (14 ounce) can sweetened condensed milk
- 2 large eggs
- 1 teaspoon pumpkin pie spice
- 1/2 teaspoon ground cinnamon
- 1/4 teaspoon ground ginger
- 1/4 teaspoon ground nutmeg
- 1/4 teaspoon salt
Instructions:
1. Combine ingredients: In a large bowl, whisk together the pumpkin puree, sweetened condensed milk, eggs, pumpkin pie spice, cinnamon, ginger, nutmeg, and salt until smooth.
2. Pour into crusts: Carefully pour the filling into the pre-baked mini pie crusts, filling them almost to the top.
3. Bake: Bake in a preheated oven at 350°F (175°C) for 18-22 minutes, or until the filling is set but still slightly jiggly in the center.
4. Cool: Let the mini pies cool completely in the muffin tin before removing them.
Tips for a Perfect Filling:
- Use pumpkin puree, not pumpkin pie filling: Pumpkin pie filling already contains spices, so using pumpkin puree allows you to control the flavor.
- Don’t overbake: Overbaking will result in a dry, cracked filling.
- Sweetened condensed milk is key: Sweetened condensed milk provides both sweetness and creaminess to the filling.
- Adjust spices to your liking: Feel free to adjust the amount of spices to suit your personal taste.
Variations on the Classic Pumpkin Pie Filling
Feel free to experiment with different flavors and ingredients to create your own unique mini pumpkin pie filling. Here are a few ideas:
- Add chocolate chips: Stir in 1/2 cup of chocolate chips to the filling for a chocolatey twist.
- Add a touch of bourbon: Add 1-2 tablespoons of bourbon to the filling for a boozy kick.
- Spice it up with chili powder: Add a pinch of chili powder for a subtle heat.
- Use different spices: Try using cardamom, cloves, or allspice instead of or in addition to the traditional pumpkin pie spices.
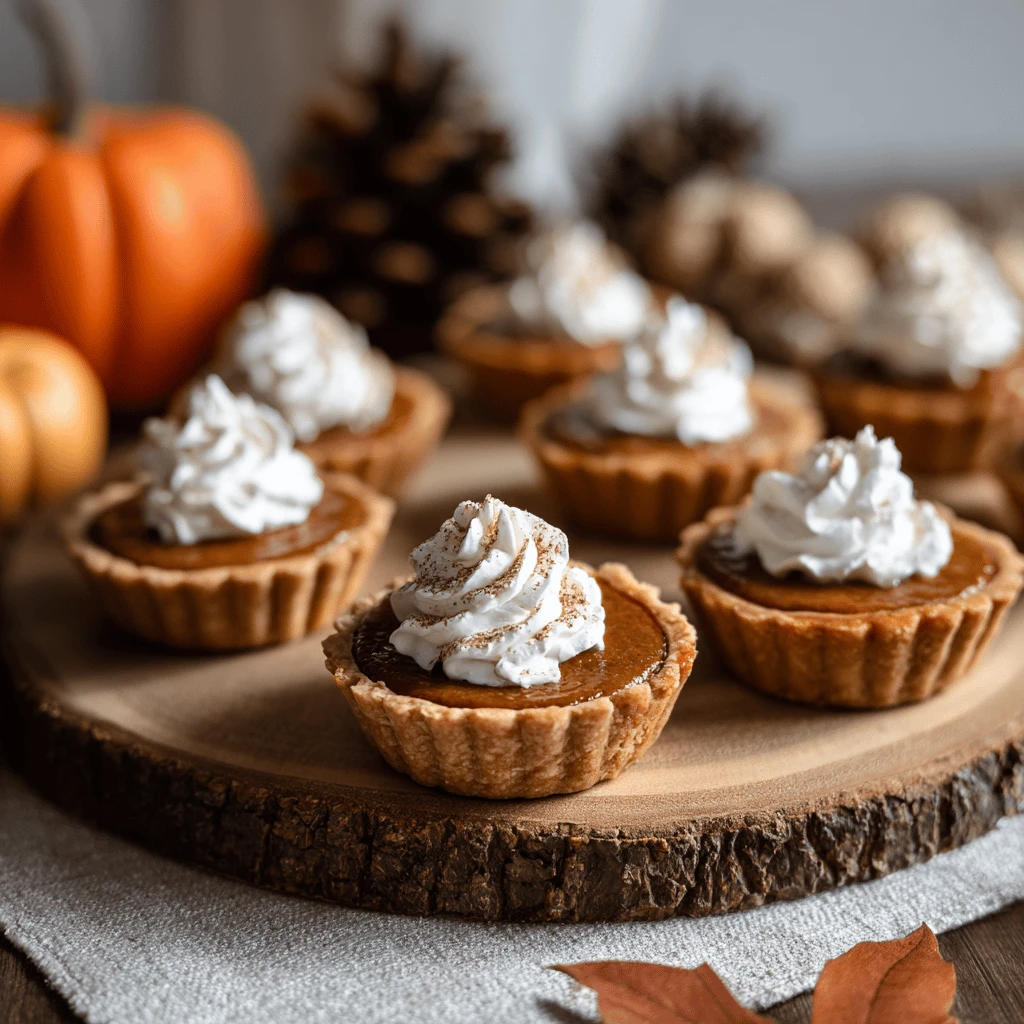
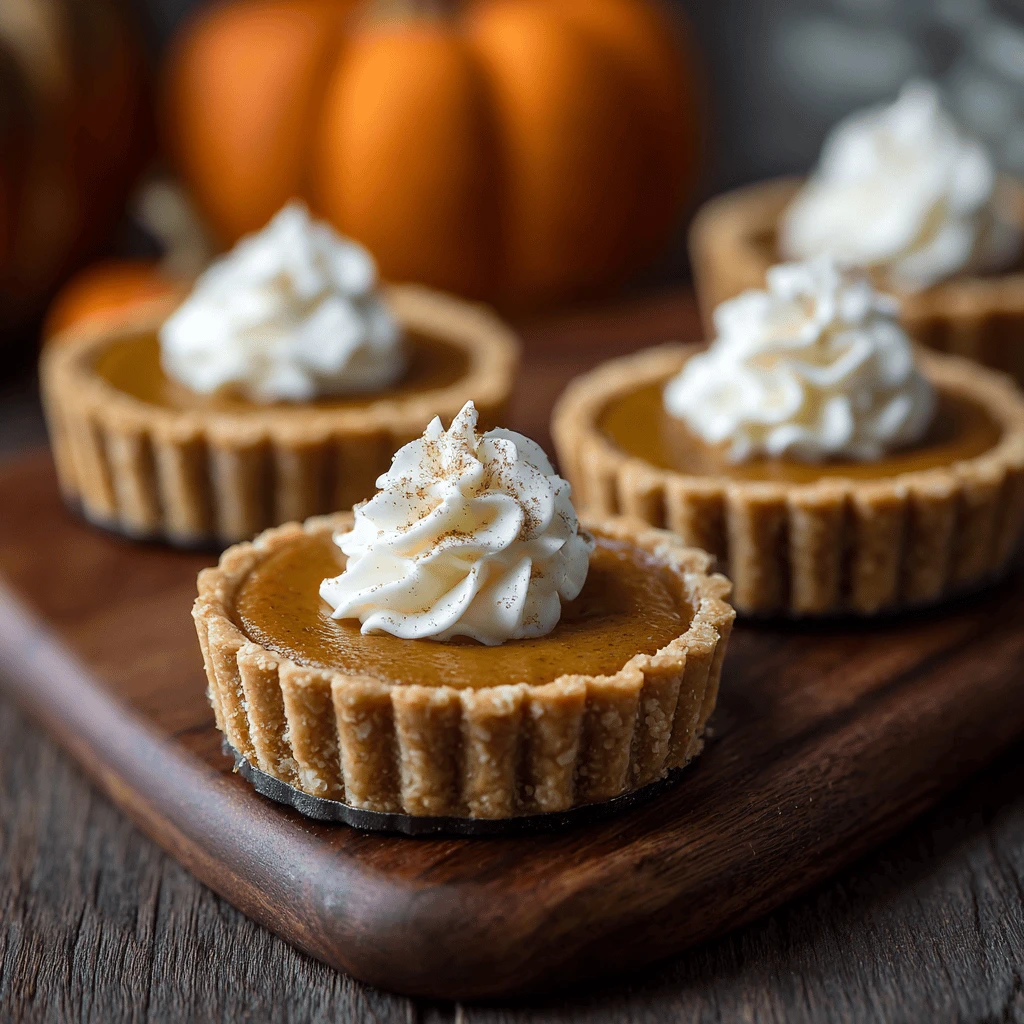
Toppings and Garnishes to Elevate Your Mini Pumpkin Pies
The finishing touches can make all the difference. A simple topping or garnish can elevate your mini pumpkin pies from ordinary to extraordinary.
Classic Toppings:
- Whipped cream: A dollop of freshly whipped cream is a classic and delicious topping.
- Cinnamon: A sprinkle of cinnamon adds warmth and flavor.
- Nutmeg: A grating of fresh nutmeg adds a touch of elegance.
Creative Garnishes:
- Pecan halves: Arrange pecan halves on top of the pies before baking for a decorative touch.
- Caramel sauce: Drizzle with caramel sauce for a decadent treat.
- Chocolate shavings: Sprinkle with chocolate shavings for a sophisticated look.
- Candied ginger: Top with candied ginger for a spicy-sweet flavor.
- Mini chocolate chips: Sprinkle with mini chocolate chips for a fun and festive look.
- Meringue: Pipe meringue onto the pies and toast it with a kitchen torch for a show-stopping dessert.
Making the Perfect Whipped Cream
If you choose to top your mini pumpkin pies with whipped cream, it’s worth making it from scratch. Homemade whipped cream is far superior to store-bought versions in terms of flavor and texture.
Ingredients:
- 1 cup heavy cream
- 2 tablespoons powdered sugar
- 1/2 teaspoon vanilla extract
Instructions:
1. Chill the bowl and beaters: Place the mixing bowl and beaters in the freezer for at least 15 minutes before starting.
2. Whip the cream: Pour the heavy cream into the chilled bowl and beat with an electric mixer until soft peaks form.
3. Add sugar and vanilla: Gradually add the powdered sugar and vanilla extract, and continue beating until stiff peaks form.
4. Serve immediately: Serve the whipped cream immediately, or store it in the refrigerator for up to a few hours.
Storing and Serving Your Mini Pumpkin Pies
Proper storage and serving will ensure that your mini pumpkin pies are enjoyed at their best.
Storing:
- Refrigerate: Store the mini pumpkin pies in an airtight container in the refrigerator for up to 3-4 days.
- Freeze: For longer storage, you can freeze the pies. Wrap them individually in plastic wrap and then place them in a freezer-safe bag or container. They can be frozen for up to 2-3 months. Thaw them in the refrigerator overnight before serving.
Serving:
- Serve chilled: Mini pumpkin pies are best served chilled.
- Garnish just before serving: If you’re using a topping or garnish, add it just before serving to prevent it from getting soggy or melting.
- Arrange attractively: Arrange the mini pies on a platter or dessert stand for a visually appealing presentation.
Presentation Tips for a Festive Thanksgiving Dessert Table
Presentation is key when it comes to creating a memorable Thanksgiving dessert table. Here are a few tips to make your mini pumpkin pies stand out:
- Use a variety of serving dishes: Mix and match different sizes and shapes of serving dishes to create visual interest.
- Add pops of color: Use colorful napkins, tablecloths, and other decorations to add pops of color to your dessert table.
- Incorporate natural elements: Add natural elements like leaves, pumpkins, and gourds to create a festive fall atmosphere.
- Light candles: Soft candlelight creates a warm and inviting ambiance.
- Label your desserts: Label each dessert so that guests know what they’re eating.
- Most importantly, have fun! Don’t stress too much about making everything perfect. The most important thing is to enjoy the company of your loved ones and celebrate the holiday.
FAQs About Mini Pumpkin Pies
Here are some frequently asked questions about making mini pumpkin pies:
Can I use a different type of crust?
Yes, you can use graham cracker crust or even a cookie crust for a different flavor and texture.
Can I make these ahead of time?
Absolutely! Mini pumpkin pies can be made a day or two in advance and stored in the refrigerator.
How do I prevent the crust from getting soggy?
Pre-baking the crust helps to prevent a soggy bottom. You can also brush the crust with egg wash before baking to create a barrier.
Can I use a different type of milk?
Sweetened condensed milk is recommended for its unique flavor and texture, but you could experiment with other types of milk. The results may vary.
What if I don’t have pumpkin pie spice?
You can make your own pumpkin pie spice by combining cinnamon, ginger, nutmeg, and cloves.
Can I double the recipe?
Yes, you can easily double or triple the recipe to make more mini pumpkin pies.
Are they good for gluten-free?
Yes. But ensure that you use gluten-free ingredients when baking.
Can I make these vegan?
Yes. Make sure you sub the milk, and butter for vegan options.