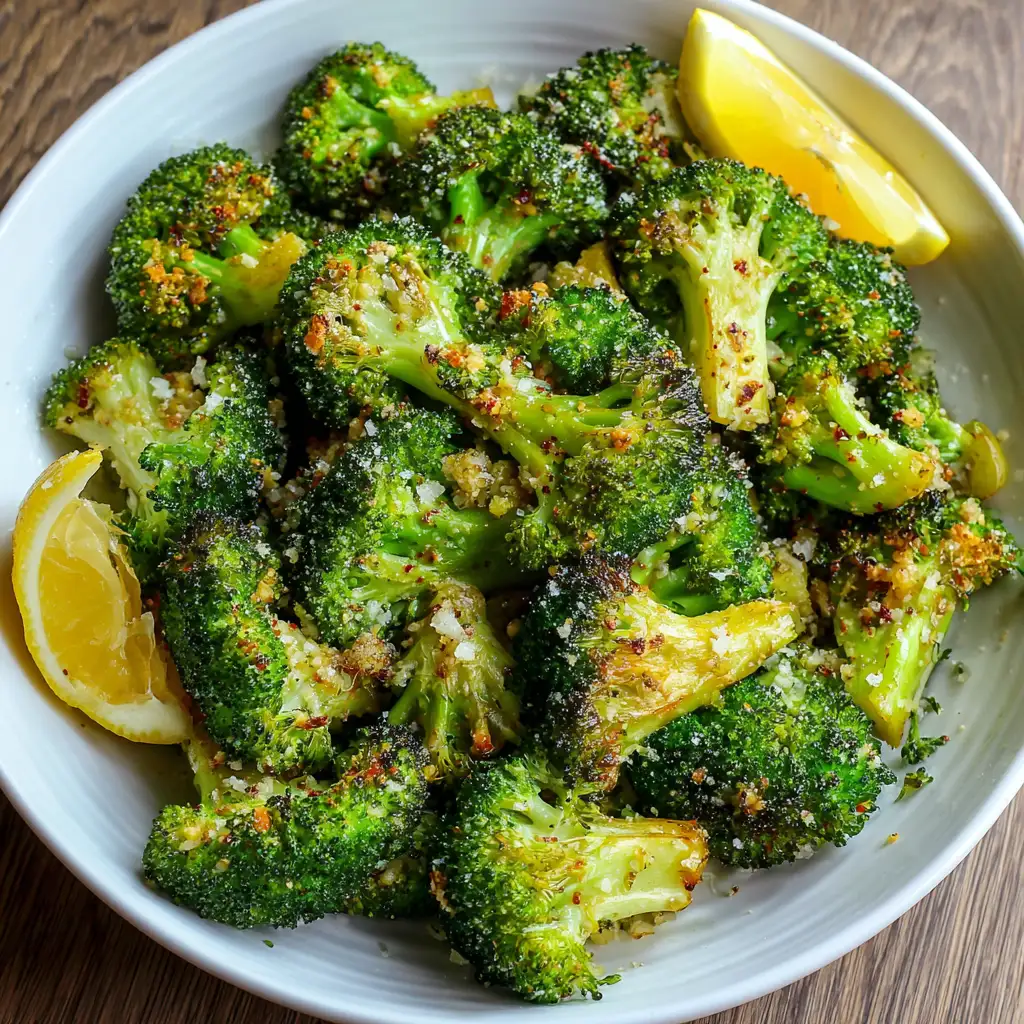
There are few side dishes that deliver such a spectacular balance of health, flavor, and sheer simplicity as oven-roasted broccoli. When subjected to the dry, high heat of the oven, the humble green florets transform, losing their slight bitterness and gaining a delightful caramelization that highlights their natural sweetness. Infused with bright, zesty lemon and warm, savory garlic, this preparation elevates broccoli from a basic vegetable to a craveable culinary experience. It is the definitive method for turning even the staunchest broccoli skeptic into a devotee.
Ingredients
-
1 large head (about $1.5\text{ lbs}$) of fresh broccoli, cut into uniform $1$-to-$1.5$-inch florets (including peeled, chopped stems)
-
$3$ tablespoons extra virgin olive oil (or half olive oil, half melted unsalted butter for richness)
-
$4$ cloves fresh garlic, peeled and thinly sliced (not minced)
-
$1/2$ teaspoon kosher salt, plus more for finishing
-
$1/4$ teaspoon freshly ground black pepper
-
Zest of $1$ medium lemon
-
$1\text{ to }2$ tablespoons fresh lemon juice (from the zested lemon)
-
Optional: A pinch of red pepper flakes, $2\text{ tablespoons}$ grated Parmesan cheese
Step-by-Step Instructions
-
Preheat and Prep: Preheat your oven to $425^{\circ}\text{F}$ ($220^{\circ}\text{C}$). Line a large, rimmed baking sheet with parchment paper for easy cleanup, or simply use a non-stick sheet.
-
Dry and Season: Ensure the broccoli florets are completely dry. Place the dry florets, sliced garlic, olive oil, salt, and pepper in a large bowl. Toss vigorously with your hands or tongs until every piece of broccoli is evenly coated in the oil and seasoning.
-
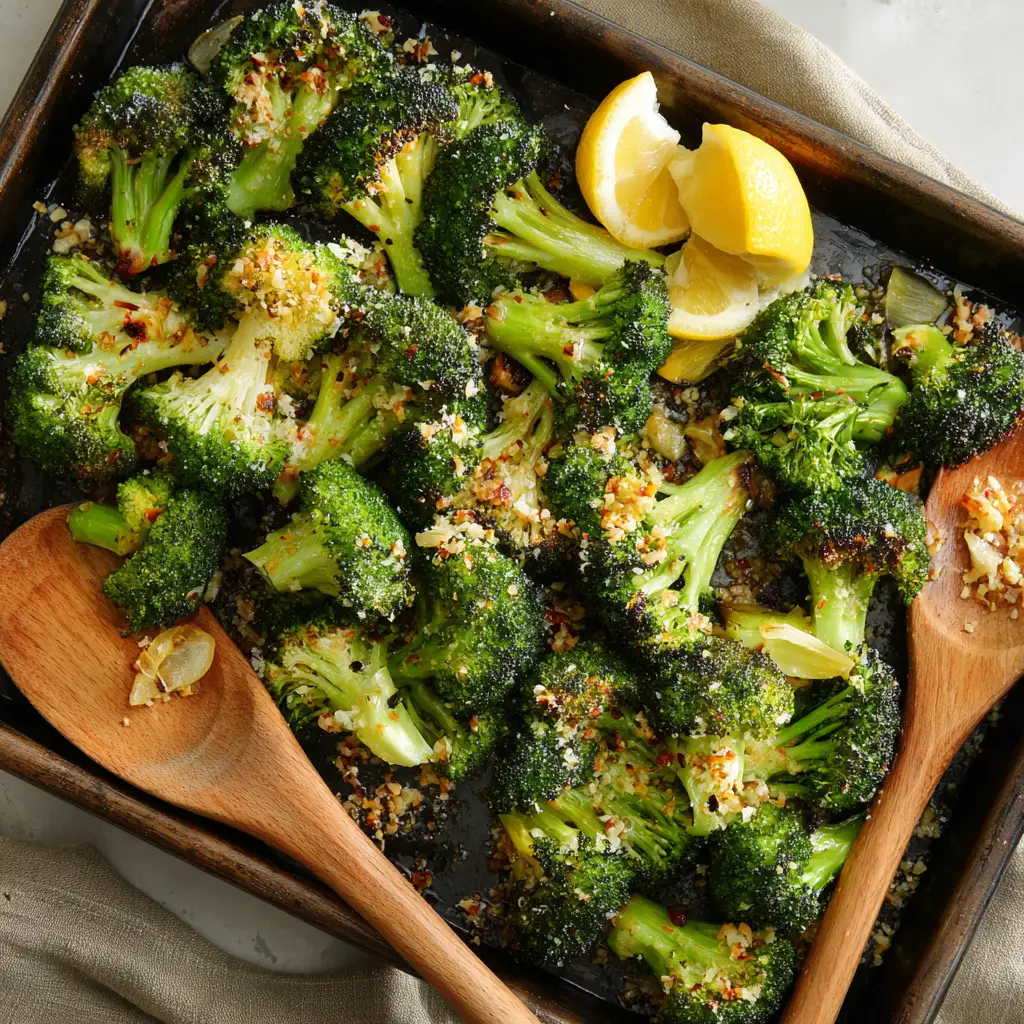
Spread and Roast: Spread the broccoli mixture onto the prepared baking sheet in a single layer. Crucially, ensure the florets are not overlapping or crowded; space is key to roasting, not steaming. Place the pan on the center rack of the preheated oven.
-
Caramelize: Roast for $15\text{ to }22\text{ minutes}$. For even browning, toss the broccoli lightly halfway through the cooking time ($8\text{ to }10\text{ minutes}$). The broccoli is done when the edges and tips of the florets are deeply browned and crispy, and the stems are fork-tender. The sliced garlic should be golden, not burnt.
-
Finish and Serve: Immediately transfer the roasted broccoli to a serving bowl. Drizzle with the fresh lemon juice and sprinkle generously with the lemon zest. If using, toss with Parmesan cheese and/or red pepper flakes. Taste, add a final sprinkle of salt if needed, and serve hot.
The Science of the Perfect Roast: Avoiding the Steam Trap
The difference between limp, waterlogged, flavorless broccoli and vibrant, nutty, caramelized florets lies entirely in the method of cooking. Roasting is fundamentally a dehydrating process that uses high heat to trigger the Maillard reaction—a chemical interaction between amino acids and reducing sugars that gives browned food its characteristic savory flavor.
Temperature and Time: The Sweet Spot
Most successful recipes for this dish rely on temperatures between $400^{\circ}\text{F}$ and $425^{\circ}\text{F}$. Using the higher end, $425^{\circ}\text{F}$, is often preferred because it accelerates the process, providing a quick, high-impact heat that caramelizes the exterior before the interior has time to soften excessively. This results in the coveted “tender-crisp” texture: crispy on the edges and yielding at the center.
The Critical Rule: No Crowding
The single greatest factor determining the success of roasted broccoli is space. When the sheet pan is crowded, the moisture released by the broccoli has nowhere to go but up, trapping steam around the vegetables. This moisture prevents the surface temperature of the broccoli from rising high enough to trigger the Maillard reaction, effectively turning your oven into a steamer.
To ensure true roasting:
-
Use a Large Pan: Always use a rimmed baking sheet large enough to spread the florets in a true single layer, leaving a small space between each piece.
-
Dry the Broccoli: After washing, use a salad spinner or pat the florets thoroughly dry with a kitchen towel. Any residual water will turn to steam in the oven, hindering caramelization.
-
Proper Fat Coating: While you need enough oil to coat the florets and act as a heat-transfer medium, avoid excessive oil. The broccoli should be glistening, not pooling in fat. Too much oil can lead to a rich, oily texture rather than a crisp one. A good starting point is $2\text{ to }3$ tablespoons per $1.5\text{ pounds}$ of broccoli.
Mastering the Flavor Trio: Garlic, Lemon, and Oil
The classic combination of garlic and lemon complements the sweet and savory notes of roasted broccoli perfectly. However, the timing and preparation of these ingredients are crucial to achieving balanced flavor without bitterness.
The Garlic Dilemma: Sliced vs. Minced
Garlic is delicate, and the high heat of $425^{\circ}\text{F}$ can cause minced garlic to burn rapidly, leading to a bitter, acrid taste that will ruin the dish. To prevent this:
-
Slice, Don’t Mince: Use thinly sliced garlic cloves instead of finely minced. The larger surface area of the slice caramelizes beautifully, staying soft and sweet without burning as quickly as tiny minced pieces.
-
Roast Timing: If you are extremely concerned about burning (or if your oven runs hot), you can add the sliced garlic to the sheet pan halfway through the cooking time (around $8\text{ to }10$ minutes).
-
Garlic Powder as a Backup: If you are using frozen broccoli or cooking at a very high temperature ($450^{\circ}\text{F}$), use a good quality garlic powder mixed into the oil before roasting, and save the fresh garlic for infusing into the oil just before serving.
The Critical Lemon Finish
The difference between a great recipe and a mediocre one often comes down to when the lemon is introduced.
-
Zest First, Juice Last: The fragrant oils in the zest are stable enough to be tossed with the broccoli before roasting, allowing the flavor to permeate the vegetable. The juice, however, is acidic and volatile. If added before roasting, the acid can break down the chlorophyll, causing the broccoli to turn an unappetizing military green, and the flavor of the juice will dissipate under the heat.
-
Post-Roast Drizzle: Always finish the dish by drizzling fresh lemon juice over the hot broccoli immediately after it comes out of the oven. The residual heat helps the juice flash-evaporate slightly, concentrating the bright, fresh, tangy flavor right before serving.
Beyond the Basics: Variations and Upgrades
While the core recipe is a masterpiece of simplicity, a few optional additions can tailor the dish to specific palates or pair it seamlessly with different cuisines.
The Cheese Factor: Parmesan and Beyond
Adding cheese provides a salty, umami depth that is universally loved.
-
Parmesan: Grate fresh Parmigiano-Reggiano and sprinkle it over the broccoli during the final $2\text{ to }3\text{ minutes}$ of cooking. This gives the cheese just enough time to melt, brown slightly, and form a thin, savory crust without burning. Alternatively, toss with finely grated Parmesan right after removing it from the oven for a raw, sharp saltiness.
-
Other Cheeses: Try a dusting of finely grated Pecorino Romano for a sharper, saltier kick, or Asiago for a nuttier flavor.
Heat and Crunch
-
Red Pepper Flakes: A small pinch of crushed red pepper flakes, added with the initial toss, provides a pleasant, low-level warmth that cuts through the richness of the oil.
-
Nutty Crunch: Toasted nuts add a contrasting texture. Toss pine nuts, slivered almonds, or chopped pistachios onto the pan for the last $5$ minutes of roasting, or simply sprinkle toasted nuts over the dish just before serving.
Fat Variations
While extra virgin olive oil is the standard and healthiest choice, replacing half or all of it with melted unsalted butter creates a richer, more luxurious side dish, especially when paired with steak or heavier main courses. If using butter, consider clarifying it slightly to raise its smoke point and minimize burning.
Prep, Storage, and Serving Suggestions
Making this dish fit seamlessly into a weeknight routine or a holiday spread is simple with smart preparation.
Preparation and Timing
The prep work for this dish is minimal and can be done entirely ahead of time.
-
Prep-Ahead: Cut the broccoli into florets and store them in a sealed container in the refrigerator up to two days in advance. Crucially, do not add the oil, garlic, or salt until just before they go into the oven. Coating them with oil prematurely can lead to them becoming soggy.
-
Uniformity is Key: When cutting the florets, aim for uniformity in size. Similar-sized pieces will cook at the same rate, ensuring every bite is perfectly tender. Don’t discard the stalk—simply peel away the tough outer skin with a vegetable peeler, chop the interior into small, bite-sized coins, and roast them alongside the florets.
Handling Leftovers
While roasted broccoli is best served immediately for optimal crispness, leftovers can be stored in an airtight container in the refrigerator for $2\text{ to }3$ days.
-
Reheating: To revive the texture, avoid the microwave. Spread the chilled broccoli on a sheet pan and place it in a $350^{\circ}\text{F}$ oven for $5\text{ to }8\text{ minutes}$ or reheat it quickly in an air fryer. This re-crisps the edges and restores the roasted texture.
Perfect Pairings
The bright, savory profile of Oven-Roasted Broccoli with Lemon and Garlic makes it a versatile companion for almost any meal.
-
Classic Proteins: It’s a perfect foil for rich, seared proteins like grilled salmon, oven-baked chicken breast, or pork tenderloin.
-
Grains and Pastas: Toss the freshly roasted broccoli into a simple pasta dish with a light butter sauce, or serve it atop a bowl of fluffy quinoa or brown rice for a vibrant, nutrient-dense meal.
-
Breakfast Upgrade: Chop the leftovers and add them to scrambled eggs or an omelet for a sophisticated weekend brunch.