Sizzling Skillet Birria Tacos: Your Quick Route to Mexican Comfort!
My earliest memories of truly comforting food often involve a low, slow simmer on the stove and the kitchen filling with incredible aromas. There’s something magical about those smells that instantly transport you. For me, “Beef Birria Tacos (Skillet Version)” is that kind of magic. I first stumbled upon a birria recipe years ago, and while the traditional version is a labor of love, my busy weeknights needed a hero. So, I experimented and perfected this incredible skillet rendition.
This recipe delivers all the deep, rich, spicy, and savory flavors you crave from authentic birria, but in a fraction of the time. It’s become a tested family favorite, the ultimate comfort food for a chilly evening or a lively taco night. Trust me, once you try these easy dinner birria tacos, there’s no going back.
You’re about to unlock the secret to incredibly flavorful, tender beef birria, transformed into crispy, cheesy tacos right in your skillet. Get ready for an explosion of taste that will make your taste buds sing!
Why You’ll Love This Recipe
❤️ Oh, let me count the ways you’ll fall head over heels for these incredible skillet birria tacos! This recipe isn’t just a meal; it’s an experience, a flavor journey that you can whip up with surprising ease.
- Unbelievable Flavor, Simplified: We’ve distilled the complex, deep, and smoky flavors of traditional birria into a quicker, skillet-friendly method. You get all the authentic taste without hours of simmering. It’s rich, savory, and perfectly spiced!
- Speedy Skillet Perfection: Forget the all-day stewing! This version uses a skillet to create tender, succulent beef much faster. It’s ideal for busy weeknights when you crave something extraordinary but are short on time.
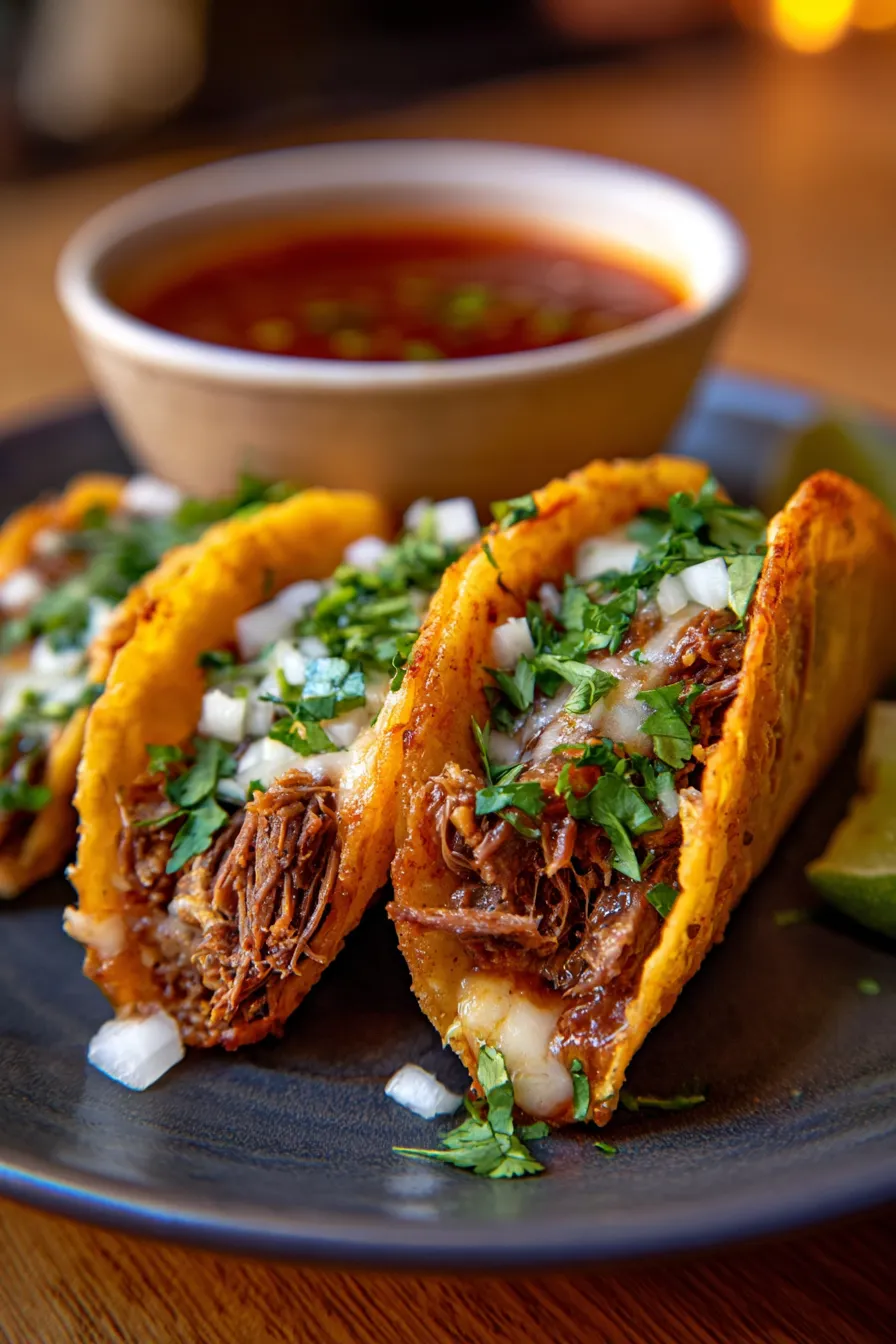
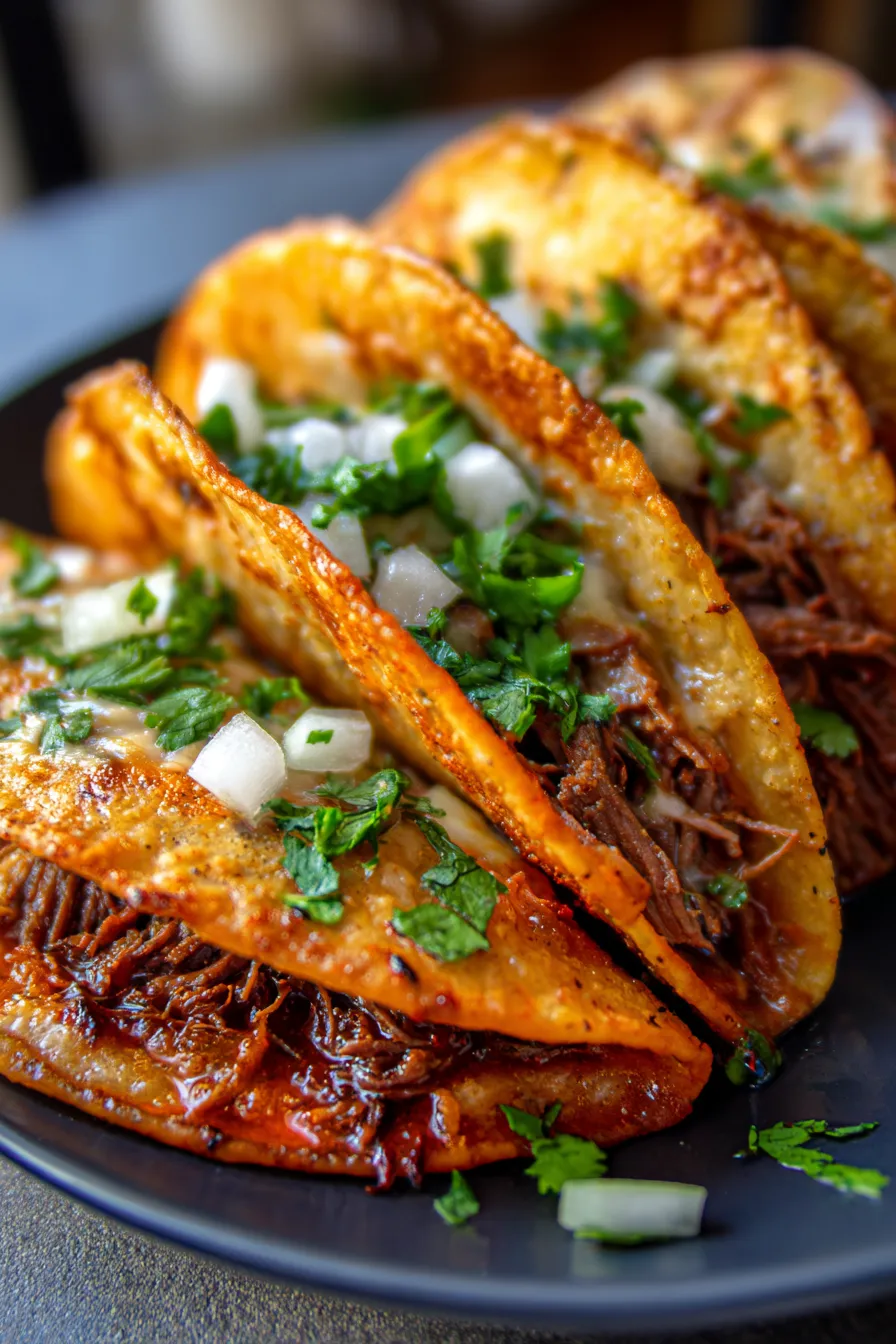
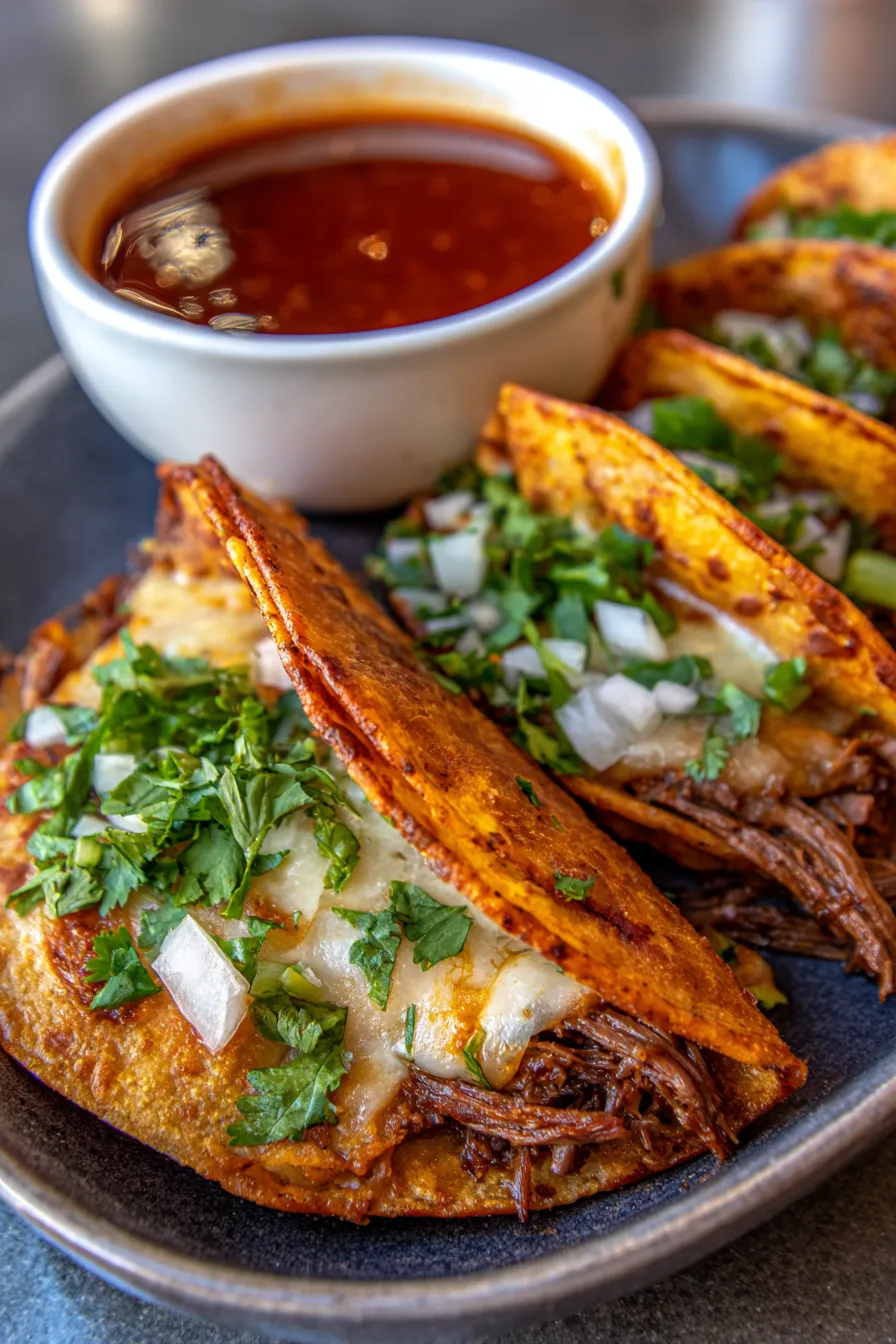
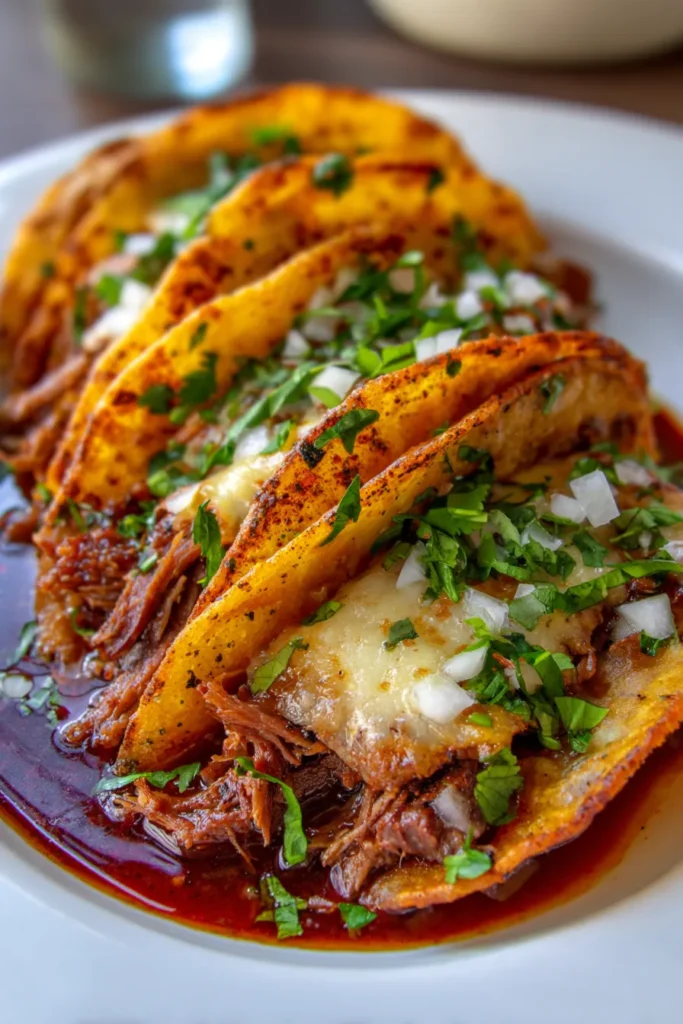
- Crispy, Cheesy Taco Magic: The tortillas are dipped in the rich birria consommé, then crisped in a hot skillet with melty cheese and tender beef. The result? A perfectly golden, slightly chewy, utterly irresistible taco shell with a gooey cheese pull.
- Interactive & Fun: Tacos are inherently fun, and these take it to the next level. Dipping, crisping, and then dunking into the vibrant consommé – it’s a culinary adventure that everyone, even picky eaters, will adore.
- Perfect for Meal Prep: The birria meat can be made ahead of time, making assembly a breeze when dinner rolls around. You can even freeze portions for future taco emergencies!
- Customizable Comfort: Adjust the spice level to your liking, add your favorite toppings, or experiment with different cheeses. This recipe is wonderfully forgiving and adaptable to your personal taste.
- Crowd-Pleasing Powerhouse: Whether it’s a casual family dinner, a game-day feast, or entertaining friends, these birria tacos are always a showstopper. Prepare for rave reviews and requests for the recipe!
What You Need
You only need a few simple pantry staples and fresh ingredients for this recipe! We’re talking about flavorful chiles, tender beef, aromatic spices, and a handful of other easy-to-find items. Check the full printable recipe card below for detailed measurements and a complete list.
Expert Tips
💡 Achieving birria taco perfection is all about a few key techniques. Follow these expert tips for the most flavorful and satisfying results every time!
- Choose the Right Beef Cut: For maximum flavor and tenderness in a shorter cooking time, opt for cuts like chuck roast or boneless short ribs. Trim excess fat, but leave some for flavor. Cut the meat into 1-2 inch chunks to ensure it cooks quickly and evenly.
- Sear for Flavor Depth: Don’t skip searing the beef! A good, dark sear on all sides creates a rich, caramelized crust that locks in juices and builds a foundational layer of flavor for your birria. Do this in batches to avoid crowding the pan.
- Bloom Your Spices: After softening your aromatics (onions, garlic), add your dried spices (cumin, oregano, etc.) and toast them for 30-60 seconds before adding liquids. This “blooming” process awakens their flavors and aromas, making them more potent and delicious.
- Rehydrate Chiles Properly: For the birria sauce, use dried chiles like Guajillo, Ancho, and Chile de Arbol. Toast them lightly in a dry skillet for 30 seconds per side until fragrant, then remove stems and seeds. Soak them in hot, almost boiling water for 20-30 minutes until softened. This step is crucial for the deep, authentic flavor.
- Blend the Sauce Until Silky Smooth: Once the chiles are rehydrated, blend them with the cooking liquid, aromatics, and spices until you have a perfectly smooth sauce. Strain it through a fine-mesh sieve if you want an extra-silky texture, but it’s not strictly necessary.
- Don’t Rush the Simmer: Even though this is a “skillet version,” the birria meat still needs time to become fall-apart tender. Simmer it gently with the lid on for at least 45-60 minutes, or until the beef shreds easily with a fork. Low and slow is the key to tender meat.
- The Consommé is Key: The rich, flavorful liquid that the birria meat cooks in (the consommé) is essential. It’s used to dip the tortillas before crisping and for dipping your tacos. Make sure to skim off any excess fat if desired, but leave some for flavor.
- Dip & Crisp Your Tortillas: For that iconic birria taco crispiness, fully immerse corn tortillas in the hot consommé (the fat on top gives them extra flavor and a beautiful color!). Place them on a hot, oiled skillet, add cheese and shredded birria, then fold and cook until golden and crispy on both sides.
- Choose the Right Cheese: Oaxaca cheese is traditional and melts beautifully, creating those incredible cheese pulls. Monterey Jack or a Mexican blend also work wonderfully. Don’t be shy with the cheese – it’s a vital component!
- Layer Your Flavors: Garnish generously! Fresh cilantro, diced white onion, and a squeeze of lime juice brighten up the rich flavors and add essential freshness and crunch. Don’t forget extra consommé for dipping!
Variations & Substitutions
This recipe is incredibly flexible, allowing you to tailor it to your preferences or dietary needs. Don’t be afraid to get creative!
- Spice Level Adjustment: For more heat, add extra chile de arbol to your sauce or a pinch of cayenne pepper. For less heat, reduce the amount of chile de arbol or omit it entirely. You can also add a jalapeño or serrano pepper to the blender for a fresh kick.
- Other Meats: While beef is traditional, you can absolutely make delicious birria with other proteins. Try boneless chicken thighs for a quicker cook, or pork shoulder for a different rich flavor. Just adjust cooking times accordingly.
- Vegetarian/Vegan Birria: For a plant-based option, substitute the beef with hearty mushrooms (like cremini or portobello), jackfruit, or even firm tofu. Ensure you still build that deep, savory base with roasted vegetables and rich spices.
- Cheese Options: If Oaxaca cheese isn’t available, Monterey Jack, shredded mozzarella, or a Mexican blend are fantastic alternatives that melt beautifully and provide that gooey texture.
- Low-Carb/Keto: Use low-carb tortillas or create birria bowls over cauliflower rice or lettuce wraps. Skip the corn tortillas for the crisping and serve the tender meat with your favorite keto-friendly toppings.
- Gluten-Free: This recipe is naturally gluten-free if you use corn tortillas! Just ensure all your spices and broths are certified gluten-free.
- Consommé Boost: For an even richer consommé, add a beef bouillon cube or a splash of beef stock to the simmering liquid.
Storage & Freezing
These Birria Tacos are fantastic fresh, but the components can be stored and even frozen for future cravings. It’s perfect for meal prepping!
- Refrigerating Cooked Birria: Store leftover shredded birria meat and the consommé separately in airtight containers in the refrigerator for up to 3-4 days.
- Reheating Birria: Gently reheat the meat and consommé on the stovetop over medium-low heat until warmed through. You can add a splash of beef broth if the consommé has thickened too much.
- Freezing Birria: Both the cooked birria meat and the consommé freeze beautifully. Allow them to cool completely, then store in separate freezer-safe bags or containers for up to 2-3 months. Thaw overnight in the refrigerator before reheating.
- Taco Assembly from Frozen: Once thawed and reheated, you can proceed with the taco assembly as usual, dipping tortillas and crisping them with the meat and cheese.
FAQ
Q: What exactly is birria?
A: Birria is a traditional Mexican stew, typically made with goat or beef, slow-cooked in a rich, flavorful, and somewhat spicy broth made from dried chiles and spices. It’s known for its incredibly tender meat and deeply aromatic consommé.
Q: Can I make the birria ahead of time?
A: Absolutely! In fact, the birria often tastes even better the next day as the flavors have more time to meld. Prepare the meat and consommé, store them in the refrigerator, and then assemble the tacos when you’re ready to eat.
Q: What kind of chiles should I use?
A: For authentic birria flavor, a mix of dried Guajillo, Ancho, and Chile de Arbol is ideal. Guajillos provide a fruity, mild heat; Anchos offer a rich, smoky depth; and Chile de Arbol adds a fiery kick. You can find these in most Mexican markets or online.
Q: How do I get my birria tacos extra crispy?
A: The key is a hot skillet and enough oil (or the fat from the consommé). Make sure your skillet is properly preheated before adding the dipped tortillas. Don’t overcrowd the pan, and cook until each side is beautifully golden brown and crispy, pressing down gently with a spatula.
There you have it – your ultimate guide to creating the most mouthwatering, irresistible Beef Birria Tacos (Skillet Version) right in your own kitchen! This recipe is a testament to how incredible flavors can be achieved without spending all day in the kitchen. It’s warm, inviting, and truly a feast for the senses.
So, gather your ingredients, fire up your skillet, and prepare for a culinary adventure that will quickly become a cherished favorite. Don’t forget to pin this recipe for later and share your delicious creations with me!
Skillet Birria Tacos: Quick & Easy Beef Birria Recipe
Ingredients
- 2 lbs chuck roast, cut into 1-inch cubes
- 2-3 tbsp olive oil
- 1 large onion, roughly chopped
- 6-8 cloves garlic, peeled
- 3-4 dried guajillo chiles, stemmed and deseeded
- 2 dried ancho chiles, stemmed and deseeded
- 2-3 dried chile de arbol (adjust to spice preference), stemmed and deseeded
- 1 (14.5 oz) can diced tomatoes (optional, for extra tang)
- 4 cups beef broth
- 2 tbsp apple cider vinegar
- 1 tsp ground cumin
- 1 tsp dried oregano
- 1/2 tsp ground cloves
- 1/2 tsp black pepper
- 1 bay leaf
- Salt to taste
- 12-18 corn tortillas
- 1.5 cups shredded Oaxaca cheese (or Monterey Jack)
- Fresh cilantro, chopped (for garnish)
- Diced white onion (for garnish)
- Lime wedges (for serving)
Instructions
- Step 1 Pat beef dry and season generously with salt. Heat olive oil in a large skillet or Dutch oven over medium-high heat. Sear beef in batches until deeply browned on all sides. Remove beef and set aside.
- Step 2 In the same skillet, add chopped onion and garlic, sautu00e9 until softened, about 5 minutes. Remove from heat.
- Step 3 Lightly toast dried chiles in a dry skillet over medium heat for 30 seconds per side until fragrant. Immediately transfer to a heatproof bowl and cover with hot water. Let soak for 20-30 minutes until soft. Drain, reserving some soaking liquid.
- Step 4 Transfer softened chiles, sautu00e9ed onion and garlic, diced tomatoes (if using), 1 cup beef broth, apple cider vinegar, cumin, oregano, cloves, and black pepper to a blender. Blend until completely smooth, adding a splash of chile soaking liquid if needed to reach a pourable consistency.
- Step 5 Return seared beef to the skillet. Pour the blended chile sauce over the beef, adding the remaining beef broth and bay leaf. Season with salt. Bring to a simmer, then reduce heat to low, cover, and cook for 45-60 minutes, or until beef is fork-tender.
- Step 6 Remove beef from the consommu00e9 (liquid) and shred it using two forks. Strain the consommu00e9 through a fine-mesh sieve into a separate bowl; discard solids. Skim off any excess fat if desired, but reserve some for dipping tortillas.
- Step 7 To assemble tacos: Heat a large non-stick skillet over medium heat. Dip a corn tortilla into the consommu00e9 (ensure it's coated in the red fat), then place it in the hot skillet. Sprinkle generously with cheese, add a spoonful of shredded beef to one half of the tortilla, and cook until the cheese begins to melt and the tortilla is slightly crispy on the bottom.
- Step 8 Fold the tortilla in half to create a taco. Cook for another 1-2 minutes per side until golden brown and crispy. Repeat with remaining tortillas, adding more consommu00e9 fat to the pan as needed.
- Step 9 Serve hot with extra consommu00e9 for dipping, garnished with fresh cilantro, diced white onion, and lime wedges.