The Ultimate Strawberry Earthquake Cake: Easy & Irresistible!
There are some desserts that just stick with you, weaving themselves into the fabric of family memories. For me, the Strawberry Earthquake Cake is one of those timeless treats. I remember rainy Saturday afternoons at my grandmother’s house, the smell of baking filling the air, and the sheer delight of watching this cake ‘erupt’ with its beautiful cracks and gooey pockets. It was always a moment of pure joy, a simple pleasure that brought everyone together around the kitchen table.
This Strawberry Earthquake Cake isn’t just a dessert; it’s an experience. It’s a delightful journey of rich, fudgy cake, bright bursts of fresh strawberries, and a dreamy cream cheese swirl that creates a truly unforgettable texture. If you’re searching for an easy dessert that’s also a showstopper, look no further. This tested and cherished recipe is a family favorite for a reason, promising comforting flavors and an irresistible charm.
It’s the kind of dish that garners rave reviews and disappears quickly from any gathering. You simply *must* make this now to bring a little bit of that comforting, sweet magic into your own home!
Why You’ll Love This Recipe
❤️ Here’s why this Strawberry Earthquake Cake will become your new go-to:
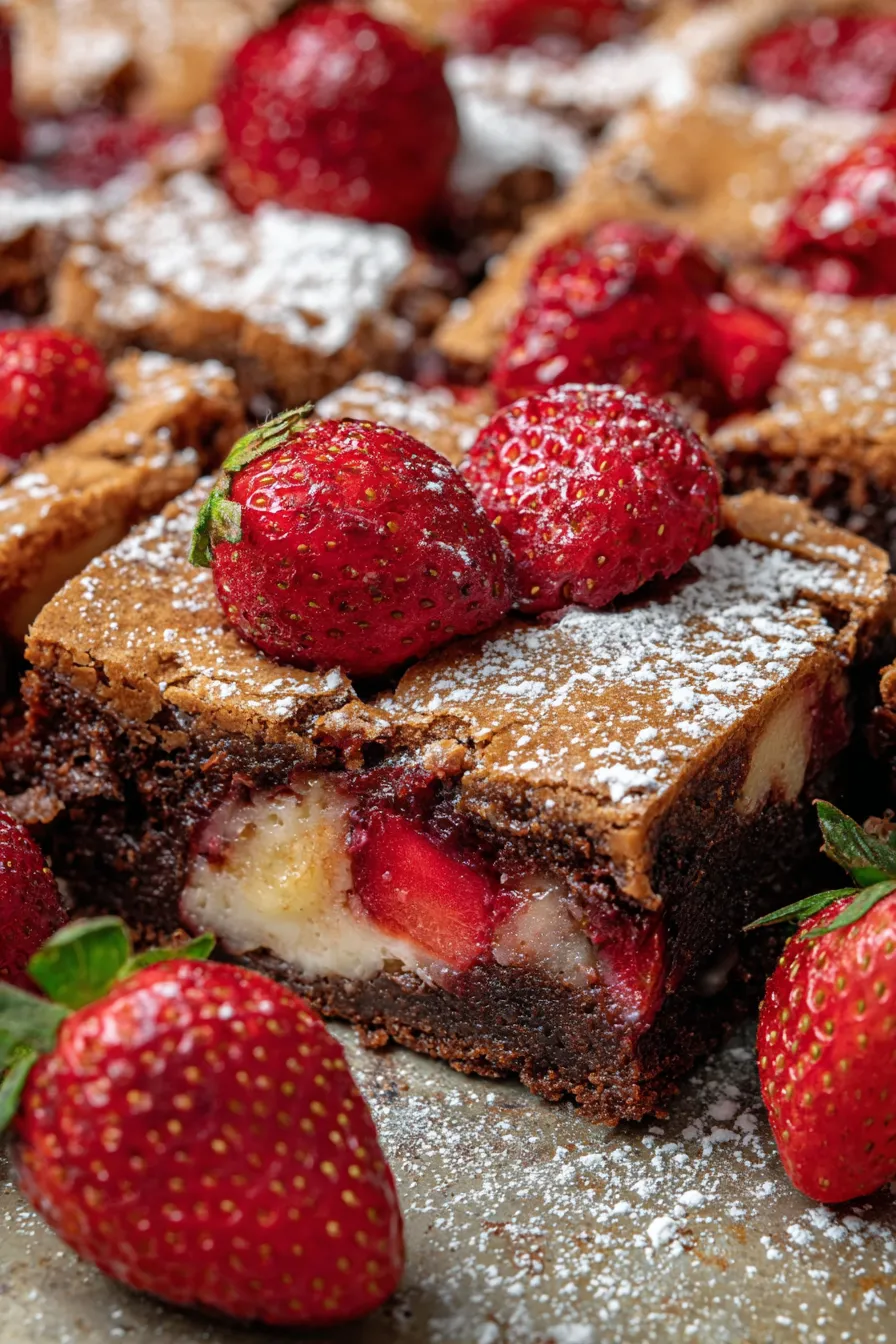
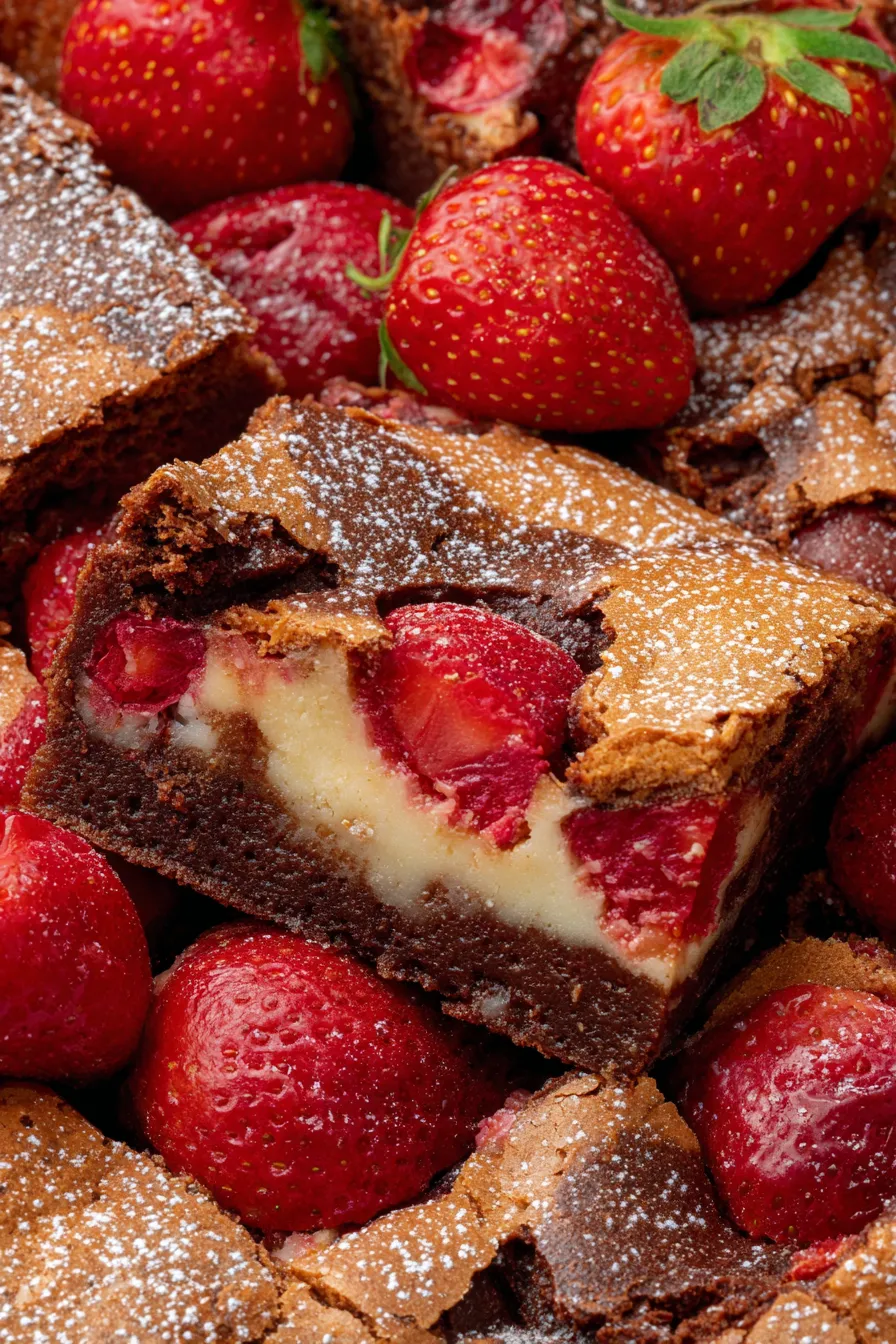
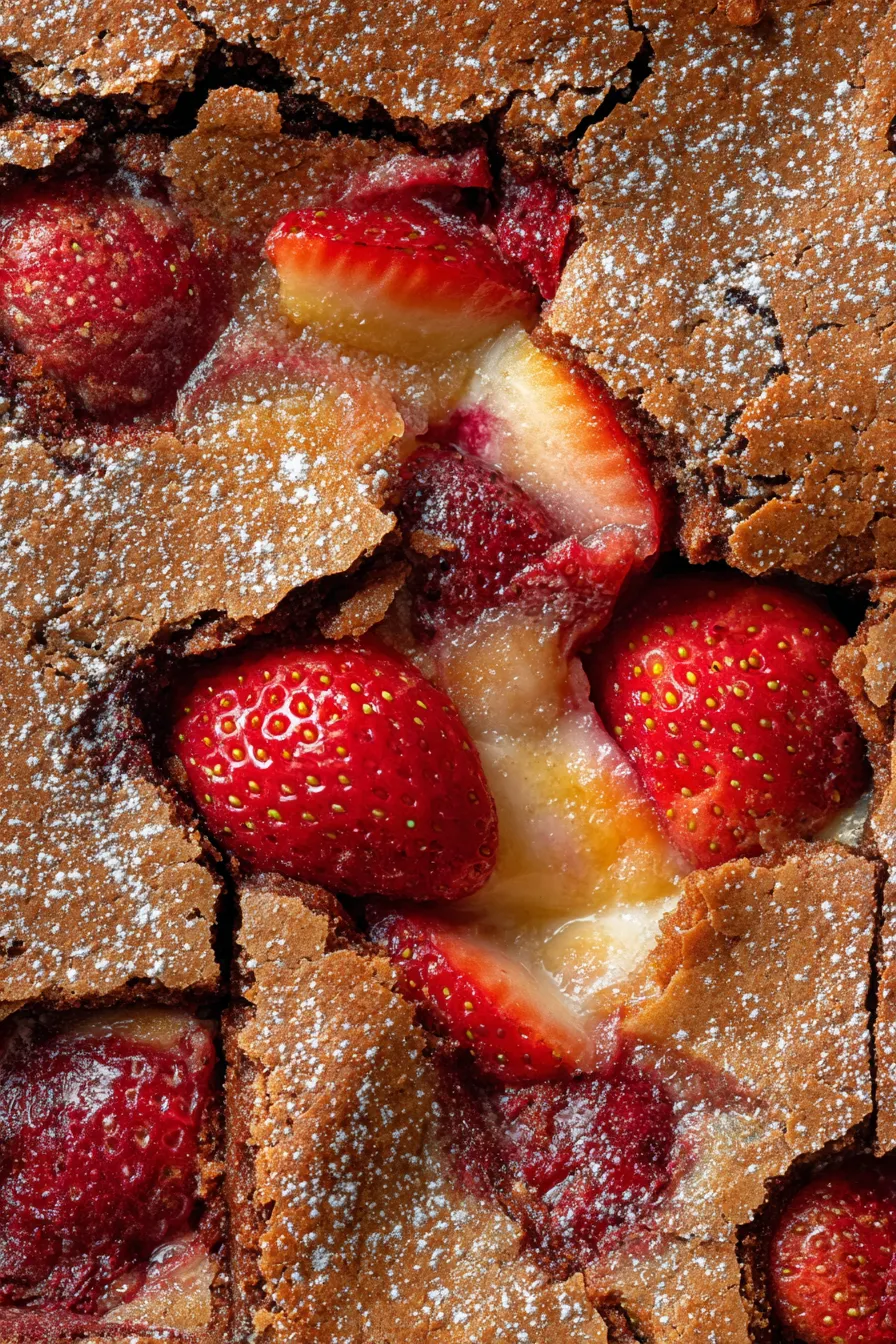
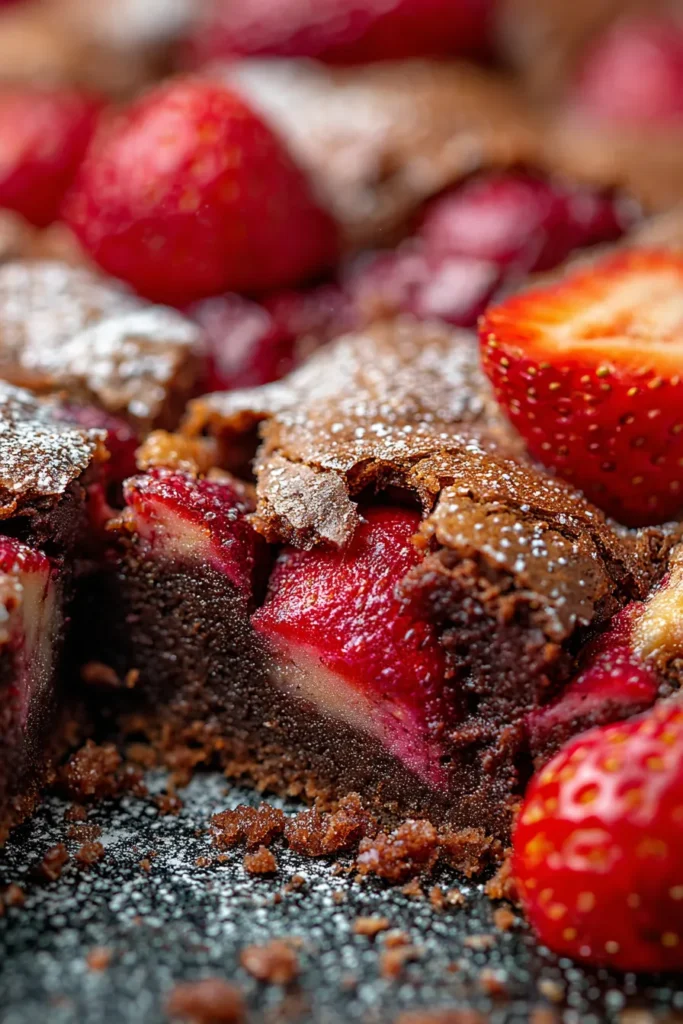
- Unforgettable Texture: The name says it all! This cake features incredible cracks and crevices, revealing pockets of gooey chocolate cake, sweet strawberries, and creamy cheesecake filling. It’s a symphony of textures in every single bite.
- Bursting with Fresh Flavor: Juicy, ripe strawberries are nestled throughout the cake, providing bright, fruity explosions that perfectly balance the richness of the chocolate and cream cheese. It’s a taste of sunshine in every forkful!
- Effortlessly Impressive: Despite its stunning appearance, this cake is incredibly simple to make. It starts with a humble cake mix, making it approachable for even novice bakers, yet it looks like you spent hours crafting it.
- Sweet & Tangy Harmony: The luscious cream cheese swirl adds a delightful tang and extra creaminess that cuts through the sweetness of the cake and fruit, creating a perfectly balanced flavor profile that’s utterly addictive.
- Customizable Delight: While strawberries are divine, this cake is wonderfully versatile. You can easily swap in other fruits or add nuts and chocolate chips to truly make it your own.
- Crowd-Pleasing Perfection: Whether it’s a casual family dinner, a potluck, or a special celebration, this Strawberry Earthquake Cake is guaranteed to be a hit. Everyone will ask for the recipe, trust us!
- Visually Stunning: The dramatic cracked top, revealing vibrant red strawberries and creamy white swirls, makes for an absolutely gorgeous presentation that’s perfect for Pinterest and Instagram.
What You Need
You only need a few simple pantry staples for this recipe, many of which you likely already have on hand! A box of chocolate cake mix forms the foundation, while fresh strawberries and cream cheese elevate it to something truly special. Check the full printable recipe card below for detailed measurements and a complete list of ingredients.
Expert Tips
💡 Master your Strawberry Earthquake Cake with these pro tips:
- Choose Ripe Strawberries: The success of this cake largely depends on the flavor of your fruit. Select vibrant, firm, and naturally sweet strawberries for the best taste and texture. Wash and hull them thoroughly before dicing.
- Soften Your Cream Cheese and Butter: This is absolutely crucial for a smooth, lump-free cream cheese swirl. Ensure both are at room temperature for at least 30-60 minutes before you begin mixing. This prevents a grainy texture in your cheesecake layer.
- Don’t Overmix the Cake Batter: While using a cake mix simplifies things, remember to mix only until just combined. Overmixing develops the gluten too much, leading to a tougher, denser cake instead of a light and tender crumb. A few small lumps are perfectly fine.
- The Art of the Swirl: When adding the cream cheese mixture and strawberries, drop them randomly over the cake batter. Use a knife or skewer to gently swirl, creating the ‘earthquake’ effect. Avoid over-swirling, as you want distinct pockets of flavor and color, not a fully integrated batter.
- Proper Pan Preparation: Grease and flour your baking dish meticulously. This ensures your beautiful cake releases easily after baking. You can also line the bottom with parchment paper for extra insurance against sticking.
- Bake Until Just Set: The baking time can vary slightly depending on your oven. The cake is done when a toothpick inserted into the cake part (avoiding a cream cheese or strawberry pocket) comes out with moist crumbs, not wet batter. The top should be golden and cracked, and the center should have a slight jiggle.
- Cool Completely: Patience is key! Allow the cake to cool completely in the pan on a wire rack before attempting to slice or serve. This allows the cake to set properly and prevents the gooey layers from oozing out too much. A warm cake will be much more fragile.
- Dust with Powdered Sugar: For a beautiful finish and an extra touch of sweetness, dust the cooled cake generously with powdered sugar right before serving. It enhances the visual appeal of the cracked top.
Variations & Substitutions
Feeling creative? This cake is a fantastic canvas for experimentation!
- Fruit Swaps: Not a strawberry fan or want to use seasonal produce? Try raspberries, blueberries, diced peaches, or even a mix of berries. Just ensure the fruit isn’t overly wet.
- Cake Mix Flavors: While chocolate is classic, a yellow cake mix or even a vanilla cake mix would be absolutely delicious here. A lemon cake mix with blueberries would also be a delightful combination.
- Add-ins: Fold in a handful of mini chocolate chips, chopped pecans, or walnuts into the cake batter or sprinkle them over the top for extra texture and flavor.
- Cream Cheese Boost: Enhance the cream cheese layer by adding a touch of lemon zest for brightness, or a different extract like almond.
- Gluten-Free: Easily adapt this recipe by using your favorite gluten-free chocolate cake mix. Follow the package instructions for the cake batter preparation.
- Dairy-Free/Vegan: Use a dairy-free cake mix (ensure it’s egg-free or use an egg replacer), dairy-free milk, oil, and a vegan cream cheese alternative to make this recipe suitable for dairy-free diets.
Storage & Freezing
Want to enjoy this deliciousness for days? Here’s how to keep it fresh:
- Room Temperature: Due to the cream cheese, it’s best not to leave this cake at room temperature for more than 2 hours.
- Refrigeration: Store any leftover cake in an airtight container in the refrigerator for up to 3-4 days. The flavors often meld and deepen overnight, making it even more delicious the next day!
- Freezing Instructions: This cake freezes beautifully! For best results, allow the cake to cool completely, then wrap individual slices or the entire cake (if unfrosted) tightly in plastic wrap, followed by a layer of aluminum foil. Freeze for up to 2-3 months.
- Thawing: When ready to enjoy, thaw frozen slices in the refrigerator overnight or at room temperature for a few hours.
FAQ
Q: What makes it an “Earthquake” cake?
A: The name comes from the dramatic cracks and fissures that form on the top of the cake as it bakes. These ‘earthquake’ cracks reveal the delicious gooey layers of chocolate cake, sweet strawberries, and creamy cheesecake filling underneath, making each bite a delightful surprise!
Q: Can I use frozen strawberries instead of fresh?
A: Yes, you can! If using frozen strawberries, make sure to thaw them completely and drain any excess liquid before dicing and adding them to the cake. This prevents too much moisture from making your cake soggy. You might also want to toss them with a tablespoon of flour to help absorb any residual moisture.
Q: How do I prevent the cake from sticking to the pan?
A: Proper pan preparation is key! Always grease your baking dish thoroughly with butter or cooking spray, then dust it lightly with flour, tapping out any excess. For extra insurance, you can also line the bottom of your pan with parchment paper before greasing and flouring.
Q: Can I make this cake ahead of time?
A: Absolutely! This Strawberry Earthquake Cake is an excellent make-ahead dessert. You can bake it a day in advance and store it, covered, in the refrigerator. The flavors often deepen overnight, making it even more enjoyable. Just be sure to allow it to come closer to room temperature for the best texture before serving.
Conclusion
This Strawberry Earthquake Cake is more than just a dessert; it’s a delightful journey of flavors and textures that brings smiles and creates lasting memories. With its easy preparation and impressive presentation, it’s the perfect sweet treat for any occasion. So go ahead, gather your ingredients, and get ready to experience a little bit of magic in your kitchen. Don’t forget to pin this recipe for later so you can revisit this incredible creation again and again!
Strawberry Earthquake Cake: Easy, Fudgy & Delicious Recipe
Ingredients
- 1 (15.25 oz) box chocolate fudge cake mix (plus ingredients to prepare mix: eggs, oil, water)
- 1 lb fresh strawberries, hulled and diced
- 8 oz cream cheese, softened
- 1/2 cup (1 stick) unsalted butter, softened
- 3-4 cups powdered sugar
- 1 tsp vanilla extract
Instructions
- Step 1 Preheat oven to 350°F (175°C). Grease and flour a 9x13 inch baking dish.
- Step 2 Prepare chocolate cake mix according to package directions. Pour batter into the prepared baking dish.
- Step 3 In a separate bowl, beat softened cream cheese, softened butter, powdered sugar, and vanilla extract until smooth and creamy. Drop spoonfuls of this mixture over the cake batter.
- Step 4 Scatter diced strawberries evenly over the cake batter and cream cheese mixture. Use a knife to gently swirl the mixtures together, creating the 'earthquake' effect. Be careful not to overmix.
- Step 5 Bake for 45-55 minutes, or until a toothpick inserted into the cake part comes out with moist crumbs (avoiding cream cheese pockets).
- Step 6 Let the cake cool completely on a wire rack before dusting with extra powdered sugar and serving. Store any leftovers in the refrigerator.