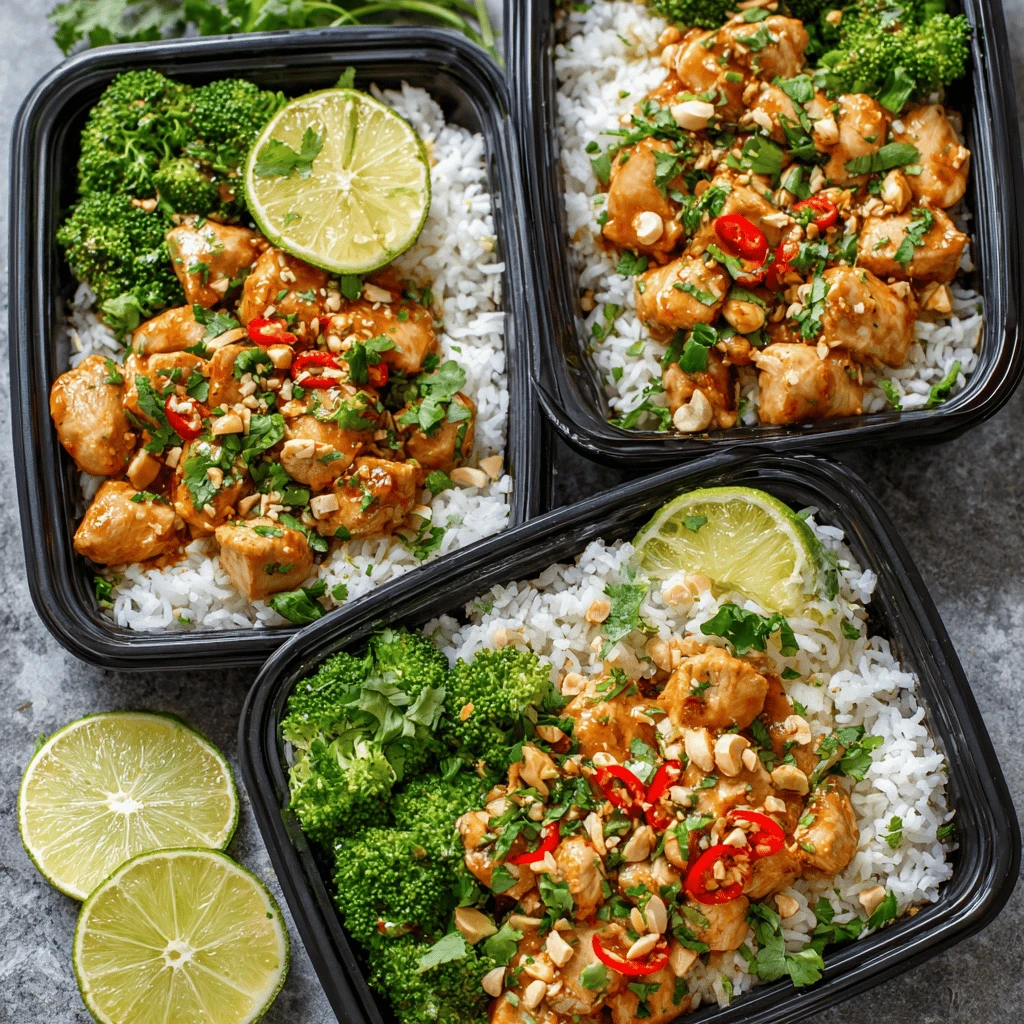
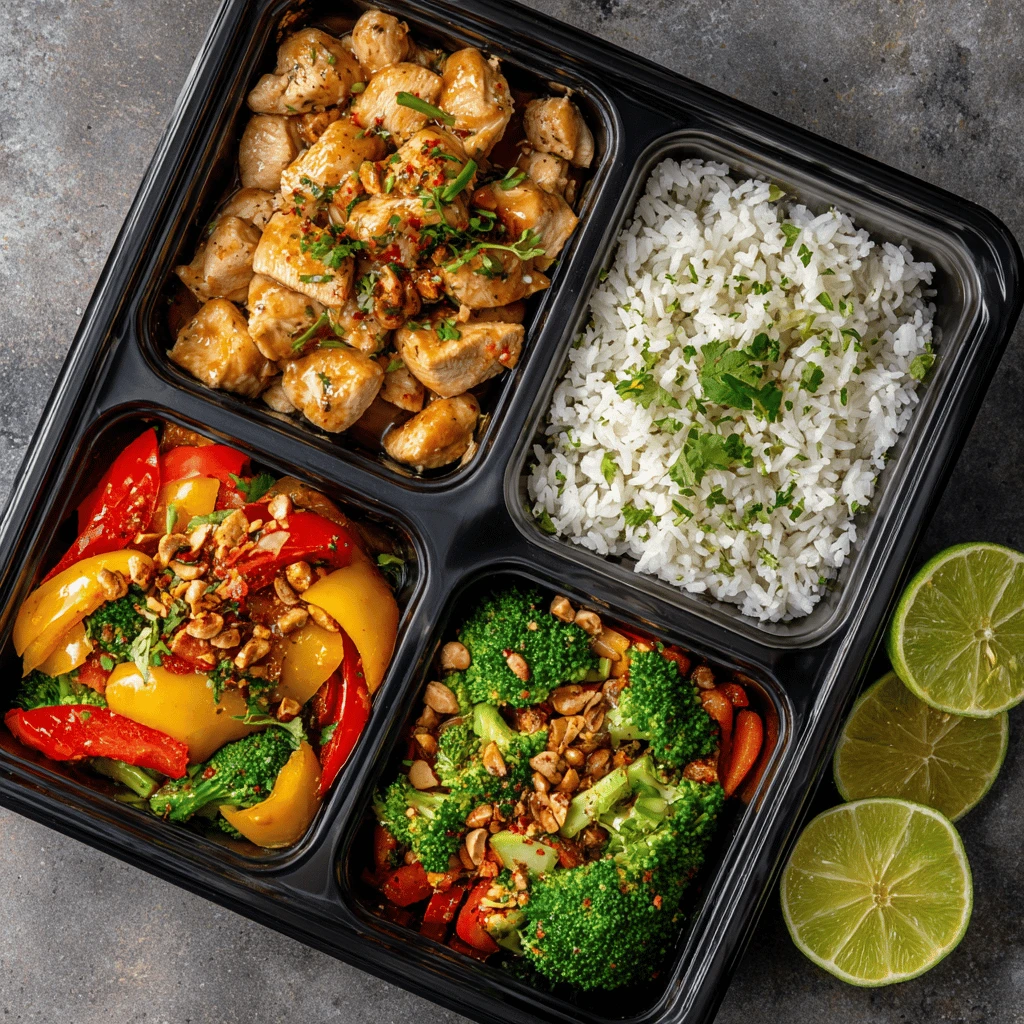
Thai Peanut Chicken Meal Prep
Meal prepping doesn’t have to be boring! This Thai Peanut Chicken Meal Prep recipe delivers flavorful, protein-packed lunches and dinners that are both delicious and convenient. Say goodbye to sad desk lunches and hello to a vibrant, satisfying meal. This recipe is easy to customize to your dietary needs and preferences, making it a perfect choice for anyone looking to eat healthier and save time.
Why Thai Peanut Chicken Meal Prep is a Game Changer
Thai Peanut Chicken Meal Prep isn’t just another meal prep recipe; it’s a lifestyle upgrade. Here’s why:
- Flavor Explosion: The combination of savory chicken and rich, nutty peanut sauce creates an irresistible flavor profile that will keep you excited for lunchtime.
- Nutrient-Packed: This recipe is packed with protein from the chicken, healthy fats from the peanut butter, and vitamins and minerals from the vegetables.
- Customizable: Easily adapt the recipe to suit your dietary needs by using gluten-free soy sauce, adding more vegetables, or swapping the chicken for tofu.
- Time-Saving: Preparing a week’s worth of meals in one go saves you valuable time during the busy work week. No more last-minute takeout or unhealthy impulse decisions!
- Budget-Friendly: Cooking at home is almost always cheaper than eating out. Meal prepping helps you control your grocery spending and reduce food waste.
The Perfect Thai Peanut Chicken Recipe
This recipe focuses on simplicity and flavor. Adjust the spice level to your preference, and feel free to experiment with different vegetables.
Ingredients:
-
- Chicken: 2 lbs boneless, skinless chicken breasts, cut into 1-inch cubes
- Vegetables: 1 red bell pepper, sliced; 1 green bell pepper, sliced; 1 cup broccoli florets; 1 cup shredded carrots; 1/2 cup snow peas (optional)
- Rice: 2 cups cooked rice (brown or white, your choice)
- Peanut Sauce:
1/2 cup peanut butter (smooth or chunky)
1/4 cup soy sauce (or gluten-free tamari)
2 tablespoons rice vinegar
2 tablespoons honey or maple syrup
2 tablespoons sesame oil
1 tablespoon lime juice
1 tablespoon grated ginger
1 clove garlic, minced
1/4 teaspoon red pepper flakes (adjust to taste)
2-4 tablespoons water (to thin)
- Garnish: Chopped peanuts, sesame seeds, green onions (optional)
Instructions:
1. Prepare the Chicken: In a large bowl, toss the chicken cubes with a tablespoon of sesame oil and a pinch of salt and pepper.
2. Cook the Chicken: Heat a large skillet or wok over medium-high heat. Add the chicken and cook until browned and cooked through, about 6-8 minutes. Set aside.
3. Sauté the Vegetables: In the same skillet, add the sliced bell peppers, broccoli florets, and shredded carrots. Sauté until tender-crisp, about 5-7 minutes. Add the snow peas (if using) during the last minute of cooking.
4. Make the Peanut Sauce: In a medium bowl, whisk together the peanut butter, soy sauce, rice vinegar, honey (or maple syrup), sesame oil, lime juice, grated ginger, minced garlic, and red pepper flakes. Add water, one tablespoon at a time, until the sauce reaches your desired consistency.
5. Combine Everything: Add the cooked chicken and vegetables to the peanut sauce and toss to coat evenly.
6. Assemble the Meal Prep Containers: Divide the cooked rice among your meal prep containers. Top with the Thai peanut chicken and vegetable mixture.
7. Garnish (Optional): Sprinkle with chopped peanuts, sesame seeds, and green onions for added flavor and visual appeal.
8. Store: Let the containers cool completely before sealing and storing in the refrigerator for up to 4-5 days.
Tips for Success:
- Don’t Overcook the Chicken: Overcooked chicken will be dry and tough. Use a meat thermometer to ensure it reaches an internal temperature of 165°F (74°C).
- Adjust the Spice Level: Red pepper flakes add a kick to the peanut sauce. Adjust the amount to your preference or omit them entirely if you prefer a milder flavor.
- Use Fresh Ingredients: Fresh ginger and garlic will provide the best flavor for the peanut sauce.
- Prep in Advance: Chop the vegetables and prepare the peanut sauce ahead of time to save time during the cooking process.
- Reheat Properly: Reheat the meal prep containers in the microwave or oven until heated through. Add a splash of water if the rice seems dry.
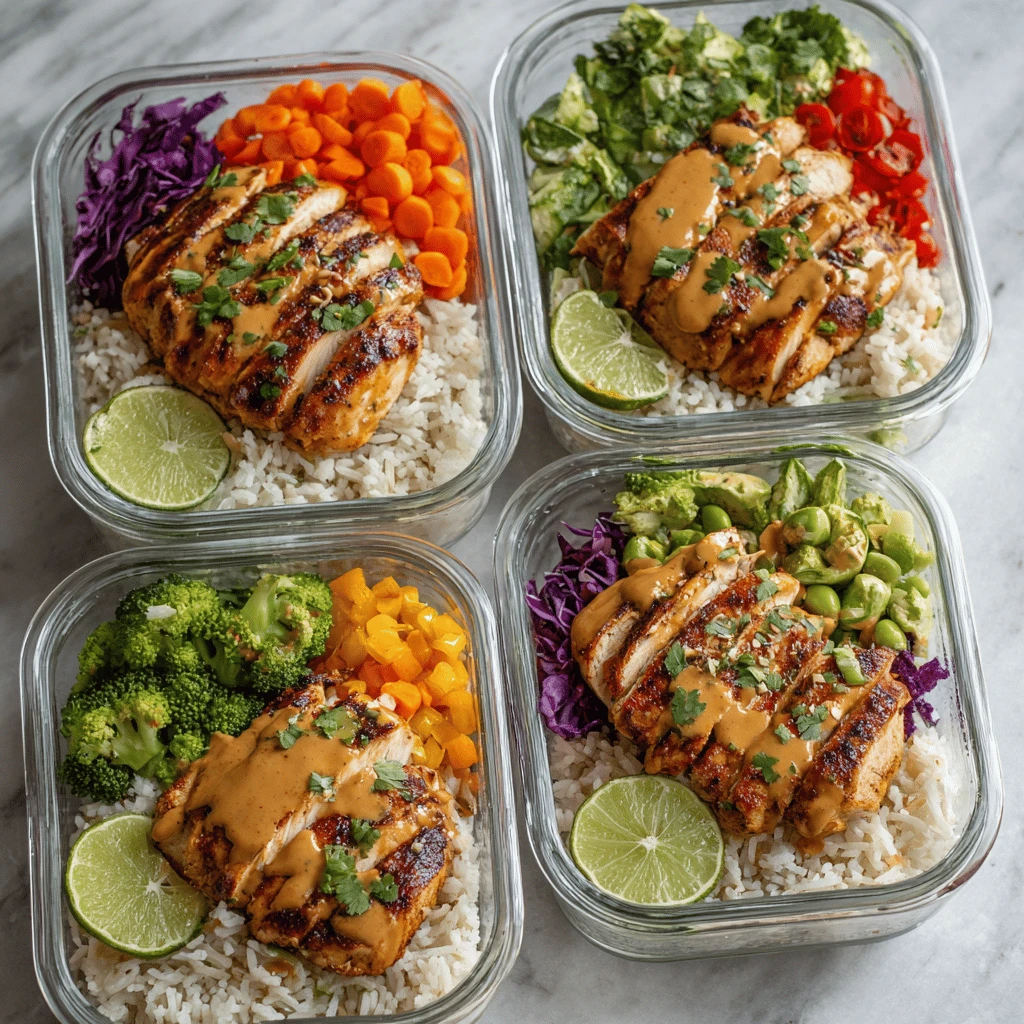
Customizing Your Thai Peanut Chicken Meal Prep
The beauty of this recipe lies in its versatility. Here are some ideas for customizing it to your specific needs and preferences:
Vegetable Variations:
- Edamame: Add shelled edamame for extra protein and fiber.
- Mushrooms: Sauté sliced mushrooms along with the other vegetables.
- Spinach: Stir in fresh spinach during the last minute of cooking for a boost of vitamins.
- Zucchini: Add diced zucchini to the vegetable medley.
- Bean Sprouts: Top the finished meal with fresh bean sprouts for added crunch.
Protein Alternatives:
- Tofu: Use firm or extra-firm tofu, pressed and cubed, as a vegetarian alternative to chicken.
- Shrimp: Substitute cooked shrimp for the chicken. Add the shrimp to the peanut sauce during the last few minutes of cooking to avoid overcooking.
- Tempeh: Use crumbled tempeh as another plant-based protein option.
Sauce Modifications:
- Spicier Sauce: Add more red pepper flakes or a dash of sriracha for extra heat.
- Sweeter Sauce: Increase the amount of honey or maple syrup for a sweeter flavor.
- Tangier Sauce: Add more lime juice for a tangier taste.
- Creamier Sauce: Add a tablespoon of coconut milk for a creamier texture.
Carb Options:
- Quinoa: Substitute quinoa for rice for a higher-protein and fiber option.
- Cauliflower Rice: Use cauliflower rice for a low-carb alternative.
- Noodles: Serve the Thai peanut chicken over rice noodles or soba noodles.
Dietary Considerations:
- Gluten-Free: Use gluten-free tamari or coconut aminos instead of soy sauce.
- Vegan: Use tofu or tempeh instead of chicken and ensure your honey or maple syrup is vegan-friendly.
- Low-Carb: Use cauliflower rice and reduce the amount of honey or maple syrup in the peanut sauce.
Meal Prep Container Essentials & Storage
Choosing the right containers and storing your meals properly is essential for keeping your Thai Peanut Chicken Meal Prep fresh and delicious.
Container Options:
- Glass Containers: Glass containers are durable, reusable, and microwave-safe. They’re a great option for long-term meal prepping.
- Plastic Containers: Plastic containers are lightweight and affordable. Choose BPA-free options for safety.
- Compartment Containers: These containers have separate compartments, which can be helpful for keeping the rice and chicken separate until you’re ready to eat.
Storage Tips:
- Cool Completely: Allow the Thai peanut chicken to cool completely before sealing the containers. This will prevent condensation from forming, which can make the food soggy.
- Refrigerate Promptly: Store the meal prep containers in the refrigerator within two hours of cooking.
- Proper Sealing: Ensure the containers are properly sealed to prevent air from getting in and drying out the food.
- Shelf Life: Thai Peanut Chicken Meal Prep will last for up to 4-5 days in the refrigerator.
Reheating Instructions:
- Microwave: The easiest way to reheat your meal prep is in the microwave. Heat for 2-3 minutes, or until heated through. You may need to add a splash of water if the rice seems dry.
- Oven: For a more even reheating, you can reheat the meal prep in the oven. Preheat the oven to 350°F (175°C) and heat for 15-20 minutes, or until heated through.
- Stovetop: You can also reheat the meal prep on the stovetop. Add a little bit of water to a skillet and heat over medium heat until heated through.
Troubleshooting Common Meal Prep Issues
Even with the best planning, things can sometimes go wrong. Here are some common meal prep issues and how to fix them:
- Dry Rice: Add a tablespoon or two of water to the rice before reheating to prevent it from drying out. You can also cook the rice with slightly more water than usual.
- Soggy Vegetables: Avoid overcooking the vegetables in the first place. If they do become soggy, try roasting them in the oven for a few minutes before adding them to the meal prep containers.
- Bland Flavor: Make sure to taste and adjust the peanut sauce before adding it to the chicken and vegetables. You can also add a pinch of salt or a dash of soy sauce to the finished meal to enhance the flavor.
- Meal Prep Fatigue: Prevent meal prep fatigue by varying your recipes and trying new flavor combinations. Don’t be afraid to experiment and get creative in the kitchen. Consider incorporating sauces like gochujang to vary flavors.
- Containers Staining: Prevent staining by using glass containers or lining plastic containers with parchment paper. You can also try soaking stained containers in a mixture of baking soda and water.
Frequently Asked Questions (FAQ)
Q: Can I freeze Thai Peanut Chicken Meal Prep?
A: Yes, you can freeze it! Allow the meal prep to cool completely before freezing in freezer-safe containers. It can be stored in the freezer for up to 2-3 months. Thaw overnight in the refrigerator before reheating.
Q: How long does Thai Peanut Chicken Meal Prep last in the fridge?
A: It will last for up to 4-5 days in the refrigerator when stored properly in airtight containers.
Q: Can I make the peanut sauce ahead of time?
A: Absolutely! The peanut sauce can be made up to a week in advance and stored in the refrigerator.
Q: Is this recipe spicy?
A: The recipe includes red pepper flakes, which add a mild amount of spice. You can adjust the amount to your preference or omit them entirely if you prefer a milder flavor.
Q: Can I use chicken thighs instead of chicken breasts?
A: Yes, you can use chicken thighs. They will take slightly longer to cook than chicken breasts. Ensure they are cooked through to an internal temperature of 175°F (79°C).
Q: What kind of rice is best for meal prep?
A: Brown rice and white rice both work well for meal prep. Brown rice is a healthier option because it is higher in fiber. However, white rice tends to hold up better in the refrigerator.
Q: Can I use a different type of nut butter?
A: Yes, almond butter or cashew butter can be used as substitutes for peanut butter. Keep in mind that the flavor will be slightly different.
Q: Is this recipe gluten-free?
A: This recipe can easily be made gluten-free by using gluten-free tamari or coconut aminos instead of soy sauce.