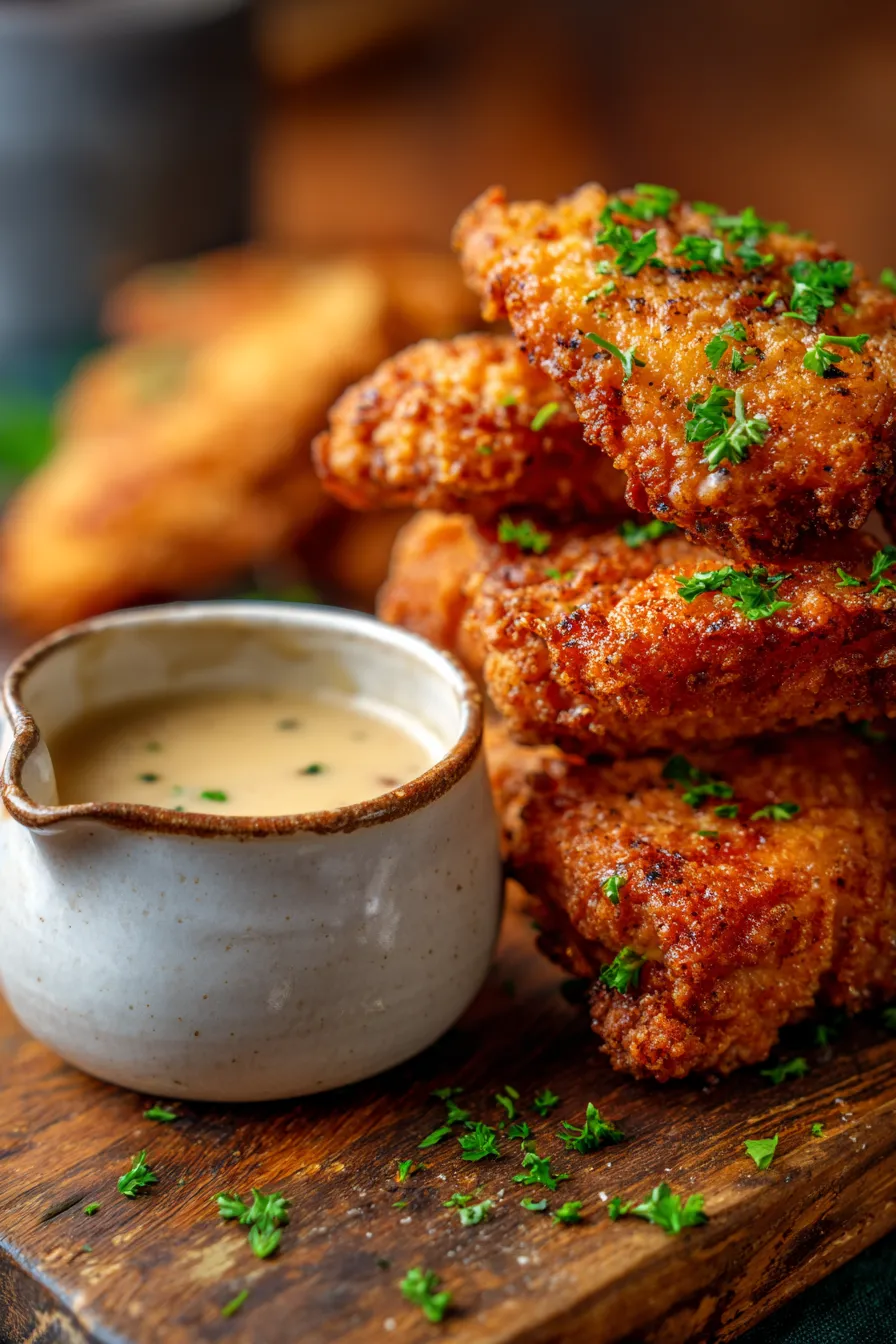
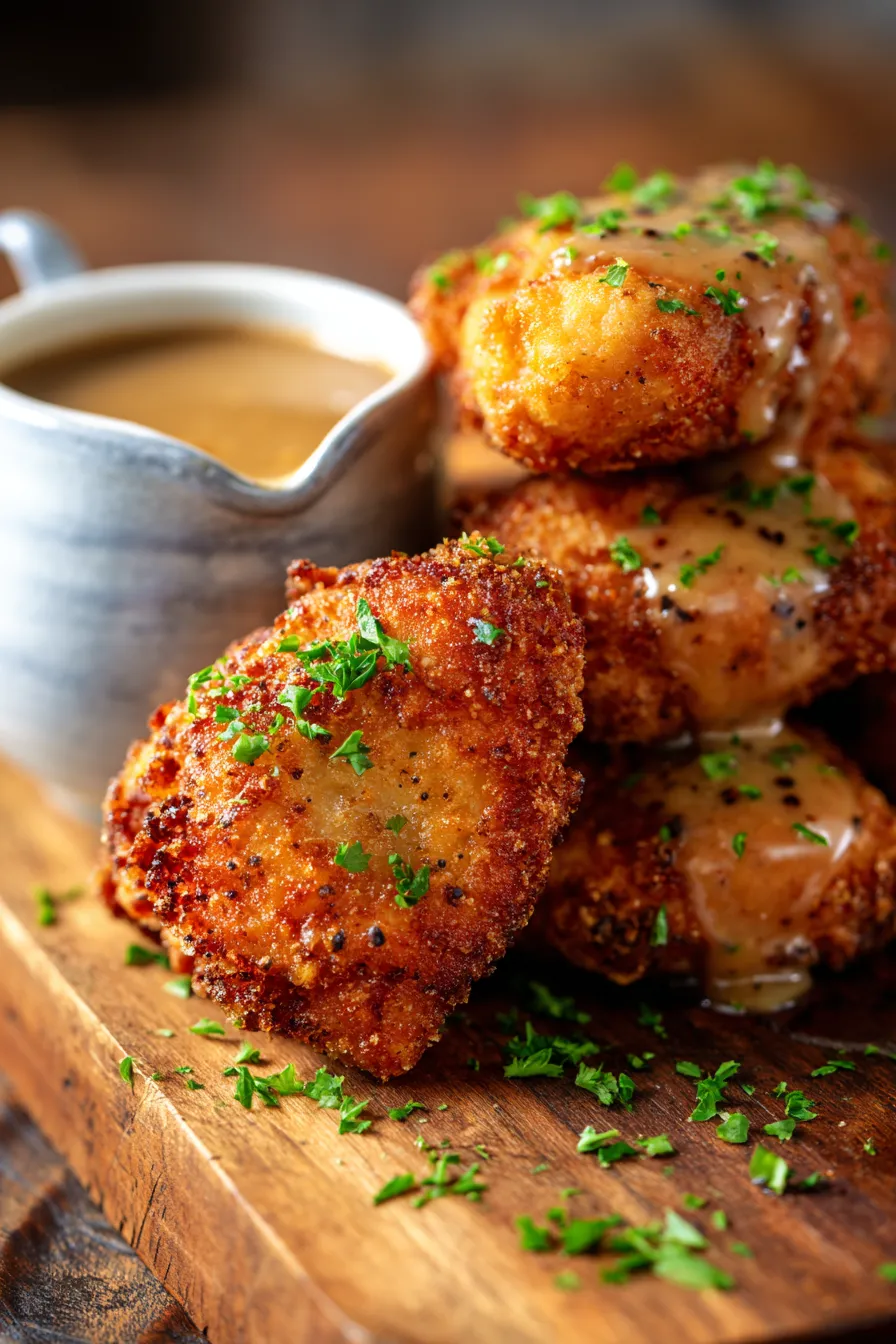
The Ultimate Crispy Country Fried Chicken with Creamy Pepper Gravy: A Southern Comfort Dream!
There’s something incredibly nostalgic and soul-satisfying about a plate of perfectly made Crispy Country Fried Chicken with Creamy Pepper Gravy. For me, it instantly transports me back to my grandmother’s kitchen on rainy Sunday afternoons. I can still close my eyes and smell the warm, savory aroma filling her cozy home, a promise of the ultimate comfort food soon to be served. Her secret wasn’t just in the recipe itself, but in the love and patience she poured into every single step, ensuring each piece of chicken was a crispy, juicy masterpiece.
That cherished memory sparked a mission: to recreate that same magic, to bottle up that feeling of warmth and utter deliciousness. After countless batches and a fair share of kitchen experiments, I’m thrilled to share this tested, family-favorite recipe with you. It’s truly an easy dinner recipe that delivers on all fronts – an irresistible crunch, unbelievably tender chicken, and a luscious, peppery gravy that ties it all together into a classic Southern dish you’ll want to make again and again.
So, get ready to roll up your sleeves and bring a taste of timeless tradition to your own table. This recipe isn’t just about cooking; it’s about creating memories, one perfectly crispy bite at a time. Trust me, your family and friends will thank you for this one!
Why You’ll Love This Recipe
❤️ Here’s why this Crispy Country Fried Chicken with Creamy Pepper Gravy will become your new go-to:
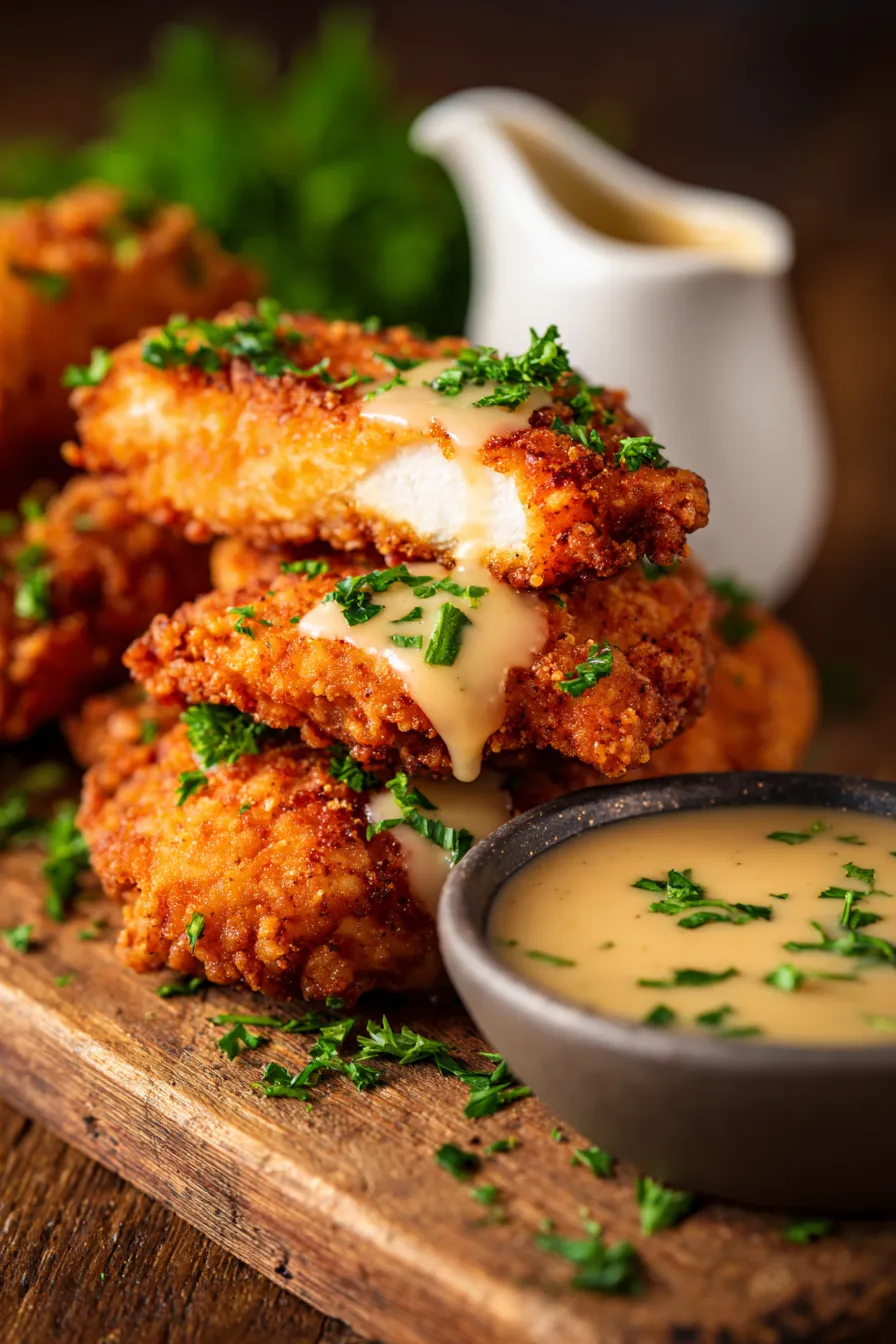
- Irresistibly Crispy Perfection: Each piece of chicken boasts a golden-brown, shattering crust that provides the most satisfying crunch with every bite. We’ll show you the secrets to achieving that coveted crispness that holds up beautifully.
- Juicy & Tender Chicken, Always: Say goodbye to dry, overcooked chicken! Our method ensures the meat stays incredibly moist and flavorful, absorbing all the delicious seasonings for a truly succulent experience.
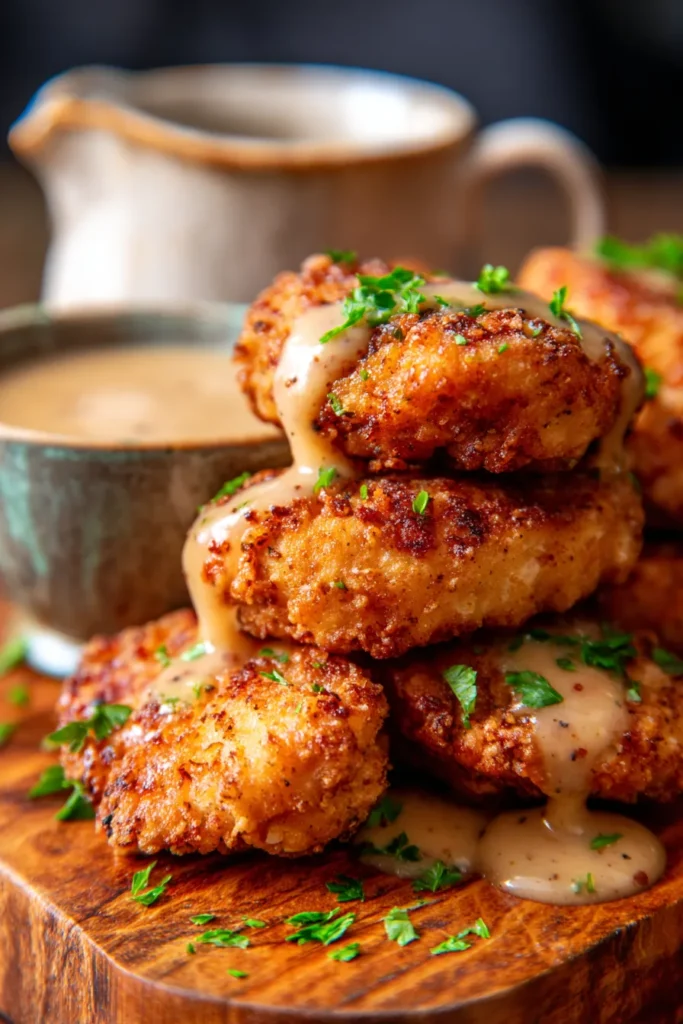
- Rich, Velvety Pepper Gravy: This isn’t just any gravy; it’s a creamy, deeply savory, and perfectly peppery concoction that’s the ideal partner to the crispy chicken. It’s made from the flavorful drippings, ensuring every spoonful is packed with robust taste.
- Authentic Southern Comfort at its Best: This recipe captures the heart and soul of traditional Southern cooking. It’s a nostalgic dish that brings warmth, contentment, and a feeling of home to any meal, perfect for those craving genuine comfort food.
- Surprisingly Simple to Master: Don’t be intimidated by fried chicken! Our step-by-step instructions break down the process into easy, manageable parts, making this classic achievable for home cooks of all skill levels.
- Perfect for Any Occasion: While it feels special enough for a Sunday dinner or holiday gathering, this recipe is also straightforward enough for a delicious weeknight meal. It’s versatile and always a crowd-pleaser.
- Flavor Layers that Impress: From the seasoned buttermilk brine to the perfectly spiced flour dredge, every component of this dish is carefully flavored to build a complex and utterly delicious profile that will have everyone asking for seconds.
What You Need
You only need a few simple pantry staples and fresh chicken for this recipe! Most ingredients are likely already in your kitchen, making this a convenient choice for a fantastic meal. Check the full printable recipe card below for detailed measurements of everything you’ll need to create this Southern classic.
Expert Tips
💡 Achieving perfect Crispy Country Fried Chicken and creamy gravy is an art, but these expert tips will guide you to success:
- Brining is Non-Negotiable: Don’t skip the buttermilk brine! Soaking the chicken in buttermilk (seasoned, of course) for at least 4 hours, or ideally overnight, does two crucial things. First, the lactic acid in the buttermilk tenderizes the chicken, making it incredibly moist. Second, it allows the seasonings to penetrate deep into the meat, ensuring flavor in every bite. This step is the secret to juicy fried chicken.
- The Power of Double Dredging: For that extra-crispy, craggy crust, a double dredge is key. After the buttermilk, dredge the chicken in the seasoned flour, then dip it back into the buttermilk mixture, and dredge it one more time in the flour. This creates multiple layers that fry up incredibly crunchy and flavorful, offering more surface area for that delicious crispness.
- Oil Temperature is Critical: Maintain a consistent oil temperature between 325-350°F (160-175°C). Too cold, and the chicken will absorb too much oil, becoming greasy and soggy. Too hot, and the exterior will burn before the inside cooks through. Use a reliable kitchen thermometer to monitor the temperature throughout the frying process. Adjust heat as needed to keep it steady.
- Don’t Overcrowd the Pan: Frying in batches is essential. Overcrowding the skillet significantly drops the oil temperature, leading to less crispy, often greasy chicken. Give each piece enough space to fry properly and evenly. This also prevents pieces from steaming instead of frying, which detracts from the desired crisp texture.
- Let the Dredged Chicken Rest: After its final flour dredge, let the chicken sit on a wire rack for about 10-15 minutes before frying. This allows the flour coating to adhere more firmly to the chicken, preventing it from falling off in the hot oil and ensuring a more intact, crispy crust.
- Season Every Layer: Flavor builds! Season the buttermilk brine, season the flour dredge, and even add a pinch of salt to your oil if you wish. This layered seasoning approach ensures that every component of your fried chicken is bursting with flavor, from the inside out and all through the crispy coating.
- Achieving Perfect Gravy Consistency: The secret to smooth, lump-free gravy lies in the roux. Make sure to whisk the flour thoroughly into the melted butter and chicken drippings until it forms a smooth paste before adding your milk. Add the milk slowly, whisking constantly, and ensure it’s at least room temperature (or slightly warm) to prevent lumps. Simmer gently until it thickens to your desired consistency.
- Use a Heavy-Bottomed Skillet or Dutch Oven: Cast iron or a heavy-bottomed Dutch oven provides excellent heat retention and even heat distribution, which is crucial for consistent frying. This helps maintain a stable oil temperature, reducing hot spots and ensuring all your chicken cooks uniformly.
Variations & Substitutions
While the classic recipe is perfect as is, feel free to customize it to your taste or dietary needs:
- Gluten-Free Option: Easily make this recipe gluten-free by substituting the all-purpose flour with your favorite cup-for-cup gluten-free flour blend. Ensure your blend contains xanthan gum for best results in crispness.
- Dairy-Free Gravy: For the gravy, swap out regular milk with unsweetened plain almond milk, oat milk, or soy milk. The flavor will be slightly different, but the creaminess can still be achieved. Ensure your buttermilk is also dairy-free (or make a homemade version with dairy-free milk and lemon juice).
- Spice It Up: If you love a kick, increase the amount of cayenne pepper in the flour dredge. You can also add a pinch of red pepper flakes to the gravy for an extra layer of warmth and spice.
- Herbaceous Chicken: Incorporate dried herbs like thyme, rosemary, or sage into your flour mixture for a different aromatic profile. A teaspoon of dried herbs can add a wonderful complexity.
- Different Chicken Cuts: While bone-in, skin-on pieces are traditional, you can use boneless, skinless chicken thighs or cutlets for a quicker cooking time. Just be mindful to adjust frying times to prevent drying them out.
Storage & Freezing
Proper storage ensures your delicious fried chicken and gravy stay fresh and tasty for future enjoyment:
- Refrigerator: Store leftover fried chicken in an airtight container in the refrigerator for up to 3-4 days. The gravy should also be stored in a separate airtight container and will keep for up to 3-4 days.
- Reheating Chicken: To bring back some of that coveted crispness, reheat fried chicken in an oven preheated to 375°F (190°C) for 15-20 minutes, or until heated through. An air fryer is also excellent for reheating, at 350°F (175°C) for 8-10 minutes. Avoid the microwave, as it will make the crust soggy.
- Reheating Gravy: Gently reheat the gravy in a saucepan over low heat, whisking frequently. If it’s too thick, add a splash of milk or chicken broth to thin it to your desired consistency.
- Freezing: Cooked fried chicken can be frozen for up to 2-3 months. Allow it to cool completely, then wrap individual pieces tightly in plastic wrap and then foil, or place in a freezer-safe bag. Thaw in the refrigerator overnight before reheating. The gravy can also be frozen in an airtight container for up to 2-3 months; thaw and reheat gently.
FAQ
What kind of chicken pieces are best for country fried chicken?
Bone-in, skin-on chicken pieces are traditionally preferred for country fried chicken due to the flavor depth and juiciness they offer. Thighs and drumsticks are particularly forgiving and flavorful. While boneless, skinless pieces can be used for quicker cooking, you’ll need to monitor them carefully to prevent them from drying out. Ensure all your chosen pieces are of similar size to ensure even cooking.
How do I get my fried chicken extra crispy?
Achieving extra-crispy fried chicken involves a few key steps: first, a proper buttermilk brine tenderizes and preps the chicken. Second, use a double-dredging technique with seasoned flour to build a thicker, craggier crust. Crucially, maintain a consistent oil temperature between 325-350°F (160-175°C) and avoid overcrowding the pan. A little cornstarch or baking powder added to your flour mixture can also contribute to a wonderfully crisp texture.
My gravy is lumpy, what went wrong?
Lumpy gravy typically results from the flour not being fully incorporated into the fat to create a smooth roux, or from adding liquid too quickly or without warming it first. To prevent lumps, ensure you whisk the flour thoroughly into the hot fat until a smooth paste forms, then gradually whisk in warm milk. If lumps still appear, you can vigorously whisk the gravy off the heat or, for stubborn lumps, strain it through a fine-mesh sieve before serving.
Can I make this recipe ahead of time?
While fried chicken is best enjoyed fresh, you can definitely prepare parts of the recipe in advance. The chicken can be brined in buttermilk for up to 24 hours ahead of time. You can also mix your flour dredge. The gravy can be made a day or two in advance and stored in the refrigerator, then gently reheated. Cooked fried chicken can be stored in the fridge for 3-4 days and reheated in the oven or air fryer for best results.
What’s the best oil for frying chicken?
The best oils for frying chicken are those with a high smoke point and a neutral flavor, which won’t overpower the taste of the chicken. Excellent choices include vegetable oil, canola oil, peanut oil, or refined sunflower oil. Avoid oils with lower smoke points, like olive oil or butter, as they can burn and impart an undesirable flavor before the chicken is fully cooked.
Conclusion
There you have it – the ultimate guide to creating a truly unforgettable Crispy Country Fried Chicken with Creamy Pepper Gravy! This isn’t just a meal; it’s an experience, a taste of genuine Southern hospitality, and a guaranteed crowd-pleaser that brings warmth and comfort to any table. Don’t just dream about that golden crunch and savory gravy – make it a reality tonight!
I can’t wait for you to try this recipe and fall in love with its irresistible flavors. Pin this recipe for later so you always have this family favorite at your fingertips, and share your culinary creations with us! Happy cooking, y’all!
Ultimate Crispy Country Fried Chicken with Creamy Pepper Gravy
Ingredients
- 3-4 lbs bone-in, skin-on chicken pieces (drumsticks, thighs, breasts)
- 4 cups buttermilk
- 1 tbsp hot sauce (optional, for brine)
- 2 cups all-purpose flour
- 1/2 cup cornstarch (for extra crispness)
- 2 tsp salt
- 1.5 tsp black pepper
- 1 tsp paprika
- 1 tsp garlic powder
- 1 tsp onion powder
- 1/2 tsp cayenne pepper (adjust to taste)
- 4-6 cups vegetable oil (or peanut oil, for frying)
- FOR THE GRAVY:
- 1/4 cup pan drippings/reserved oil
- 1/4 cup all-purpose flour
- 3 cups milk (whole milk recommended)
- 1 tsp black pepper (or more, to taste)
- Salt to taste
Instructions
- Step 1 BRINE THE CHICKEN: In a large bowl, combine buttermilk, hot sauce (if using), 1 tsp salt, and 1/2 tsp black pepper. Add chicken, ensuring it's fully submerged. Cover and refrigerate for at least 4 hours, or preferably overnight.
- Step 2 PREPARE FLOUR DREDGE: In a large shallow dish or brown paper bag, combine flour, cornstarch, 1 tsp salt, 1 tsp black pepper, paprika, garlic powder, onion powder, and cayenne pepper. Mix well.
- Step 3 DREDGE THE CHICKEN: Remove chicken from buttermilk, allowing excess to drip off (do not rinse). Dredge each piece thoroughly in the flour mixture, pressing to coat. Dip back into the buttermilk briefly, then dredge again in the flour for a thick, craggy coating. Place coated chicken on a wire rack and let rest for 10-15 minutes.
- Step 4 HEAT THE OIL: In a large, heavy-bottomed skillet or Dutch oven, pour enough oil to reach 2-3 inches deep. Heat over medium-high heat until a deep-fry thermometer reads 325-350°F (160-175°C).
- Step 5 FRY THE CHICKEN: Carefully place 3-4 pieces of chicken into the hot oil, ensuring not to overcrowd the pan. Fry for about 6-8 minutes per side, turning occasionally, until golden brown and cooked through (internal temperature of 165°F or 74°C). Cooking time varies by chicken piece size. Adjust heat as needed to maintain oil temperature. Remove chicken to a clean wire rack set over a baking sheet to drain. Repeat with remaining chicken.
- Step 6 MAKE THE GRAVY: Carefully pour off all but 1/4 cup of the frying oil from the skillet, leaving any browned bits (fond) in the pan. Place skillet over medium heat. Whisk in 1/4 cup flour, cooking for 1-2 minutes to create a roux, scraping up the browned bits. Gradually whisk in the milk, a little at a time, until smooth and no lumps remain. Continue whisking as the gravy thickens.
- Step 7 SEASON THE GRAVY: Season gravy with 1 tsp black pepper and salt to taste. Simmer gently for 3-5 minutes, until it reaches desired thickness. If it's too thick, add a splash more milk; if too thin, simmer a bit longer. Serve immediately with the hot fried chicken.